Category: Home Security

  • Hands-on Review: Aeotec Doorbell 6 (ZW162)

    Hands-on Review: Aeotec Doorbell 6 (ZW162)

    Hands-on Review - Aeotec Doorbell 6 Z-Wave - VueVille

    What if you are not interested in a wireless video doorbell, but still want a smart doorbell? The [easyazon_link identifier=”B07DC569FL” locale=”US” tag=”vueville.com-eaz-20″]Aeotec Doorbell 6[/easyazon_link] is one such wireless smart doorbell based on the Z-Wave standard.

    This doorbell can be added to your Z-Wave network to send you push notifications whenever the bell is pressed. You can also trigger other actions such as turning on porch lights, or recording a camera that covers your porch.

    Aeotec kindly provided a review sample and we tested it in our own DIY smart home.

    Here’s the video review:

     
    [wpsm_titlebox title=”Contents” style=”1″][contents h2][/wpsm_titlebox]

    Aeotec – who are they?

    Aeotec used to belong to Aeon Labs, the company founded in 2006 and based out of Silicon Valley. But that’s no longer the case. Aeotec also have another brand that’s popular in the smart home market – Popp.

    They also are an OEM for Oomi.

    Un-boxing

    Hands-on Review - Aeotec Doorbell 6 Z-Wave - Box Contents - VueVille

    The box contents are:

    • Aeotec Doorbell 6 Chime unit
    • Chime wall adapter
    • Bell push button and wall plate
    • 3M double-sided tape, screws
    • Power adapter
    • Button cell for bell push button
    • Quick start guide
    • Warranty card

    Specifications

    • Product Model Number: ZW162
    • Dimensions Chime: 76*76*38.5mm Button: 85*38*14mm
    • Weight
      • Chime: 100g
      • Button: 35g
    • Operating temperature: 32° to 104° F (0° to 40° C)
    • Relative humidity: 8% to 80%
    • Wireless Technology:
      • Z-Wave (Between Chime and Gateway)
      • 433.92MHz/FSK (Between Chime and Button)
    • Z-Wave Plus: Yes
    • Z-Wave Module: ZM5101
    • Security Class: S0, S2 Unauthenticated/Authenticated
    • Over The Air (OTA) Updates: Yes, requires Z-Stick USB
    • Distance between Chime and Z-Wave Gateway: 30m (Indoor) /150m (Outdoor)
    • Button Control distance between Chime and Button: 120m (Barrier-free sight line distance)
    • Input Voltage Chime:
      • Battery, 3.7V; Power Adapter, DC 5V/2A
      • Button: Battery, 3V
    • Chime’s Battery:
      • Model: PT502035
      • Capacity: 400mAh
      • Detachable: No
      • Chargeable: Yes. Charging via Chime Power Adapter.
      • Endurance: 4 hours
    • Button’s Battery:
      • Model: CR2450
      • Capacity: 630mAh
      • Detachable: Yes
      • Chargeable: No
      • Endurance: 2 years
    • Power Consumption Chime: IWORK < 80mA, I STANDBY < 70mA
    • Button: IWORK < 20mA, I STANDBY < 0.1uA
    • Splash, Water, and Dust Resistant
    • Chime: Not Waterproof
    • Button: Rated IP55 under IEC standard 60529
    • Sensors: Vibration Sensor
    • Supported Paired Buttons Max: 3
    • Tones Storage Size 16MB
    • Supported Tones Max: 30; (No interface to replace the built-in tones. If want to change these built-in tones, you need to contact us to customize).
    • Volume Max: 105dB from 10cm away; 7 adjustable volume levels

    Design and Hardware Features

    The Aeotec Doorbell 6 has two halves – the chime unit and the ring button.
    Hands-on Review - Aeotec Doorbell 6 Z-Wave - Chime and Button - VueVille
    The chime unit unit has a premium look and feel about it. There is a white LED embedded in the front face and lights up when the chime rings. The LED in the chime unit is actually a very powerful 1000 lumens strobe light as well.

    Why does a doorbell have such a powerful LED? Because the chime unit is also engineered to be a standalone siren, in fact it is the exact same thing sold as the Aeotec Siren 6.
    Hands-on Review - Aeotec Doorbell 6 Z-Wave - Chime - VueVille
    The chime has a 105dB speaker. You can also add up to 3 additional buttons to the same chime unit. Aeotec sells these as [easyazon_link identifier=”B07PB3NPPJ” locale=”US” tag=”vueville.com-eaz-20″]accessory buttons[/easyazon_link]. The signal between the chime unit and the bell button is a 433MHz ultra low-power signal. This also maximises the range between the two.

    The chime has a built-in rechargeable battery, but surprisingly it only has a capacity of 400mAh. Not much for a doorbell chime if you ask me. However, it is designed to be powered with the included power adaptor. So for powering the doorbell through a brief power cut, the battery seems to be fine.

    What about tamper-resistance? The chime has a sensitive vibration sensor. So once you include the doorbell in your Z-Wave network, the siren will go off if you move the chime. The Z-Wave tamper device will also be triggered at your Z-Wave controller.

    The chime unit is not water-proof by the way, it is intended for indoor use only.

    Hands-on Review - Aeotec Doorbell 6 Z-Wave - Chime Rear - VueVille

    The bell button has a tiny LED at the top that blinks twice when you push the bell. An included CR2450 3V button cell powers the button. It has a capacity of 630mAh and is rated for 2 years use.

    The bell button is water-proof with an IP55 ingress rating.
    Hands-on Review - Aeotec Doorbell 6 Z-Wave - Bell Button - VueVille

    Software Features

    The chime unit uses Z-Wave to communicate with your HA controller/hub. The chime unit has 16MB storage and comes with 30 tones pre-installed. You cannot add more unless you delete a few existing ones.

    The 30 tones range from the standard ding-dong tone, a Christmas tree tone, and various alarm tones such as smoke, CO and even a tornado siren!

    The doorbell has a surprising number of unusual features such as a Z-Wave signal quality tester.

    You can also change the chime LED light effect. This is achieved by changing certain parameters described in the engineering document. I find the vibration sensor alarm unnecessary, and thankfully you can mute it or reduce the alarm volume by modifying parameter 0x11(17). Just like other Aeotec products, the doorbell is extremely customisable. You just need to check whether your Z-Wave controller can send parameter configuration commands.

    Installation and Setup

    The bell button can be easily installed beside your door with the included 3M double-sided tape or the small screws.

    I plugged in the chime unit using the provided power adaptor.

    My smart home automation system is built on Z-Wave using the excellent HomeSeer HS3 software. I use an Aeotec Z-Stick USB device as the Z-Wave radio, plugged into a Dell Inspiron laptop running HS3.

    Pairing the Aeotec Doorbell 6 with my Z-Wave controller

    1. As per the quick start guide, I plugged in the Doorbell 6 chime unit. The front white LED started blinking in heartbeat style.
    2. I then had to set HomeSeer HS3 into ‘Inclusion mode’. For this I navigated to Plugins > Z-Wave > Controller Management. Under Actions, I selected ‘Add/Include a Node’ and clicked the Start button.
    3. I pressed the action button on the rear of the doorbell once. If your hub requires S2 security, you can enter the first 5 digits of the DSK printed on the back of the doorbell.
    4. The inclusion process finished successfully in HS3. According to the manual, doorbell’s white LED should then turn solid white for 30 seconds to indicate successful inclusion, but it didn’t. Nevertheless the doorbell was included successfully.
    5. I could then see all the different devices the doorbell created in my HS3 devices list.

    Performance

    Loudness

    The chime can get very loud indeed. If you place it at a central location in your home, you should hear it from pretty much any room.

    Wireless Range

    The first thing I tested is the range between the bell and the chime. Remember this does not use Z-Wave, just a standard signal like an ordinary wireless doorbell. Aeotec claims the range between the chime and the button is up to 90 metres. I had no trouble with the chime ringing throughout my home, so the stated range sounds right.

    Next up was the range between the chime and my Z-Wave controller. My home is of solid concrete construction and where I have placed the chime means that the Z-Wave signal has to penetrate at least 2 solid concrete walls. This the chime unit did with ease.

    The mesh network design of Z-Wave networks allows the doorbell chime unit to act as a repeater . So the chime unit actually extended the reach of my Z-Wave network.

    Responsiveness and Reliability

    Whenever I pressed the button, the chime instantaneously rang. There was mo delay in the device status updating in HS3 either.

    Compatibility

    The Aeotec Doorbell 6 is officially compatible with Samsung SmartThings, Fibaro HomeCenter and Popp Hub. But as you can see from my review, it works with HomeSeer HS3 also.

    Zack at Self-hosted Home has got it to work with HomeAssistant event though its not officially supported.

    You can see the full compatibility list on the Aeotec website.

    Verdict

    I have been using the Aeotec Doorbell 6 for over 4 months now. A smart doorbell means that I can now trigger actions such as turning on porch lights and sending notifications to mobile devices.
    [review]

    Where to Buy

    Buy the Aeotec Doorbell 6 from [easyazon_link identifier=”B07PB2HN6D” locale=”US” tag=”vueville.com-eaz-20″]your local Amazon store[/easyazon_link].

  • IronWolf vs. IronWolf Pro – NAS Hard Drives Compared

    IronWolf vs. IronWolf Pro – NAS Hard Drives Compared

    For a few years now I have been using WD RED NAS hard drives in my DIY NAS NVR. But these are running 24/7 and its only a matter of time before I need to start replacing them one by one.

    So I have been researching the various NAS hard drives from WD, Seagate and other top brands. I looked at WD RED vs. Seagate IronWolf drives recently. That’s when I came across the Ironwolf Pro range.

    Let’s take a closer look at how the IronWolf differs from the IronWolf Pro.

    Ironwolf vs IronWolf Pro - NAS Drives Compared - VueVille

    A quick note: As an Amazon Associate I earn from qualifying purchases. This post contains affiliate link(s). An affiliate link means I may earn advertising or referral fees if you make a purchase through my link, at no extra cost to you.

    IronWolf vs. IronWolf Pro – Comparison Table

    [table id=76 responsive=scroll /]

    (* = affiliate link / image source: Amazon Associates Program)

    IronWolf vs. IronWolf Pro – Features

    Seagate IronWolf 8Tb NAS Internal Hard Drive HDD – 3.5 Inch SATA 6GB/S 7200 RPM 256MB Cache for Raid Network Attached Storage (ST8000VN0022),Silver
    ×
    Product prices and availability are accurate as of the date/time indicated and are subject to change. Any price and availability information displayed on https://www.amazon.com/ at the time of purchase will apply to the purchase of this product.

    The biggest difference between the Ironwolf & Ironwolf Pro is the number of drive bays supported:

    • IronWolf is aimed at Home, SOHO and small business NAS drives with up to 8 drive bays.
    • IronWolf Pro, on the other hand is for businesses and digital artists who need extremely high performance from their NAS servers with up to 24 drive bays.
    Seagate IronWolf Pro 8TB NAS Internal Hard Drive HDD – 3.5 Inch SATA 6Gb/s 7200 RPM 256MB Cache for RAID Network Attached Storage, Data Recovery Service – Frustration Free Packaging (ST8000NEZ01)
    ×
    Product prices and availability are accurate as of the date/time indicated and are subject to change. Any price and availability information displayed on https://www.amazon.com/ at the time of purchase will apply to the purchase of this product.

    Another major difference is the rotational speed. As you can see in the comparison table above, the larger Ironwolf drives from 8 TB and upwards rotate at 7200 rpm but the smaller capacity models run at 5400 or 5900 rpm. But all the IronWolf Pro drives run at 7200 rpm.

    Performance

    The IronWolf Pro has a much higher rated transfer speed than the IronWolf, as can be seen in the comparison table above.

    However in real life, which drive is faster will depend on what type of enclosure or rack you are using.

    In a smaller enclosure, the IronWolf may pull ahead whereas in larger enclosures or storage racks, the Pro version will have better performance. This can be attributed to the vibration optimizations of the Pro version.

    All IronWolf and IronWolf Pro drives utilize write-back caching.

    Reliability

    Seagate has improved the the workload rating of the Ironwolf Pro drives from 300 TB/year to 550 TB/year. This is a welcome change. However, the standard Ironwolf’s rating remains at 180TB/year. But that doesn’t tell us the full story.

    While we may not have specific reliability data for the Seagate Ironwolf and WD RED drives, one cloud storage provider regularly publishes drive failure data for all the drives it uses – Backblaze.

    Please note that the Seagate hard drives they use are the Exos variety, not Ironwolf. Still, it gives us some sense of how reliable the Seagate brand is.

    Looking at the latest Backblaze data, in general at lower capacities, Seagate seems to have slightly lower reliability. Although do note the sample size is much larger in Seagate’s case for most drive sizes, generally the higher the sample size, the more accurate the data becomes.

    Noise

    The Ironwolf has a noise level rating of 20-30dB, which is low enough to place the NAS in your living room or in your study.

    Not all IronWolf Pro drives are as quiet because the professional audience that the Pro drives target do not really care much about sound levels. But they still stay under a pretty quiet 32 dB level.

    VueVille Verdict

    The IronWolf is our choice for most home users. If you are using a storage rack or an enclosure with more than 8 bays, go for the IronWolf Pro.

    Where to buy

    (* = affiliate link / image source: Amazon Associates Program)

  • Reolink vs. Arlo – The Most Popular Security Cameras Compared

    Reolink vs. Arlo – The Most Popular Security Cameras Compared

    Thinking of getting a battery-powered security camera and stuck between Reolink and Arlo? I know, its a tough choice because each brand has so many different models and it can be difficult to figure out what you need exactly.

    Let’s take a close look at the top cameras from each brand and compare them on the important requirements of a good security camera:

    • How is the night vision?
    • Can it work if there is no Internet connection?
    • Can it work properly without a monthly fee?
    • Does it have local storage? Or does everything have to go on the cloud?
    • Does it integrate with other smart home tech (Alexa etc.)?
    [wpsm_titlebox title=”Contents” style=”main”][contents h2][/wpsm_titlebox]

    Reolink vs Arlo - VueVille

    Reolink vs. Arlo – the Stories behind the Brands

    Reolink

    Reolink is one of our favourite IP security camera brands. We have been using their cameras for a few years now and have a good deal of experience with them.

    Reolink is a popular brand that is only a few years old. But they are not exactly new to the surveillance camera industry. The brand Reolink is owned by Reolink Innovation Limited (earlier known as Shenzhen Baichuan Security Technology Co., Ltd.) who are a manufacturer of security cameras and other surveillance equipment. What’s the source? I simply emailed them and asked. Simple as that.

    So Reolink is not a rebranded Hikvision or Dahua as some people have claimed online. Therefore they are not subject to the Federal government ban imposed through the National Defense Authorization Act (NDAA). This is a huge positive for Reolink.

    Arlo

    Netgear kicked-off the battery powered security camera craze when they launched the Arlo range. Small, cute, battery operated cameras that were weather-proof. A winning combination. Many clones have spawned since, but Arlo remains very popular.

    Does Reolink have anything that can challenge the might of Arlo? Let’s find out.

    Reolink Argus 2 vs. Arlo Pro 3

    Reolink has upgraded the original Argus which we reviewed with the new and improved Argus 2.

    [wpsm_column size=”one-half”]
    [easyazon_image align=”center” height=”500″ identifier=”B07W3MCDNH” locale=”US” src=”https://m.media-amazon.com/images/I/41l3ox4tSGL.jpg” tag=”vueville.com-eaz-20″ width=”500″]
    [/wpsm_column][wpsm_column size=”one-half” position=”last”]
    [easyazon_image align=”center” height=”348″ identifier=”B07YDYP6JH” locale=”US” src=”https://m.media-amazon.com/images/I/31BFfweIZ5L.jpg” tag=”vueville.com-eaz-20″ width=”500″]
    [/wpsm_column]

    Meanwhile Netgear has the latest Arlo Pro 3 on offer. This is the model that’s closest to the Argus 2.

    Hardware features

    The Reolink Argus 2 is a 1080p camera (FullHD) whereas the Arlo Pro 3 has a 4MP sensor with a maximum video resolution of 2560×1440. That’s twice as many pixels as the Reolink. Arlo put the extra pixels to good use with a cool feature – cropping the video to 1080p while automatically tracking and zooming moving objects.

    So the Arlo Pro 3 can work like a PTZ within its field of view, by zooming in on moving objects like a car or a person.

    The Arlo also has a wide 160° field of view, whereas the Argus 2 can do 130°.

    However it is important to note that while the Argus 2 is a standalone camera, the Arlo Pro 3 is useless without buying the smart hub also. Thankfully the Arlo Pro 3 cameras can connect to the older Arlo Base Station models VMB4000 and VMB4500. It is also compatible with existing outdoor security mounts. But it isn’t backward compatible with previous generation Arlo batteries or charging cables.

    The Arlo battery is rated for 4-6 months of battery life. The Argus 2 uses a 5200mAh battery which is also rated for 4-6 months battery life. Both use rechargeable batteries.

    Arlo Pro 3 has an integrated spotlight which no doubt contributes to its colour night vision abilities. Argus 2 also has colour night vision but relies on its Sony Starlight sensor to achieve this.

    Software features

    The Argus 2 is a standalone camera whereas the Arlo requires the Arlo Smart Hub to function. Furthermore, the Arlo is primarily a cloud-camera, whereas the cloud is optional for Reolink cameras. The Arlo 3 is designed by default to stream video to the Smart Hub and then from there to the cloud. These are the biggest differences between the two brands.

    With Reolink, local storage is simple: Add an inexpensive microSD card to the Argus and you have local storage. No need to have an Internet connection at all.

    Arlo has a very confusing cloud plan structure. With the older Arlo’s you got free local storage: just add a USB storage device to the Arlo Smart Hub.

    But with the new Arlo3, Arlo Ultra, and Arlo Doorbell products, Netgear has taken away all of the above. You get just live video streaming to the mobile app and notifications.

    Does the Arlo Pro 3 have free cloud storage?

    No, the 7-day free cloud storage has been taken away. Now you have to pay for an Arlo Smart plan if you want cloud storage.

    Does the Arlo Pro 3 have local storage?

    Yes, and you don’t need an Arlo Smart monthly plan for this. But to view the recorded clips, you have to unplug the USB drive from the Smart Hub and then plug it into a computer. This inconvenience seems to be deliberately designed so that you will just give up and pay for a cloud plan.

    Motion Detection ability

    Both the Argus 2 and Arlo Pro 3 use a PIR motion sensor for motion detection. This is more accurate than software based motion detection.

    However, the Arlo Smart cloud plan strikes again. The Arlo Pro 3 requires you to pay if you want to mark motion detection zones or ‘activity zones’. This is a basic feature and shame on Netgear for doing this. Of course the Reolink doesn’t make you pay for this.

    Cloud-reliant cameras have one advantage – they can use the cloud for things like Person, Vehicle, & Animal Detection. It can even do package detection. But you have to pay for any of these features. The Argus 2 has optional cloud storage (Reolink Cloud) but it doesn’t have these advanced motion detection methods.

    One are where the Argus 2 disappoints is the lack of pre-recording. Without this feature, your motion triggered clips may be missing the few seconds before motion was triggered. Arlo does has this feature in AC power mode.

    Smart Home Connectivity

    The Arlo Pro 3 is compatible with IFTTT, Alexa, Google Assistant, Apple. The Argus 2 can interface with Alexa and Google Assistant.

    Warranty

    Reolink offers a 2 year limited warranty. Netgear offers only a 1 year limited warranty on Arlo products.

    Verdict

    The Arlo Pro 3 has the edge in video quality and it has some features like smart motion detection which the Argus 2 doesn’t have. However you have to pay for a monthly Arlo Smart plan to use a lot of these features. Netgear has designed the Arlo Pro 3 to work best with a paid cloud plan. So you are really looking at paying a monthly fee if you want the Arlo.

    If you don’t mind this and are also okay with your data being on the cloud, the Arlo might work for you.

    But VueVille is a privacy and wallet-conscious blog – we pick the Reolink Argus 2 because it is not crippled without the cloud or an Internet connection. Local storage is also free to use. This coupled with the 2 year warranty puts it miles ahead of the Arlo. And we haven’t even talked about price yet.

    Also check out the other recommendations on our best outdoor IP cameras list.

    Where to buy

    • [easyazon_link identifier=”B07W3MCDNH” locale=”US” tag=”vueville.com-eaz-20″]Reolink Argus 2 at your local Amazon website[/easyazon_link]
    • [easyazon_link identifier=”B07YDYP6JH” locale=”US” tag=”vueville.com-eaz-20″]Netgear Arlo Pro 3 at local Amazon website[/easyazon_link]

    Summary comparison table

    Here’s a summary of the full review in a nice and easy table:

    [table id=63 responsive=”scroll” /]
  • Hikvision vs. Amcrest – The Most Popular IP Cameras Compared

    Hikvision vs. Amcrest – The Most Popular IP Cameras Compared

    How do the more budget oriented Amcrest IP cameras compare to the more expensive Hikvision models? This is something I have been wondering about for some time now. From the emails I get, I am not the only one! So in this post, let’s take a detailed look at Hikvision vs Amcrest.

    We have looked at Hikvision vs. Dahua in the past, and we found that comparable models from the two companies are very close to each other in both features and performance.

    [wpsm_titlebox title=”Contents” style=”main”][contents h2][/wpsm_titlebox]

    A quick note: This article may contain affiliate links. If you click on one of these links and then purchase something, we may receive a fee. This does not cost you anything extra. Also note that Hikvision and Dahua do not consider certain platforms including Amazon as an authorized seller platform. So if you need warranty support please purchase from authorized resellers of Hikvision and Dahua products in your country.

    Hikvision vs. Amcrest – the Stories behind the Brands

    Hikvision vs Amcrest - The Most Popular IP Cameras Compared - VueVille

    Hikvision

    You’re probably no stranger to Hikvision if you have been dabbling with DIY security cameras for some time. Hikvision is a surveillance equipment manufacturer based in Hangzhou China. They primarily cater to professional installers and are not really interested in retailing to the general public. But still they made a splash in the DIY space because of their affordable DIY IP cameras with powerful features. Like 3MP sensors which were unheard of in mainstream IP cameras in 2014 when I bought my first IP camera, the Hikvision DS-2CD2032-I.

    A few years ago, they launched their retail brand EZVIZ. Confusingly, EZVIZ used to be the name of their cloud app as well. Anyway the EZVIZ models are dumbed down versions of the Hikvision cameras and are not worth spending any money on. That’s why I am focusing on the main Hikvision brand.

    The biggest concern I have with Hikvision is not so much about their cameras, but who owns the company. The Chinese government owns at least a partial stake in Hikvision. This creates a few ethical and moral quandaries that I won’t go into here – you know what I’m talking about.

    If you live in the USA, there’s one more reason to avoid Hikvision cameras – the US government has recently banned the sale and import of new Hikvision products into the USA unless certain conditions are met. They are still being sold by their authorized retail seller BH Photo though. Of course, you can always get them from AliExpress as most of us have always done.

    From a technical standpoint, you should treat any security camera the same way – with maximum suspicion that they may be ‘dialing home’ to their manufacturer’s own servers and leaking your data. So lock them down using Virtual LANs (VLAN) and strict firewall rules like I have in my DIY home security camera system.

    Amcrest

    Foscam US re-branded themselves as Amcrest Technologies in early 2016. Foscam US (Foscam Digital Technologies) used to be an independent reseller for the Chinese manufacturer/supplier Foscam Shenzhen. However in 2016, the Chinese supplier allegedly started undercutting Foscam US. Foscam US says they had no choice but to cut all ties with Foscam Shenzhen and go it alone as Amcrest Technologies.

    Foscam security cameras never had a great reputation and once Amcrest launched their own products, they have quickly overtaken the original Foscam brand both in quality, reliability, support service levels, and reputation.

    8MP 4K IP Camera Duel – Hikvision DS-2CD2085G1-I vs. Amcrest IP8M-T2669EW-AI

    In 2025, everybody’s selling 8MP IP cameras. 4K resolution is the buzzword and 8MP is what you need to get 4K video.

    I have picked two compelling options from the two companies and pitted them against each other. I would normally compare the DS-2CD2083G0-I which is the cheapest Hikvision 8MP bullet you can get. However as a consumer you will probably be looking at the more powerful Hikvision DS-2CD2085G1-I which is priced only a bit more than the DS-2CD2083G0-I. It would be remiss of me to steer you to the DS-2CD2083G0-I when the more capable DS-2CD2085G1-I is available at a similar price.

    So as you peruse the rest of this comparison, please bear in mind that the Hikvision DS-2CD2085G1-I is the best Hikvision 4K camera to compare to the best Amcrest 4K camera, the IP8M-T2669EW-AI.

    Hardware features – Hikvision vs. Amcrest

    The Hikvision I have selected is from the Darkfighter series. These are ultra low-light camera that can produce night-time colour video down to 0.008 lux. They can also provide great black and white video together with IR. Interestingly, Hikvision doesn’t claim that this camera has ColorVu technology but which does the same thing effectively.

    Nor does this camera have the AcuSense feature which reduces false alarms by ignoring birds, animals, lights and movement of trees. For these features you need to step up to a more premium line of Hikvision cameras.

    The Hikvision has a larger sensor (1/2″) than the Amcrest camera (1/2.8″). But as we shall see below they are closer in performance than this spec suggests.

    Amcrest cameras have historically been rebranded Dahua cameras, and so shared most of the same features. Dahua has a highly acclaimed low-light technology called Starlight. The highest spec of Starlight also has full color night vision. Until last year, Amcrest cameras didn’t get Starlight at all. But now the IP8M-T2669EW-AI sports the Starlight sensor and can match the Hikvision in low-light colour vision. Even though Amcrest doesn’t market this camera as a color night vision model.

    Both the Hikvision & Amcrest have true 120dB Wide Dynamic Range (WDR) to help improve video quality in high glare situations.

    The cameras are both made from metal and have the same level of ingress protection (IP67). I am happy to see Hikvision have embraced IP67, they have always gone for IP66 for their outdoor IP cameras. But Dahua has always been using IP67. So Amcrest also gets the IP67 rating.

    Neither have vandal protection (IK10), more expensive Hikvision bullets do have it these days.

    The Amcrest does have a built-in microphone, but Hikvision doesn’t.

    Winner: Amcrest

    Software features – Hikvision vs. Amcrest

    The three most important software features that I look for are ONVIF support, the built-in NVR feature, and the advanced motion detection features that help reduce false alerts. Why because if an IP camera has ONVIF and RTSP features, you can use it as a standalone IP camera or easily integrate it into a Pro-DIY type DIY NVR system like mine.

    Both Hikvision and Amcrest support ONVIF, and RTSP on all their IP cameras.

    ONVIF ensures that your camera will work with standards-compliant equipment from 3rd party manufacturers. This is why you can add a Hikvision or Amcrest camera to your ONVIF-compatible NVR or DIY NAS NVR and integrate it into my smart home automation system.

    RTSP allows even non-ONVIF equipment (such as software) to access the security camera’s video stream. Examples are video players like the popular VLC player or [easyazon_link identifier=”B004VD3YIM” locale=”US” tag=”vueville.com-eaz-20″]tinyCAM Monitor Pro[/easyazon_link] on Android.

    Motion Detection ability

    Both Amcrest and Hikvision have advanced motion detection features like line crossing, intrusion detection. Hikvision further supports unattended baggage detection, and object removal detection.

    I can’t emphasize enough the importance of these advanced motion detection methods in reducing false motion alerts.

    But Amcrest has something the Hikvision DS-2CD2085G1-I doesn’t have – person and vehicle detection. This is a recent addition to Amcrest cameras and not all models have it yet, but the IP8M-T2669EW-AI does as indicated by the AI in the model name.

    So Amcrest gets the slight edge here if you are going to use it as a standalone IP camera without an NVR connected, or as part of a DIY NAS NVR system.

    Winner: Amcrest

    Mobile app

    There’s no contest here, the Amcrest mobile app is miles ahead of the IVMS suite of Hikvision mobile apps.

    Winner: Amcrest

    Warranty – Hikvision vs. Amcrest

    Hikvision products come with a limited 3-Year Warranty if purchased from authorized dealers. Please note you may not get the warranty if you purchase from other retailers such as Amazon.

    Amcrest provides only a 1 year warranty.

    So Hikvision wins easily here.

    Detailed Comparison Table

    Here’s a summary of the full review in a nice and easy table:

    [table id=60 responsive=”scroll” /]

    Verdict – Hikvision vs. Amcrest

    Thanks to the smart detection features such as person and vehicle detection, Amcrest gains the edge over Hikvision in my opinion. The ongoing governmental sanctions against Hikvision also mean its probably a better idea to avoid Hikvision products.

    Also check out the other recommendations on our best outdoor IP cameras list for more interesting cameras reviewed from a DIY perspective.

    Where to buy

    • Amcrest IP8M-T2669EW-AI at [easyazon_link identifier=”B08CWGJY37″ locale=”US” tag=”vueville.com-eaz-20″]local Amazon website.[/easyazon_link]
    • Hikvision DS-2CD2085G1-I at BH Photo (authorized US retailer)

    Related Comparisons

  • Top 3 All-in-One DIY Smart Home Security Systems with Cameras

    Top 3 All-in-One DIY Smart Home Security Systems with Cameras

    Looking to save some money by going DIY? But don’t want to spend a ton of time researching and picking parts for your DIY Smart Home Security System with Security Cameras? Fear not, VueVille’s here!
    [wpsm_divider top=”20px” bottom=”20px” style=”clear”]

    How to use this buying guide

    If you are new to this blog, I highly recommend you first plan/review your smart home journey using my VueVille DIY Smart Home Framework. Knowing what you want is the secret to getting the right DIY setup at a reasonable price!

    Starting from scratch and want a zero-hassle all-in-one option? You can get an all-in-one kit with both home security and security cameras – I call it Easy-DIY. That’s what this post is all about.

    However if you already have an alarm system and need just a complete security camera kit consider Pro-DIY. Check out our top recommendations here. If you want to link your existing alarm panel to the cameras, look out for the smart home connectivity verdict of each kit.

    ADT Lifeshield Z-Wave All-in-one System

    [wpsm_divider top=”20px” bottom=”20px” style=”clear”]

    [wpsm_column size=”one-half”]
    [wpsm_titlebox title=”Features” style=””]

    • Z-Wave Wireless system
    • Works with 3rd party Z-Wave products
    • Outdoor and indoor security cameras
    • 24-hour video storage
    • Free mobile app
    • Fail-over to cellular (paid)/landline (free)
    • Professional monitoring available ($20/mo)

    [/wpsm_titlebox]
    [/wpsm_column]

    [wpsm_column size=”one-half” position=”last”]
    [wpsm_titlebox title=”VueVille Smart Home Verdict” style=””]

    • Local storage available: No
    • Advanced motion detection: No
    • Cloud reliant: No
    • Battery backup: Yes (24 hours)
    • Self-monitoring works without Power or Internet? Yes
    • Auto fail-over to cellular? Yes
    • Smart home compatibility: Z-Wave Plus Alexa, Google Assistant, IFTTT

    [/wpsm_titlebox]
    [/wpsm_column]

    ADT is one brand that probably needs no introduction. A trusted and reputed brand in the professionally monitored alarm industry, they have now rather belatedly entered the DIY market. But what an entrance they have made with the Lifeshield!

    The ADT Lifeshield is an all-in-one kit with a base station, an entry keypad, indoor camera, 6x door/window sensors, 2x motion sensors, fire safety sensors, a keychain remote and stickers. You can add glass break sensors, temperature/flood sensors, outdoor cameras, and even a video doorbell.

    But really surprised me is the fact that the base is a fully functional Z-Wave hub that supports certain 3rd party Z-Wave devices. So you are not locked into the ADT eco-system. You can add supported Z-Wave lights, locks, thermostats or garage openers and easily add them to the LifeShield. They can then be controlled using the home automation cards from the mobile apps or web interface. Unfortunately Z-Wave sensors are not supported at this time.

    The outdoor security camera is billed as an HD device with 128.6° field of view. This is below our recommended minumum resolution of 1080p. It does have night vision and adjustable motion detection zones though. But overall it is not really comparable to our recommended outdoor IP cameras. There’s always a tradeoff – the convenience of an all-in-one platform means you don’t get the cutting edge in security cameras. The downsides of an all-in-one home security system rear their ugly heads!

    Overall, if you are brand new to DIY, you can’t really go wrong with the ADT LifeShield kit.

    [wpsm_column size=”one-half”][wpsm_pros title=”PROS:”]

    • Easy to install and setup
    • Wireless system using industry standard Z-Wave platform
    • Works with certain 3rd party Z-Wave devices
    • Optional RJ-45 Ethernet port on base and camera (more robust than Wi-Fi connection to router)
    • Outdoor and indoor security cameras
    • Self-monitored option works without the Internet/Cloud connection
    • Landline failover in free self-monitored plan
    • Professional monitoring available
    • Straightforward transparent pricing structure
    • Great customer support

    [/wpsm_pros][/wpsm_column]

    [wpsm_column size=”one-half” position=”last”][wpsm_cons title=”CONS:”]

    • Cellular backup unavailable unless you pay for professional monitoring
    • Security cameras are only 720p resolution
    • No local storage of video
    • No alarm in/out connections but Z-Wave devices are a good alternative

    [/wpsm_cons][/wpsm_column]

    [wpsm_divider top=”20px” bottom=”20px” style=”clear”]

    Ring Alarm

    [wpsm_divider top=”20px” bottom=”20px” style=”clear”]

    [wpsm_column size=”one-half”]
    [wpsm_titlebox title=”Features” style=””]

    • Z-Wave Wireless alarm system with a variety of sensors
    • Ring security cameras not included, but are supported
    • Works with certain 3rd party Z-Wave products
    • Outdoor and indoor security cameras
    • No video storage for free
    • Free mobile app with free push notifications
    • Professional monitoring & unlimited cloud video storage available ($10/mo)

    [/wpsm_titlebox]
    [/wpsm_column]

    [wpsm_column size=”one-half” position=”last”]
    [wpsm_titlebox title=”VueVille Smart Home Verdict” style=””]

    • Local storage available: No
    • Advanced motion detection: No
    • Cloud reliant: No
    • Battery backup: Yes (24 hours)
    • Self-monitoring works without Power or Internet? Yes
    • Auto fail-over to cellular? Yes (paid plan only)
    • Smart home compatibility: Z-Wave Plus, Zigbee, Alexa, IFTTT

    [/wpsm_titlebox]
    [/wpsm_column]

    Ring is famous for their video doorbells, the Ring and the Ring Pro. They were the first wireless video doorbells to get really popular. So it follows that the next step was security cameras and now a smart home security system that ties everything together.

    The Ring Alarm kits are available in the following pre-configured kits: 5 piece, 8 piece, 14 piece, CO & Smoke kit, and an enhanced kit which has everything Ring has to offer.

    All the kits have a base station, a keypad, door/windows sensors and motion detectors. All of these components are of the Z-Wave standard. This is the second major brand I have seen using Z-Wave instead of proprietary wireless frequencies. I guess it just goes to show the level of acceptance that Z-Wave finally has secured.

    So you can add any Ring certifies Z-Wave device to your kit – this includes Schlage locks, GE Z-Wave switches and a slew of other devices. Link them together and you can control all of them from within the Ring smartphone app.

    The biggest advantage of the Ring platform is the impressive array of security cameras and doorbells you can add to the base station. So here the Ring Alarm has the advantage over the ADT Lifeshield system.

    Pay $10 a month for Ring Protect Plus to get professional monitoring, failover to cellular, unlimited video storage for any number of cameras, extended warranty and 10% off all Ring products. Note that self-monitoring doesn’t include any failover if there is no internet connection.

    [wpsm_column size=”one-half”][wpsm_pros title=”PROS:”]

    • Easy to install and setup
    • Wireless system using industry standard Z-Wave platform
    • Works with certain 3rd party Z-Wave devices
    • Self-monitored option works without the Internet/Cloud connection
    • Professional monitoring available
    • Straightforward transparent pricing structure
    • RJ-45 Ethernet port on base (more robust than Wi-Fi connection to router)
    • Great customer support

    [/wpsm_pros][/wpsm_column]

    [wpsm_column size=”one-half” position=”last”][wpsm_cons title=”CONS:”]

    • No failover whatsoever in free self-monitored plan
    • No landline failover feature (even if you pay)
    • No RJ-45 Ethernet port on camera (more robust than Wi-Fi connection to router)
    • No local storage of video
    • No alarm in/out connections but Z-Wave devices are a good alternative

    [/wpsm_cons][/wpsm_column]

    [wpsm_divider top=”20px” bottom=”20px” style=”clear”]

    SimpliSafe Wireless Home Security System with HD Camera

    [wpsm_divider top=”20px” bottom=”20px” style=”clear”]

    [wpsm_column size=”one-half”]
    [wpsm_titlebox title=”Features” style=””]

    • Wireless system with all sorts of sensors
    • Wi-Fi Camera with 120° field of view & PIR
    • Using the mobile app for camera viewing is free
    • Professional monitoring available ($10/mo Standard Plan)
    • Mobile app remote control and smart home integration costs an extra $10/month (part of Interactive monitoring plan)

    [/wpsm_titlebox]
    [/wpsm_column]

    [wpsm_column size=”one-half” position=”last”]
    [wpsm_titlebox title=”VueVille Smart Home Verdict” style=””]

    • Local storage available: No
    • Advanced motion detection: No
    • Cloud reliant: No
    • Battery backup: Yes (24 hours)
    • Self-monitoring works without Power or Internet? Yes
    • Auto fail-over to cellular? Yes (paid plan)
    • Smart home compatibility: Alexa, Google Assistant, August, Nest (all need paid plan)

    [/wpsm_titlebox]
    [/wpsm_column]

    The Simplisafe is a very popular all-in-one kit and has been very positively reviewed by the big tech publications. So I thought its worth taking a look at. You can pick one of the pre-built kits (see below) or design your own at their website.

    Started in 2008, Simplisafe initially targeted renters looking for a budget-friendly self-monitored option. But in 2010 they pivoted to targeting homeowners by expanding the product range to include sensors like smoke detectors.

    The pre-built kits come with everything you need to get your security system set up (12 piece kit pictured above). Here are the details of the other kits.

    The large vase-shaped wireless base station is the heart of the system. The keypad, the motion sensors, door/window sensors and other bits all connect wirelessly to the base station. It also houses the alarm siren, so you want to place it somewhere at the center of your home.

    You can also add additional sensors like CO2, smoke, and flood detectors. You can even add the Simplisafe Video Doorbell.

    The basic features of a smart home security system are a fully functional mobile app and smart home integration (Alexa etc.). However I was disappointed to see that neither are free. Even though the company touts itself as a DIY-friendly option, the whole platform is designed to push you into paying $25/mo. Want to use the mobile app for viewing your camera? That’s free. Want to arm/disarm the system remotely, or use smart home integrations? That’s $25/mo please for the ‘Interactive Monitoring’ plan.

    So without the $25/mo plan, your smart security system is pretty dumb. In my opinion, this needs to be more explicitly mentioned on the website because it is a customer’s expectation that a basic feature such as remote arm/disarm will be free and not cost nearly as much as the whole hardware every year!

    [wpsm_column size=”one-half”][wpsm_pros title=”PROS:”]

    • Easy to install and setup
    • Wireless system
    • Self-monitored option works without the Internet/Cloud connection
    • Professional monitoring available at a cost
    • Built-in battery backup

    [/wpsm_pros][/wpsm_column]

    [wpsm_column size=”one-half” position=”last”][wpsm_cons title=”CONS:”]

    • Opaque website and marketing material that obscures monthly fee structure
    • Mobile app is very limited unless you pay for the “Interactive Monitoring” plan
    • No Z-Wave support
    • No failover whatsoever in free self-monitored plan
    • No landline failover feature (even if you pay)
    • No free remote arm/disarm of alarm
    • No free push notifications
    • No local storage of video
    • No outdoor camera
    • No alarm in/out connections
    • No RJ-45 Ethernet port (more robust than Wi-Fi connection to router)
    • No tablet for controlling the system
    • Does not work with 3rd party devices

    [/wpsm_cons][/wpsm_column]

    Conclusion

    More and more of us are becoming aware of the advantages of going DIY and self-monitoring using smart home security. The all-in-one systems above sacrifice some features and flexibility for the convenience of plug-and-play.

    If you feel the choices above are too limiting, but still don’t want to go pro-DIY, consider Pro-DIY: split the home security/automation part and the security camera part.

  • Review: Reolink E1 Pro 4MP Wireless Indoor Pan-Tilt Security Camera

    Review: Reolink E1 Pro 4MP Wireless Indoor Pan-Tilt Security Camera

    A few years ago we reviewed the Reolink C1 Pro, a 4 Megapixel wireless pan-tilt indoor security camera. We loved it so much that it became our main nursery baby monitor. Now Reolink has launched another 4MP Pan-Tilt, the E1 Pro which is an even more affordable option than the C1 Pro. What’s more, it supports person and pet detection and even auto-tracking!

    So how does the E1 Pro perform, what features if any have been sacrificed and ultimately should you buy it? To find out, we put a review sample that Reolink provided through its paces in this hands-on review.

    VueVille Review - Reolink E1 Pro PT Indoor Security Camera - Front view

    [wpsm_titlebox title=”Contents” style=”main”][contents h2 h3][/wpsm_titlebox]

    A quick note: As an Amazon Associate I earn from qualifying purchases. This post contains affiliate link(s). An affiliate link means I may earn advertising or referral fees if you make a purchase through my link, at no extra cost to you.


    Specifications

    [table id=61 responsive=scroll /]

    Unboxing

    VueVille Review - Reolink E1 Pro PT Indoor Security Camera - Box front
    VueVille Review - Reolink E1 Pro PT Indoor Security Camera - Box side 1
    VueVille Review - Reolink E1 Pro PT Indoor Security Camera - Box side 2

    What’s in the box

    VueVille Review - Reolink E1 Pro PT Indoor Security Camera - Box Contents
    VueVille Review - Reolink E1 Pro PT Indoor Security Camera - Quick Start Guide
    • Reolink E1 Pro PT Indoor Wireless Security Camera
    • DC 5V wall adaptor
    • Power cable
    • Wall mounting bracket
    • Quick Start guide
    • What’s next booklet
    • Drilling templates
    • Reolink surveillance notification sticker
    • Screws and rawl plugs

    Design & Features

    VueVille Review - Reolink E1 Pro PT Indoor Security Camera - Front view

    The E1 Pro is different from any other Reolink camera I have seen. It is very compact and weighs just 200 grams.

    The camera can be divided into 3 parts – the black lens housing, the white tennis ball shaped body, and the white base. The tennis ball design of the body which surrounds the black lens housing is a neat design. Overall, the high-quality fit and finish of the camera exudes a premium aura that belies its budget price.

    So how does this Pan-Tilt camera work? When panning, the entire upper body revolves around the base. When tilting, only the black lens housing rotates up or down.

    The black lens housing has a matte design and is super smooth to the touch. The daylight sensor is integrated into the ring-type 8 Infrared LEDs concealed smartly around the lens. If you look carefully you can see the red tinge of the Infrared LEDs under the darkened glass surrounding the lens.

    The built-in microphone is placed just under the lens. The SD card slot and the reset button are also placed here, which is actually a genius idea. When the camera is in its default position of looking straight ahead, the SD card slot and the reset button are totally concealed! Tilt the lens up all the way using the Reolink mobile app or PC Client software and you can access the slot and the reset button.

    VueVille Review - Reolink E1 Pro PT Indoor Security Camera - SD card
    VueVille Review - Reolink E1 Pro PT Indoor Security Camera - Side view 2
    VueVille Review - Reolink E1 Pro PT Indoor Security Camera - Side view 1

    The left and right sides of the body are bare but you will find the built-in speaker on the back of the lens housing.

    VueVille Review - Reolink E1 Pro PT Indoor Security Camera - Back view

    The base of the E1 Pro has just the AC power input. Unusually this is not a microUSB design.

    Update: Reolink has recently added an Ethernet port to the E1 camera lineup, and so the E1 Pro can also be used as a wired camera.

    Flip the camera over and you will find the slot for fitting the wall bracket and a sticker with the QR code for setting up the camera in the Reolink mobile app.

    VueVille Review - Reolink E1 Pro PT Indoor Security Camera - Bottom view

    The dual-band Wi-Fi antennae are prominent by their absence. Yes, the antennae are built-in but in my testing this doesn’t seem to affect range noticeably. Just like the C2 Pro, the 5 Ghz Wi-Fi is a great feature to have as most of the competitors are still sporting just 2.4 GHz Wi-Fi. The higher bandwidth capacity of the 5 Ghz band comes with a significant range disadvantage though.

    All in all, the camera feels light yet solid in construction. The contrasting colours and the matte finish of the black lens housing really makes the E1 Pro look and feel far more expensive than it really is.

    Installation & Setup

    The Reolink E1 Pro comes with a very good quick start guide which is a double-sided glossy booklet, just like the other Reolink cameras I have reviewed. The general introduction section illustrates and labels the different parts of the camera such as the daylight sensor, the built-in mic, the speaker, the indicator LEDs and the various connections.

    There is also a helpful camera connection guide for those who are new to security cameras. The setup is voice guided (just like the Reolink Argus) and can be done fully wireless. I would expect most people to use the camera’s Wi-Fi option rather than the Ethernet port, so that’s what I have also done in this review.

    So you have two options for setting up the camera:

    1. Setup using a smartphone or tablet using the Reolink app, or
    2. Setup using a laptop and the Reolink Client software for PC

    Reolink recommends the smartphone app method, so that’s what I did.

    1. Install the Reolink mobile app. I had it already installed since I use the Reolink C2 Pro, C1 Pro and the Argus all of which I have reviewed in the past.Review - Reolink E1 Pro PT Indoor Security Camera - App - 1
    2. Power on the E1 Pro. You will hear a voice message ‘Please run the Reolink app and add the camera to set it up’.
    3. In the Reolink app, click the plus button at the top right to add the camera, and choose the ‘Connect to Wi-Fi option’.
      Review - Reolink E1 Pro PT Indoor Security Camera - App - 2
    4. I was not happy to see the app asking for location access, feel free to deny it – the setup will continue successfully anyway.
    5. Enter your Wi-Fi info into the app. The app will then transfer it to the camera in the next step.Review - Reolink E1 Pro PT Indoor Security Camera - App - 5
    6. Scan the QR code on the bottom of the camera base.Review - Reolink E1 Pro PT Indoor Security Camera - App - 6
    7. The camera will then attempt to connect to your Wi-Fi network.Review - Reolink E1 Pro PT Indoor Security Camera - App - 7Review - Reolink E1 Pro PT Indoor Security Camera - App - 8
    8. After the camera has initialized, create a login password to complete the setup process.Review - Reolink E1 Pro PT Indoor Security Camera - App - 9

    Configuring the E1 Pro

    The only way of configuring the camera is using the Reolink mobile app. Unlike the C1 Pro, the E1 Pro does not have a built-in web server where you can access the advanced settings. In that respect it is more like the Reolink Argus. In the next section, I will cover the camera configuration also.

    Using the Reolink mobile app

    The Reolink mobile app has always been a reliable and well-designed app. I have never experienced the app crashing on my Samsung Galaxy S9.

    As Reolink started introducing cameras such as the Argus without a built-in web server, it became essential for the app to be able to fully configure the camera. The E1 Pro leverages the app very well and the app allows you almost full control over the camera.

    Review - Reolink E1 Pro PT Indoor Security Camera - App - 20

    When you open the app after setting up the camera, you are greeted with the familiar camera selection list with a static preview image. What’s new in the app is the ability to group cameras together and apply Scenes or quick modes to them quickly – this is a great feature if you have multiple Reolink cameras but dont have an NVR. You can create custom scenes, say, ‘Arm alarm’ to instantly enable motion detection recording, push/email alerts, and audio buzzer alarms when you leave the home. Then when you return you can just activate a ‘Disarm alarm’ scene to deactivate all alarms/alerts.

    Touching the camera preview image takes you to the Live-view screen of the E1 Pro. Here you can adjust the Pan-Tilt camera position, use the 2-way audio talk feature, record a clip or take a snapshot. There’s also a nifty audio buzzer button that will briefly sound the camera alarm buzzer. Its not very loud but should be enough to scare away an intruder!

    The playback button at the bottom right is for accessing the built-in NVR feature of the E1 Pro. More on that later. Back in the app home page, you can touch the gear icon of the E1 Pro to access the camera settings.

    Review - Reolink E1 Pro PT Indoor Security Camera - App - 19

    You can either activate/deactivate individual alert settings or use the Scenes feature mentioned earlier to control the camera behaviour. This is my favourite way of managing the alert settings of the E1 Pro.

    Under Display, you can adjust the video stream settings – you can choose between 4MP, 3MP, 1080p and 720p for the main stream. 4MP is the default.

    Review - Reolink E1 Pro PT Indoor Security Camera - App - 13

    You can also perform user management here, such as setting up additional users for your family members’ smartphones.

    The E1 Pro has the usual P2P and UID features but the app doesn’t give access to these settings. If you want to change these and other advanced settings such as port numbers, you can do it through the Reolink Client PC app.

    Built-in NVR Feature

    The built-in NVR feature of the E1 Pro allows you to record video clips without having to buy a separate NVR. What is this built-in NVR feature? Basically, pop in a microSD card and the camera can record motion detection triggered video clips or snapshots to the SD card.

    This means that if you need only a single camera or two in your home , you don’t need to buy a separate NVR just to record video footage (although I strongly recommend it ). The camera can also push notifications to the Reolink app on your mobile phone, send email alerts with attached snapshots or video clips.

    Adding a microSD card for motion detection recording

    I inserted a microSD card into the SD card slot. I had to push the card all the way into the slot before it click-locked. I then formatted the card through the Reolink mobile app. The camera then automatically rebooted and the microSD card was ready for use.

    You have several options to control the motion detection recording behaviour. First up is sensitivity, you can go for the default single setting or set up multiple settings for different times of the day.

    Review - Reolink E1 Pro PT Indoor Security Camera - App - 10
    Review - Reolink E1 Pro PT Indoor Security Camera - App - 14

    You can also define the area that the camera should monitor for motion.

    Review - Reolink E1 Pro PT Indoor Security Camera - App - 11

    The two features above will go a long way in reducing false motion detection alerts.

    Reviewing recorded footage

    There are three ways to view the recorded footage – the Reolink mobile app, the Reolink Client PC software, and manually accessing the clips on the microSD card with a laptop.

    Using the mobile app, you can login any time from anywhere to review the footage through a timeline view. The mobile app also identifies each motion detection event so that you can just play those without having to scrub through the timeline.

    At first I thought were only the sub-stream clips could be downloaded to the phone and not the main stream. But Reolink guided me to the picture quality icon – tap it and change it to 4MP and you can download the 4MP clips!

    Review - Reolink E1 Pro PT Indoor Security Camera - App - 18

    You can also do all of the above through the Reolink Client app or remove the SD card and take the video clips off it with a laptop.

    Mobile Push Notifications

    Use the Scenes feature to control when and how push notifications are delivered to your smartphone.

    Review - Reolink E1 Pro PT Indoor Security Camera - App - 16

    Remember that push notifications will not work outside your local network if you switch off P2P though.

    Adding the Reolink to QNAP Surveillance Station

    The E1 Pro supports both ONVIF and RTSP, so I was easily able to add it to my QNAP TS-253A’s Surveillance Station app. I first created an additional user for the NAS using the admin section of the camera app.

    The ONVIF port is port 8000, the media port is 9000, RTSP is available at port 554 and RTMP at port 1935.

    Performance

    The E1 Pro has a 4MP sensor which can record at up to 2560 x 1440 resolution. The maximum bitrate of 4Mbps is lower than the usual 8Mbps of other Reolink cameras.

    Let’s look at the default settings the Reolink E1 Pro comes with from the factory:

    Main stream: 4MP @ 15fps and 3Mbps

    Since these are the defaults, I ran my day and night tests at these settings.

    Video quality

    Video captured was sharp and detailed both during the day time and in total darkness, in line with my expectations for a 4 Megapixel IP camera.

    Here are the motion detection triggered videos recorded at the default settings:

    There was no blurring of the video and there were no dropped frames.

    Motion detection

    The E1 Pro is able to do both pre-recording and post-recording. This means the camera is able to record not just what happens after motion was triggered but 5 seconds before the trigger as well. This is a great feature and something that I always look for in a security camera.

    The post-record feature lets you decide how many seconds the camera should record after the last motion trigger. The default is 15 seconds.

    Night vision

    The 8 InfraRed LEDs placed around the lens in a ring pattern are reasonably powerful and can light up a decent sized room with no trouble.

    There are no settings to control the brightness of the LEDs and there are no advanced features to dynamically control the infrared light output.

    Audio quality

    Just like the other Reolink indoor security cameras, the E1 Pro supports 2-way audio. Usually the implementation in most manufacturers’ native apps mutes the audio when you activate the microphone. In other words they have half-duplex audio, not full-duplex. Ideally to use the camera as an intercom, you need 2-way full duplex audio.

    Interestingly Reolink has not claimed full duplex audio, but the Reolink app doesn’t mute the incoming audio when you press the microphone button. You can continue to hear what the person at the other end is saying when you are speaking. So the E1 Pro actually supports full duplex audio.

    So how well does it work in practice? The audio quality is great and the dual speakers do a great job in reproducing audio. But there is a noticeable lag, however slight, in audio playback and this makes the full duplex capability less useful. We found ourselves using the Reolink E1 Pro more like a walkie-talkie just like the Amcrest ProHD cameras.

    PT performance

    If you are planning to use the E1 Pro as a baby monitor with 2-way audio, you will be interested in how much noise it makes while panning and zooming.

    I was pleased to find that the E1 Pro just like the C1 Pro hardly makes a sound while starting up, panning or tilting. So it makes for a great baby monitor.

    A long-standing issue I have seen in Reolink cameras is that the motion detection stays active even when you use the Pan-Tilt controls. This means the camera records a motion detection clip each time you use the PTZ controls. The E1 Pro is no different here and exhibits the same behaviour.

    Wireless performance

    The E1 Pro (just like the C2 Pro) boasts 2T2R MIMO antennae for improved wireless performance. So I moved the camera to the farthest point in my house to see how the Wi-Fi performed. Over both 2.4GHz and 5 GHz, the E1 Pro was stable and performed just as if it was connected over Ethernet.

    Mobile app push notifications

    So what should you be looking for when it comes to push notifications? The speed and reliability of the push notifications reaching you. You want the camera to send you push notifications immediately after it detects motion.

    Especially if you have configured email alerts, SD card recording at 4 Megapixel recording and push notifications, inferior cameras may struggle with the workload.

    The E1 Pro performed like a champ. Inside my local network I got push notifications on my phone instantaneously and on remote networks there was a delay of just 1 second which is very impressive. The success rate of receiving the push notifications over multiple motion triggers was a solid 100%.


    Verdict

    The E1 Pro is a stylish yet budget-friendly DIY security camera that simply gets the job done. With its easy voice-guided setup, smart person detection, on-board microSD storage, built-in NVR feature, full duplex 2-way audio, push alerts and dual-band WiFi, the E1 Pro offers fantastic bang for the buck.

    DIY enthusiasts will appreciate the availability of RTSP streams & ONVIF compliance which allows the E1 Pro to work with a DIY NAS NVR. Kudos to Reolink for supporting this feature even in this entry-level camera. But they may not be too happy about no web browser access and the max 4Mbps bitrate. Still that’s a small price to pay for this much value.

    [review]


    Where to buy

    (* = affiliate link / image source: Amazon Associates Program)

  • Amcrest vs. Lorex – The Most Popular IP Cameras Compared

    Amcrest vs. Lorex – The Most Popular IP Cameras Compared

    Having just recently compared Reolink and Lorex, let’s now throw in another popular DIY IP camera brand into the mix and compare them – Amcrest vs Lorex.

    Reolink and Amcrest are similar in the type of products they market – good quality standalone IP cameras and NVRs that are ONVIF compliant and very affordable.

    Lorex on the other hand has focused on selling NVR kits rather than IP cameras capable of standalone operation.

    [wpsm_titlebox title=”Contents” style=”main”][contents h2 h3][/wpsm_titlebox]

    A quick note: As an Amazon Associate I earn from qualifying purchases. This post contains affiliate link(s). An affiliate link means I may earn advertising or referral fees if you make a purchase through my link, at no extra cost to you.

    Amcrest vs Lorex - The Most Popular IP Cameras Compared - VueVille

    Amcrest vs. Lorex – the Stories behind the Brands

    Amcrest

    Foscam US re-branded themselves as Amcrest Technologies in early 2016. Foscam US (Foscam Digital Technologies) used to be an independent distributor for the Chinese manufacturer/supplie Foscam Shenzhen. However in 2016, the Chinese supplier allegedly started undercutting Foscam US. Foscam US says they had no choice but to cut all ties with Foscam Shenzhen and go it alone as Amcrest Technologies.

    Foscam security cameras never had a great reputation and once Amcrest launched their own products, they have quickly overtaken Foscam both in quality, reliability, support service levels, and reputation. They are still around though.

    Amcrest mostly re-brands Dahua cameras.

    Lorex

    Lorex was founded in 1993 and has head offices in Markham, Ontario, Canada and in Linthicum, Maryland, USA. They have product warehouses in Markham, Indiana and California.

    But first let’s start with the company FLIR, better known as the high-end camera manufacturer who revolutionized thermal imaging for the military and industrial markets. They acquired Lorex in 2012 for around $60 million seeking to lower the cost of thermal imaging and open it up to the retail market.

    So for the next 6 years they tried to penetrate the DIY and SMB markets. During this period, their main OEM supplier was Dahua. In February 2018, however, FLIR exited the DIY security camera space by selling Lorex to Dahua. They currently operate as a subsidiary of Dahua. So think of Lorex as a Dahua brand.

    8MP 4K IP Camera Duel – Amcrest (IP8M-2496EB) and Lorex LNB8111BW

    So Amcrest rebrands Dahua and Lorex is Dahua. So this is looking more like Dahua vs. Dahua isn’t it? Well Amcrest and Lorex used to target different DIY consumers, but that gap is narrowing as we shall see.

    I have opted to compare the most popular 8MP models from Amcrest (IP8M-2496EB) and Lorex (LNB8111BW). These are 4K cameras.

    The Biggest Difference between Amcrest and Lorex IP Cameras

    If you thought the answer is ONVIF support, you would have been right…. last year.

    But all Lorex cameras now support ONVIF, so you can use them with any ONVIF-compatible NVR. So you can add them to a non-Lorex NVR or to a DIY NAS NVR system.

    Amcrest has always supported ONVIF.

    So what is the biggest difference between Amcrest and Lorex? Amcrest IP cameras are capable of standalone independent operation without an NVR, wheras Lorex IP cameras cannot.

    Amcrest has always made cameras that are capable of standalone operation. This means you do not need an NVR to make the camera work. That’s right they have the built-in NVR functionality just like Hikvision, Dahua and Reolink do. They can also detect motion, record video clips to a microSD card, send email and push notifications, even upload to an FTP server.

    Lorex cameras cannot do any of this. Without an NVR or another device (like a NAS) to store the video, there’s no point in buying one. Now if you are going to use an NVR anyway, this is not an issue for you. Also since they have ONVIF support, they should theoretically work with any ONVIF-compliant NVR. Not just Lorex ones.

    Hardware features

    Both the Amcrest and Lorex cameras have a nice large 1/2.5″ progressive scan CMOS sensor. This is even better than Reolink’s which has a slightly smaller 1/2.7″ sensor. The Lorex uses a Sony Exmor R CMOS sensor whereas the Amcrest uses a Sony Starvis CMOS sensor.

    The size of the sensor has a huge bearing on the low light ability of a camera. The larger the sensor, the greater its ability to gather light and so do well in low light conditions. But as you cram in more and more pixels into the same size sensor, they get smaller and smaller, which adds noise. Noise is the bane of low light video and reduces the detail that you can get out of your video. So while security camera manufacturers have pushed pixel count from 2MP to 5MP and beyond, most have not really increased the sensor size.

    The Amcrest has a substantially wider viewing angle of 112° vs. the Lorex’s 88° angle of view.

    On to low light performance. While most IP cameras are good in daylight, night-time performance is what separates the men from the boys. The Lorex sports colour night vision – this is a very interesting feature and does set the Lorex brand apart. However be aware that the camera will switch back to black & white IR night vision below 1 lux to ‘ensure optimal low-light image quality’ as Lorex puts it.

    The Amcrest camera has only standard black and white infrared night vision. But the minimum illumination required is impressive, 0.06Lux without IR and 0Lux with IR on. The IR range is also 40 feet more than that of the Lorex.

    Neither camera has special features such as PIR motion sensors, audio, or alarm connections. But the Amcrest does have a microSD card slot and the built-in NVR feature.

    Software features

    When it comes to video encoding, both cameras support the highly desirable H.265 option for lowering bandwidth usage and generating smaller video file sizes.

    Next up is WDR or Wide Dynamic Range. This is a feature that enhances the level of detail an IP camera can pick out in shadows. Amcrest supports 120dB WDR. Lorex doesn’t have WDR, but instead claims High Dynamic Range (HDR) support. While I doubt they are comparable, it is better than nothing.

    The three software features that make a great IP camera are ONVIF/RTSP support, built-in NVR feature, and the advanced motion detection features that help reduce false alerts.

    Here, the main differences between the Amcrest and the Lorex are that:

    • Amcrest has the built-in NVR feature, as it is capable of standalone operation, but Lorex doesn’t.
    • Both Amcrest and Lorex have only basic motion detection but the Lorex can work only when it’s connected to an NVR.

    Motion Detection ability

    Neither camera has advanced motion detection methods which go a long way in reducing reducing false motion alerts.

    Warranty

    Lorex has a 2 year warranty as standard, but can be extended to 3 years or 5 years for an extra fee.

    Amcrest has only a 1 year warranty as standard, but promises lifetime support.

    Here’s a summary of all the differences in a nice and easy table:

    [table id=59 responsive=”scroll” /]

    Verdict

    Lorex cameras are basically Dahuas that are locked down. You can still add them to any NVR that supports ONVIF. It has all the basic hardware features that you would expect and has colour night vision and HDR also. But they still are not as capable as Amcrest cameras. Lorex cameras are not an option if you want a standalone IP camera that can operate without an NVR.

    So I would recommend Amcrest instead. Now if the Amcrest doesn’t meet your specific requirements, just opt for a Dahua IP camera. Simples.

    For IP cameras that are capable of standalone operation and designed for DIY security camera fans, check out the other recommendations on our best outdoor IP cameras list and best indoor IP cameras list.

    Where to buy

    • Amcrest IP8M-2496EB at [easyazon_link identifier=”B07C7W91YR” locale=”US” tag=”vueville.com-eaz-20″]Amazon[/easyazon_link]
    • Lorex LNB8111BW at [easyazon_link identifier=”B077PC2R3C” locale=”US” tag=”vueville.com-eaz-20″]Amazon[/easyazon_link]

    (* = affiliate link / image source: Amazon Associates Program)

  • Best Wireless Hidden Camera – 2020 Recommendations

    Best Wireless Hidden Camera – 2020 Recommendations

    Most hidden cameras have to be placed in your chosen hiding place, and then retrieved after the incriminating recordings have been made. But what if you can live-view the hidden camera remotely, from anywhere on Earth?

    Best Wireless Hidden Camera - VueVille

    Enter wireless hidden cameras, which connect to your home Wi-Fi. So all you need to do is use a smartphone app to connect to your hidden camera wirelessly and live-view or download recorded photos and clips. Without having to access the hidden camera physically. Now that’s the next level of hidden cameras!

    We have rounded up the best wireless hidden cameras you can get today. They come in a variety of shapes and capabilities, so we have put together a quick buying guide below too.

    The Best Wireless Hidden Camera Recommendations

    [wpsm_toplist]
    [text-blocks id=”earning-disclaimer”]

    What to look for in a Wireless Hidden Camera

    • Live stream to mobile – The main advantage of a wireless hidden camera over a standalone hidden camera is its ability to stream video in real time to a smartphone app.
    • 1080p resolution – Full HD resolution is now pretty much the standard for wireless hidden cameras. 720p is not enough to give you a detailed enough video.
    • Pre-record feature – When motion is detected, the camera should be able to record for a certain duration to an SD card. The best camera will have a pre-record feature so that you can see what happened a few seconds before motion was detected also
    • Audio recording and recording trigger – Not all wireless hidden cameras record audio. Even rarer is the ability to detect sounds and start recording to the SD card.
    • Battery backup – Battery power either as the main power source or as a backup is an essential feature of a hidden wireless camera. The higher the energy capacity (mAh) rating, the longer the battery will last before it needs a recharge.
    • Charge battery and record at the same time – If you intend to hook up the hidden camera to AC power, as in the case of a deck clock it should charge the battery while it is recording.
    • Infrared LEDs – Some IR LEDs have a wavelength that can be detected by human eyes. Some manufacturers use higher wavelength LEDs that do not visibly glow but those tend to have poor illumination. 850 nm is the most common – this is at the edge of what we can detect but also gives good illumination. So while the ‘no glow’ feature may sound like its undetectable, in perfect darkness you can actually make it out if you look for it.

    Wireless Hidden Camera Alarm Clock with Wi-Fi

    [easyazon_image align=”center” height=”500″ identifier=”B07K6GYR2N” locale=”US” src=”https://images-na.ssl-images-amazon.com/images/I/41Vr6PGpscL.jpg” tag=”vueville.com-eaz-20″ width=”500″]

    [wpsm_divider top=”20px” bottom=”20px” style=”clear”]

    Alarm clocks are the perfect hidden camera device. Its perfectly normal to have one on your bedside. This hidden camera disguised as an alarm clock is capable of real-time streaming without physical access to the device. The Wi-Fi feature and the mobile app are what makes this feature possible.

    The image sensor is 1080p and will give you clear and sharp video. Motion detection is performed by the built-in software, there is no PIR/heat sensor. Audio is recorded by the built-in microphone.

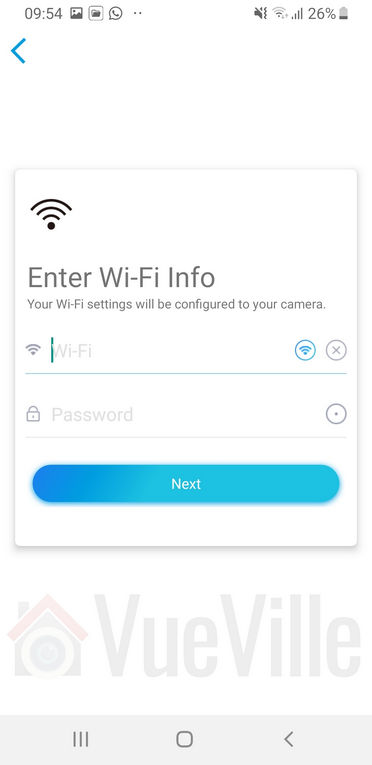
    While setting up the device, make sure you connect to a 2.4GHz Wi-Fi network. This spy camera does not support the newer 5GHz frequency band that you increasingly see in homes and businesses.

    Hidden cameras need a wide angle lens and this camera is no exception. It has a viewing angle of 90° giving decent scene coverage.

    Night vision is available with the “no glow “InfraRed LEDs that cannot be easily detected by the naked eye. Pop in an SD card of up to 64GB, turn on loop recording and the camera will record non-stop for up to 4 hours. Or you can set it for motion detection recording to maximise battery life. When the 2000mAh battery runs out, recharge it and you are back in business.

    The camera can record while the battery is being charged. In other words, you don’t have to worry about the battery running out. If the power does fail or if someone accidentally unplugs it, the battery will keep the clock and the camera running.

    Set up the camera with the mobile app and you can get push notifications to your phone whenever motion is detected. Viewing the recorded clips and deleting them is achieved through the app too.

    In case you are wondering, yes its a full-fledged alarm clock. One feature that would have been great is a PIR sensor for true and accurate motion detection. Another down-side is that only the 2.4 GHz Wi-Fi band is supported. There is no audio-triggered recording either.

    [wpsm_divider top=”20px” bottom=”20px” style=”clear”][wpsm_column size=”one-half”]Features:

    • 2MP 1080p CMOS image sensor
    • 90° Viewing Angle
    • Night vision
    • Microphone
    • WiFi (802.11 b/g/n, 2.4GHz)
    • Live-view on mobile app
    • Motion detection or continuous loop recording
    • 2000 mAh rechargeable battery
    • Can record and charge simultaneously
    • 4 hours recording time
    • SD card up to 64GB

    [/wpsm_column][wpsm_column size=”one-half” position=”last”]Verdict:

    • Local storage available: Yes
    • Cloud reliant: No
    • Battery backup: Yes
    • Smart home compatibility: No

    [/wpsm_column]

    [easyazon_link identifier=”B07K6GYR2N” locale=”US” tag=”vueville.com-eaz-20″]Check Price on Amazon[/easyazon_link]

    Wireless Hidden Camera Alarm Clock Speaker with Wi-Fi

    [easyazon_image align=”center” height=”500″ identifier=”B07LF877QB” locale=”US” src=”https://images-na.ssl-images-amazon.com/images/I/51LmUGsd4fL.jpg” tag=”vueville.com-eaz-20″ width=”500″]

    [wpsm_divider top=”20px” bottom=”20px” style=”clear”]

    Here’s another alarm clock which is also a hidden camera. This handsome cube is also a wirelesss Bluetooth 4.2 speaker with FM radio. The 5W speaker can do duty as your Bluetooth speaker but don’t expect super heavy bass from it.

    The controls for the speaker and the clock are the touch-sensitive type and placed at the top.

    The camera lens is well hidden and you won’t find it unless you know where to look. Some surprising features are support for 128GB SD cards which is really good. Wi-Fi is not required for the camera to record to the SD card.

    When its dark, the spy camera will automatically switch to night vision using the “no glow” IR LEDs.

    Of course it has all the standard features such as motion triggered recording, loop recording, and mobile app connectivity for real time streaming. The mobile app gets special mention as it is very easy to use, is very reliable and a treat to use.

    Make sure you connect the camera to a 2.4GHz Wi-Fi network, just like any other wireless hidden camera it doesn’t support the 5GHz band.

    A unique addition to the camera is a USB port so that you can charge your mobile devices right at your bedside.

    Now the biggest downside of this camera – the camera is mains powered and does not have a battery. However, there is a small backup battery inside so that the clock keeps time if power fails.

    [wpsm_divider top=”20px” bottom=”20px” style=”clear”][wpsm_column size=”one-half”]Features:

    • 2MP 1080p CMOS image sensor
    • Night vision with 30 feet range
    • WiFi (802.11 b/g/n, 2.4GHz)
    • Schedule, Motion detection or continuous loop recording
    • SD card up to 128 GB
    • Live-view on mobile app
    • Bluetooth speaker
    • USB port for charging mobiles
    • 3 dimmer levels for LCD Display

    [/wpsm_column][wpsm_column size=”one-half” position=”last”]Verdict:

    • Local storage available: Yes
    • Cloud reliant: No
    • Battery backup: No
    • Smart home compatibility: No

    [/wpsm_column]

    [easyazon_link identifier=”B07LF877QB” locale=”US” tag=”vueville.com-eaz-20″]Check Price on Amazon[/easyazon_link]

    Wireless Hidden Camera Clothes Hook with Wi-Fi

    [easyazon_image align=”center” height=”500″ identifier=”B07CHDM3GB” locale=”US” src=”https://images-na.ssl-images-amazon.com/images/I/51sbxRgaiDL.jpg” tag=”vueville.com-eaz-20″ width=”500″]

    [wpsm_divider top=”20px” bottom=”20px” style=”clear”]

    Want something a bit more discreet? Here’s something that nobody will ever suspect of being a hidden camera. This clothes hook hidden camera even sports 1080p,night vision and can take a microSD card of up to 128GB capacity.

    The camera supports only 2.4GHz 802.11 b/g/n, so do remember to choose the right network when you first set it up.

    [wpsm_divider top=”20px” bottom=”20px” style=”clear”][wpsm_column size=”one-half”]Features:

    • Product Dimension: 4.9*2.7*0.3 inch
    • Full HD 1920×1080/JPEG
    • Video Resolution: 1080P, 720P, 640P, 480P (adjustable)
    • Video Format: ASF
    • Frame Rate: 25 fps
    • Wifi: 2.4GHz 802.11 b/g/n
    • Available capacity: Micro SD up to 128GB
    • USB Output: 5V/500mA
    • Working voltage: AC 100V-240V

    [/wpsm_column][wpsm_column size=”one-half” position=”last”]Verdict:

    • Local storage available: Yes
    • Cloud reliant: No
    • Battery backup: Yes
    • Smart home compatibility: No

    [/wpsm_column]

    [easyazon_link identifier=”B07CHDM3GB” locale=”US” tag=”vueville.com-eaz-20″]Check Price on Amazon[/easyazon_link]

    Wireless Hidden Camera Wall Clock with Wi-Fi

    [easyazon_image align=”center” height=”500″ identifier=”B07PHYG96B” locale=”US” src=”https://images-na.ssl-images-amazon.com/images/I/41ljSEcC0NL.jpg” tag=”vueville.com-eaz-20″ width=”500″]

    [wpsm_divider top=”20px” bottom=”20px” style=”clear”]

    A wall clock is an excellent object to place a hidden camera in. Better still, here’s a wall clock that comes with a hidden camera already installed in it.

    What’s more you can position it to get an excellent view of the whole room without any issues, hey after all what better place to be a hidden camera than the fly on the wall approach. The 1080p sensor gives clear visuals and you can also adjust the resolution downwards to double the storage recording time.

    The clock of course functions like a regular clock and nobody will suspect it has a lens hidden in the dial face. It can do either loop recording, automatically overwriting old footage or do motion detection recording.

    The rechargeable battery has 220mAh capacity and can shoot video for 3-5 hours continuously. Motion detection range is 6 metres.

    [wpsm_divider top=”20px” bottom=”20px” style=”clear”][wpsm_column size=”one-half”]Features:

    • 2MP 1080p CMOS image sensor
    • 90° Viewing Angle
    • WiFi (802.11 b/g/n, 2.4GHz)
    • Live-view on mobile app
    • Motion detection or continuous loop recording
    • 2200 mAh rechargeable battery
    • Up to 5 hours recording time
    • SD card up to 128GB

    [/wpsm_column][wpsm_column size=”one-half” position=”last”]Verdict:

    • Local storage available: Yes
    • Cloud reliant: No
    • Battery backup: Yes
    • Smart home compatibility: No

    [/wpsm_column]

    [easyazon_link identifier=”B07PHYG96B” locale=”US” tag=”vueville.com-eaz-20″]Check Price on Amazon[/easyazon_link]

    Wireless Hidden Camera Smoke Detector with Wi-Fi (AC Powered)

    [easyazon_image align=”center” height=”500″ identifier=”B07Q5F58QS” locale=”US” src=”https://images-na.ssl-images-amazon.com/images/I/418Ljgc8fzL.jpg” tag=”vueville.com-eaz-20″ width=”500″]

    [wpsm_divider top=”20px” bottom=”20px” style=”clear”]

    A smoke detector has the advantage of a unique vantage point. It’s also something that nobody is going to suspect contains a security camera! Plus you have the advantage of wiring it to AC power.

    This smoke detector hidden camera has Wi-Fi support and a smartphone app. Using the app you can live-view in real time, receive push notifications of motion alerts, and access recorded clips.

    You can add up to a 64GB SD card for storage of recorded clips. If the power fails, the built-in battery can power the camera for up to 3 hours.

    [wpsm_divider top=”20px” bottom=”20px” style=”clear”][wpsm_column size=”one-half”]Features:

    • 2MP 1080p CMOS image sensor
    • WiFi (802.11 b/g/n, 2.4GHz)
    • Live-view on mobile app
    • Motion detection or continuous loop recording
    • AC power, Built-in rechargeable battery
    • Up to 3 hours recording time
    • SD card up to 64GB

    [/wpsm_column][wpsm_column size=”one-half” position=”last”]Verdict:

    • Local storage available: Yes
    • Cloud reliant: No
    • Battery backup: Yes
    • Smart home compatibility: No

    [/wpsm_column]

    [easyazon_link identifier=”B07Q5F58QS” locale=”US” tag=”vueville.com-eaz-20″]Check Price on Amazon[/easyazon_link]

    Wireless Hidden Camera Keychain with Wi-Fi

    [easyazon_image align=”center” height=”500″ identifier=”B07GRQNCVN” locale=”US” src=”https://images-na.ssl-images-amazon.com/images/I/51KsIM7GX3L.jpg” tag=”vueville.com-eaz-20″ width=”500″]

    [wpsm_divider top=”20px” bottom=”20px” style=”clear”]

    Want something a bit more portable? Something a bit more discreet? This humble keychain is a powerhouse of a hidden camera. With 1080p resolution, a 128GB SD card capacity and live-stream to mobile apps, these guys have thought of everything.

    The camera can also live-stream or record to the SD card when it is plugged in for charging. So you won’t miss a minute of the action.

    [wpsm_divider top=”20px” bottom=”20px” style=”clear”][wpsm_column size=”one-half”]Features:

    • 2MP 1080p 1/3″ progressive CMOS sensor
    • Sensor sensitivity 3.3 Lux @ F 2.0
    • WiFi (802.11 b/g/n, 2.4GHz)
    • Angle of View 66°
    • Live-view on mobile app
    • Motion detection or schedule recording
    • AC power, Built-in rechargeable battery
    • Continuous Record Time 70 Wi-Fi On,90 minutes Wi-Fi Off
    • microSD card up to 128GB
    • Vibration Alert Power on/off and Recording
    • File Format MP4 and JPEG
    • Power Input DC 5V
    • 3.7V/550 mA battery

    [/wpsm_column][wpsm_column size=”one-half” position=”last”]Verdict:

    • Local storage available: Yes
    • Cloud reliant: No
    • Battery backup: Yes
    • Smart home compatibility: No

    [/wpsm_column]

    [easyazon_link identifier=”B07GRQNCVN” locale=”US” tag=”vueville.com-eaz-20″]Check Price on Amazon[/easyazon_link]

    Wireless Hidden Camera Wall Charger with Wi-Fi

    [easyazon_image align=”center” height=”500″ identifier=”B07L4XM1X4″ locale=”US” src=”https://images-na.ssl-images-amazon.com/images/I/41KsRd9gWmL.jpg” tag=”vueville.com-eaz-20″ width=”500″]

    [wpsm_divider top=”20px” bottom=”20px” style=”clear”]

    A very innocuous looking wall charger could be hiding a lot more you may think. This hidden wireless camera packs quite a punch with 1080p Full HD resolution, real-time viewing through a mobile app, motion detection alerts, and video loop recording.

    Oh, it will also charge your smartphone just like a regular wall charger.

    [wpsm_divider top=”20px” bottom=”20px” style=”clear”][wpsm_column size=”one-half”]Features:

    • 2MP 1080p CMOS image sensor
    • WiFi (802.11 b/g/n, 2.4GHz)
    • Live-view on mobile app
    • Motion detection or continuous loop recording
    • AC power, Built-in rechargeable battery
    • SD card up to 64GB

    [/wpsm_column][wpsm_column size=”one-half” position=”last”]Verdict:

    • Local storage available: Yes
    • Cloud reliant: No
    • Battery backup: No
    • Smart home compatibility: No

    [/wpsm_column]

    [easyazon_link identifier=”B07L4XM1X4″ locale=”US” tag=”vueville.com-eaz-20″]Check Price on Amazon[/easyazon_link]

    Wireless Hidden Camera Photo Frame with Wi-Fi

    [easyazon_image align=”center” height=”500″ identifier=”B07JG3FNPN” locale=”US” src=”https://images-na.ssl-images-amazon.com/images/I/51tfCb4qOLL.jpg” tag=”vueville.com-eaz-20″ width=”500″]
    [wpsm_divider top=”20px” bottom=”20px” style=”clear”]

    A photo frame has the advantage of being unobtrusively placed in virtually any room. Its also the perfect angle to capture the entire scene and you can also orient the frame without drawing suspicion.

    This photo frame has a hidden wireless camera on the top bezel of the frame. Note that it is designed to hang on a wall or angled on a desk with a 15° downward tilt angle for the lens.

    You can connect to the camera over Wi-Fi from a smartphone and live-view the camera video stream. You can also browse motion-tiggered recorded clips and download them.

    The 720p sensor has a lens has a viewing angle of 65° giving acceptable scene coverage. Infrared night vision of the “no glow” variety is provided, it has 20 feet range to your phone gallery.

    A standout feature on this spy camera is the PIR motion sensor which detects heat for motion detection. This is more accurate than software based motion detection and will reduce the number o false alerts you receive.

    When motion is detected, the camera will send an alert to your smartphone and record a short 10-60 seconds clip of the event to the microSD Card.

    Another stunner is the massive 10,000 mAh battery that can last for up to a year with motion detection recording.

    [wpsm_divider top=”20px” bottom=”20px” style=”clear”][wpsm_column size=”one-half”]Features:

    • 1MP 720p CMOS image sensor
    • Viewing angle of 65°
    • WiFi (802.11 b/g/n, 2.4GHz)
    • Live-view on mobile app
    • PIR heat detection sensor
    • Motion detection or continuous loop recording
    • Built-in 10,000mAh rechargeable battery
    • Up to 30 hours daytime / 10 hours night time continuous recording
    • microSD card up to 128GB

    [/wpsm_column][wpsm_column size=”one-half” position=”last”]Verdict:

    • Local storage available: Yes
    • Cloud reliant: No
    • Battery backup: Yes
    • Smart home compatibility: No

    [/wpsm_column]

    [easyazon_link identifier=”B07JG3FNPN” locale=”US” tag=”vueville.com-eaz-20″]Check Price on Amazon[/easyazon_link]

    Wireless Hidden Camera Camera Bank with Wi-Fi

    [easyazon_image align=”center” height=”500″ identifier=”B07PFFTQTT” locale=”US” src=”https://images-na.ssl-images-amazon.com/images/I/41YpRcJyKGL.jpg” tag=”vueville.com-eaz-20″ width=”500″]
    [wpsm_divider top=”20px” bottom=”20px” style=”clear”]

    Stuffing a wireless spy camera inside a power bank is ingenious. Huge amount of power available? Check. Can be left lying around randomly? Check. Enough power to run night vision? Check. Very long operation time? Yes!

    That’s why this spy camera can record 1080p video for over 7 hours. It can also stream this video in real-time to your smartphone.

    A very unique feature is the view and control option from a computer.

    It’s also a fully functioning power bank and can charge up to 4 devices at the same time over the two full-size and two mini-USB ports

    [wpsm_divider top=”20px” bottom=”20px” style=”clear”][wpsm_column size=”one-half”]Features:

    • 2MP 1080p CMOS image sensor
    • Viewing angle of 120°
    • Fully functioning power back with 4 USB charging ports
    • WiFi (802.11 b/g/n, 2.4GHz)
    • Night-vision, 15 feet range
    • Live-view on mobile app
    • View and control option from a computer
    • Motion detection or continuous loop recording
    • 5,000mAh rechargeable battery
    • Can record while charging
    • SD card up to 64GB

    [/wpsm_column][wpsm_column size=”one-half” position=”last”]Verdict:

    • Local storage available: Yes
    • Cloud reliant: No
    • Battery backup: Yes
    • Smart home compatibility: No
    • Smartphone app: HDMiniCam or P2PLiveCam

    [/wpsm_column]

    [easyazon_link identifier=”B07PFFTQTT” locale=”US” tag=”vueville.com-eaz-20″]Check Price on Amazon[/easyazon_link]

    Wireless Hidden Camera LED Light Bulb with Wi-Fi

    [easyazon_image align=”center” height=”500″ identifier=”B07DZYTK58″ locale=”US” src=”https://m.media-amazon.com/images/I/418BuTojEqL.jpg” tag=”vueville.com-eaz-20″ width=”500″]

    [wpsm_divider top=”20px” bottom=”20px” style=”clear”]

    Another brilliant application of a hidden wireless camera is the humble light bulb. Of course it has to be LED, and this particular camera does a great job at that also. This is the highest resolution camera we have seen yet and is justified by the panoramic 360° viewing angle.

    There’s a lot of features you would expect at this price range and its all there – night vision, 2-way audio, built-in mic and speaker, and microSD card support up to 128GB.

    There is no battery backup though.

    [wpsm_divider top=”20px” bottom=”20px” style=”clear”][wpsm_column size=”one-half”]Features:

    • 3MP 1536p CMOS image sensor
    • Panoramic viewing angle of 360°
    • WiFi (802.11 b/g/n, 2.4GHz)
    • Night vision IR LED with IR-cut filter
    • 34 White LEDs, 1W power consumption
    • Standard E27 bulb base
    • Push notifications and camera control through 360eye app
    • 2-way audio, built-in speaker
    • Dual-microphones with noise reduction
    • Live-view and light control on mobile app
    • Motion detection or continuous loop recording
    • AC power
    • SD card up to 128GB
    • 2-3 years service life
    • Operating Temperature: 0-60 ℃

    [/wpsm_column][wpsm_column size=”one-half” position=”last”]Verdict:

    • Local storage available: Yes
    • Cloud reliant: No
    • Battery backup: No
    • Smart home compatibility: No
    • Smartphone App: 360eye

    [/wpsm_column]

    [easyazon_link identifier=”B07DZYTK58″ locale=”US” tag=”vueville.com-eaz-20″]Check Price on Amazon[/easyazon_link]

    Wireless Hidden Camera Desktop Speakers with Wi-Fi

    [easyazon_image align=”center” height=”500″ identifier=”B0058IC0N4″ locale=”US” src=”https://images-na.ssl-images-amazon.com/images/I/51UB55Nz78L.jpg” tag=”vueville.com-eaz-20″ width=”500″]

    [wpsm_divider top=”20px” bottom=”20px” style=”clear”]

    This is the only good hidden wireless spy camera we found that supports the ONVIF protocol. So you can connect this camera to your existing ONVIF-compliant NVR or to a PC using software like Blur Iris.

    There is 16GB internal memory but no SD card slot. The speakers are functional and you can connect to it using Bluetooth.

    The LED lamp can be switched off in the smartphone app if you don’t like it.

    [wpsm_divider top=”20px” bottom=”20px” style=”clear”][wpsm_column size=”one-half”]Features:

    • 2MP 1080p 1/2.8″ CMOS image sensor
    • Viewing angle of 80°
    • Functional Bluetooth speaker
    • WiFi (802.11 b/g/n, 2.4GHz)
    • 0.01Lux low light sensitivity
    • Sensor is 940nm InfraRed sensitive
    • ONVIF compliant
    • 16GB internal memory
    • Works with iSpyConnect, AnyCam, Blue Iris
    • Works with Synology/QNAP Surveillance Station
    • Live-view on mobile app
    • Motion detection or continuous loop recording
    • AC power

    [/wpsm_column][wpsm_column size=”one-half” position=”last”]Verdict:

    • Local storage available: Yes
    • Cloud reliant: No
    • Battery backup: Yes
    • Smart home compatibility: No

    [/wpsm_column]

    [easyazon_link identifier=”B0058IC0N4″ locale=”US” tag=”vueville.com-eaz-20″]Check Price on Amazon[/easyazon_link]

    Conclusion

    Hidden cameras with the Wi-Fi feature let you view what the camera sees in real-time, without physically accessing the device. This is a game-changer when it comes to hidden cameras.

    How have you used a wireless hidden camera to keep your family or home safe? Tell us in the comments below!