Review: Reolink C1 Pro 4MP Wireless Indoor Pan-Tilt IP Camera
February 8, 2025
Reolink recently launched their latest indoor pan-tilt wireless camera, the 4 Megapixel [easyazon_link identifier=”B01LS71HNM” locale=”US” tag=”vueville.com-eaz-20″]Reolink C1 Pro[/easyazon_link]. I got the chance to do a thorough hands-on review and I found it to be a great multi-purpose DIY security camera. With its easy setup, built-in NVR features, full duplex 2-way audio, and dual-band WiFi, its a solid choice for your DIY home security system, especially if you don’t want to be reliant on any cloud service.
I currently use the Amcrest ProHD 1080p as my son’s baby monitor. Since the Reolink C1 Pro is likely to be pitched as an upgrade to a ‘mere’ 2MP camera and I have been using the Amcrest for over a year, I will be drawing comparisons between these two throughout this review.
A quick note: As an Amazon Associate I earn from qualifying purchases. This post contains affiliate link(s). An affiliate link means I may earn advertising or referral fees if you make a purchase through my link, at no extra cost to you.
The Reolink C1 Pro comes in a nicely packed box with a sufficient level of padding inside to protect the camera. The model name of the camera, and its main specs are clearly listed on a sticker on the outside of the box along with the default login details.
What’s in the box
Reolink C1 Pro Mini PT Camera
DC 5V wall adaptor
Mini USB cable
Ethernet cable (1 metre long)
Wall mounting bracket
Quick Start guide
What’s next booklet
Drilling templates
CD-ROM with software and manuals
Reolink surveillance notification sticker
Screws and rawl plugs
Design & Features
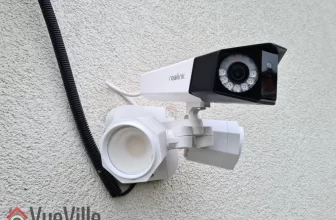
The C1 Pro is available in only one colour – black. The camera can be divided into three parts – the base, the body and the lens mounting which contains the lens itself. A chrome trim runs around the base, lending it a high-end look and feel.
The base has the indicator LEDs on the front (see above) and the connectivity ports on the back. You will find the 10/100 Mbps ethernet port, a microSD card slot and a micro-USB port which serves as the power input. Yes the camera runs on 5V DC which means that you can easily plug it into a USB port to power it. How much amperage would you need? Power = Voltage x Current. Since the camera is rated for a maximum of 6W power usage and runs at 5V, the current requirement is 1.2A. If your USB port is rated for charging devices, its 1.5A rating is more than sufficient to power the camera.
The dual Wi-Fi antennae are also fixed to the back of the base. Now this is a great feature to have as most of the C1 Pro’s competitors are still sporting just 2.4 GHz Wi-Fi. The antennae are adjustable and so you can orient it to get the strongest Wi-Fi signal.
You will also find a handy reset pin hole on the side of the base.
The body is the part that rotates around the vertical axis, and has a 355 degree freedom of motion. The body also contains the dual speakers, one on each side as you can see below. The built-in microphone can be found on the front of the body just under the lens mount.
The lens mounting piece is free to rotate about the horizontal plane with 42 degrees of movement. The daylight sensor is integrated into the Ring-type Infrared LEDs concealed smartly around the lens. If you look carefully you can see the red tinge of the Infrared LEDs under the darkened glass surrounding the lens.
All in all, the camera feels solid in construction and the matte finish of the dark plastic makes it look more expensive than it really is.
Installation & Setup
The Reolink C1 Pro comes with a very good quick start guide which is a double-sided glossy booklet, just like the Reolink Argus I reviewed recently. The general introduction section illustrates and labels the different parts of the camera such as the daylight sensor, the built-in mic, the speaker, the indicator LEDs and the various connections.
There is also a helpful camera connection guide for those who are new to security cameras. Initial setup needs the C1 Pro to be connected to your router via an ethernet cable unlike the Argus which had a niftier setup method. Nope, there’s no voice guiding you through the setup process like the Argus either.
Since the C1 Pro doesn’t support PoE, you have to use the included power adaptor. The camera uses a standard USB power plug so you may be able to power it using alternative power sources too. The blue power LED will lit up when I turned on the power. There was no ‘startup dance’ or calibration as my Amcrest ProHD 1080p PT does when I power it up, although after the initial setup I noticed it does this whenever I power it on.
So you have two options for setting up the camera:
Setup using a phone or tablet – the smart device method as Reolink calls it, or
Setup using a laptop
I suspect most people would opt for the smart device setup, so that’s what I did.
Install the Reolink mobile app. I had it already installed since I use the Reolink Argus.
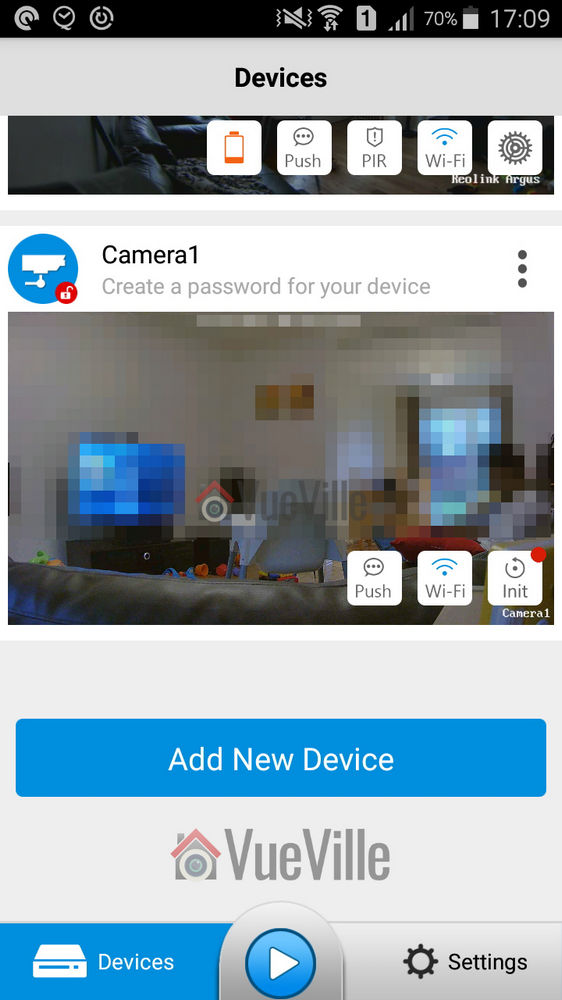
To my surprise, when I opened the app I found that it detected and added the Reolink C1 Pro automatically! There was a red indicator next to the ‘Init’ button for the C1 Pro. So I turned to the quick start booklet and sure enough it said the camera would be automatically detected.
Now its time to set up the Wi-Fi. I touched the Wi-Fi symbol for the C1, entered my Wi-Fi network details and then proceeded to perform the Wi-Fi test. The test was successful, so I backed out to the main devices page.
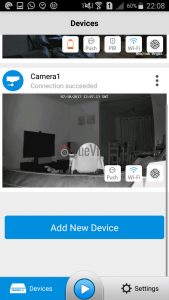
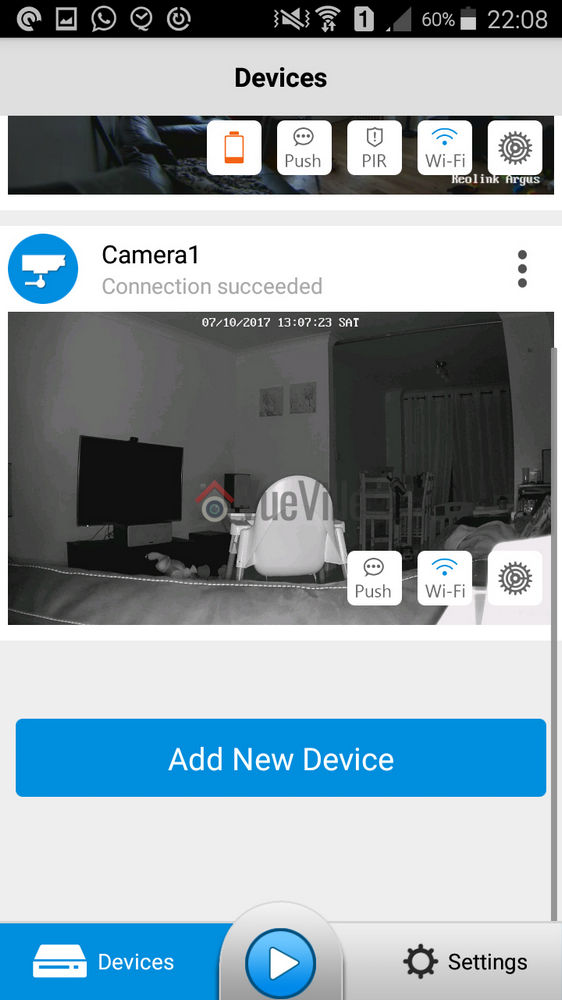
Next I clicked on the warning message saying ‘Create a password for your device’, and saved a password. The app then opened the camera’s dedicated page with all the control options including the PTZ button and Live View. Backing out to the main devices page showed that the warning message now changed to ‘Connection succeeded’.
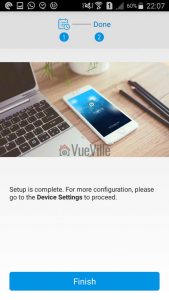
Interestingly the quick start guide didn’t say anything about the Init button which still had a red indicator next to it (as you can see above). So I touched it and completed the initial setup. I touched ‘Synchronize phone time’ and then hit Next to complete the setup. Good, now the setup was really complete and the Init button changed into a settings gear button.
Configuring the C1 Pro
As we saw earlier, the easiest way of setting up the camera is using the app. This is in part because you don’t need to know the camera’s IP address to access it, the app does that part for you. But don’t forget this is not a dumbed down security camera. It has its own web admin page where you can access the advanced settings. But to do this you need to know the IP address of the camera. Since the initial setup requires the camera to be connected physically to your router via the Ethernet cable and DHCP is enabled by default to help newbies, the camera is accessible via that interface’s IP address. You can scan the network using any number of apps to find out the ethernet interface’s IP address.
If you have set up the Wi-Fi as well, that interface will have a separate IP address. Just like the Amcrest ProHD IP camera, both interfaces are live at the same time and you can choose to access the camera through either one. This is a very nice feature.
The Web Admin page
When you first log in to the web admin page, it takes you straight to the Live View page, which Reolink calls the ‘Preview’ tab. Here you can control the PTZ function of the camera, switch between different resolution (clear/fluent/balanced), and access some of the OSD settings. You can also mute the camera audio if required. The web admin page uses Adobe Flash though, I would have preferred an HTML5 interface.
The playback tab is for accessing the built-in NVR feature of the C1 Pro. What is the built-in NVR feature? Basically, pop in a microSD card and the camera can record continuous or motion detection triggered video clips or snapshots to the SD card. You can login any time from anywhere to review the footage through a timeline view. This means that if you need only a single camera or two in your home , you don’t need to buy a separate NVR just to record video footage. The camera can also push notifications to the Reolink app on your mobile phone, send email alerts with attached snapshots or video clips and even upload them to an FTP server.
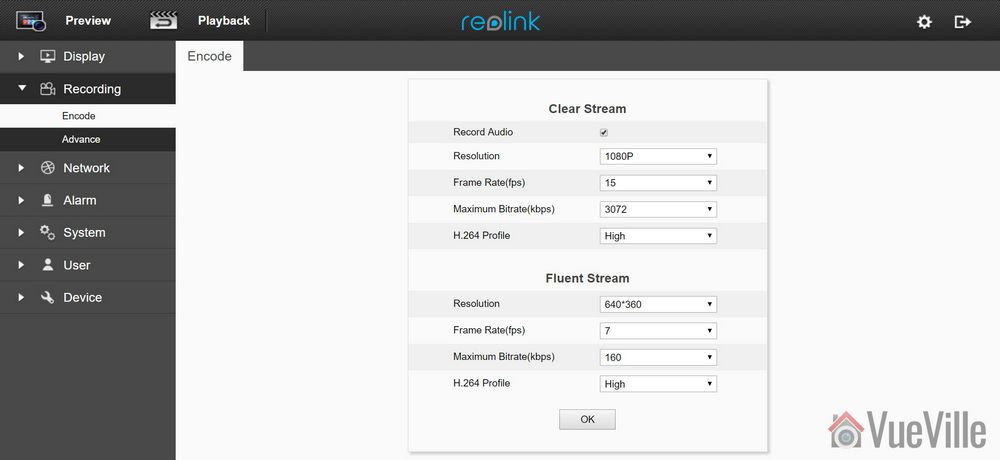
Moving on to the settings page, the various configuration options are neatly laid out in logical sections. You can set the video resolution and frame rates separately for the main stream (called clear stream) or the secondary stream (called the fluent stream). The secondary stream is used for the mobile app live view feature.
The network section lets you switch between static and dynamic IP allocation (DHCP), and also adjust many other settings such as the various ports used, set up a dynamic DNS ping, email notification setup, FTP settings, and push notifications. I was happy to see that uPNP is disabled by default – this is a great security feature. When ONVIF is available you really do not need uPNP.
Okay but how does the Reolink app manage to access the C1 Pro and receive push notifications even when you are outside your local network? Well its got to be that favourite protocol of every security camera manufacturer, P2P! Except, Reolink doesn’t call it that – you are looking for the UID setting. It is on by default which is fine for making the camera super easy to set up but for power users like me, I don’t need the C1 Pro to poke a hole through my network and connect to Reolink’s P2P servers. I have my super secure way of accessing my local network remotely through OpenVPN, so I immediately turned off the UID P2P feature.
Adding a microSD card for motion detection recording
I inserted a microSD card into the SD card slot. I had to push the card all the way into the slot before it click-locked. I then formatted the card through the web admin page. The camera then automatically rebooted and the microSD card was ready for use.
A word of warning here, by default the camera automatically will then start recording 24/7 to the SD card. I would have been happier to see the default set at ‘None’ or ‘Motion’ instead of ‘Normal’.
Mobile Push Notifications
Push notifications can be set up based on the time of the day. Remember that push notifications will not work outside your local network if you switch off P2P though.
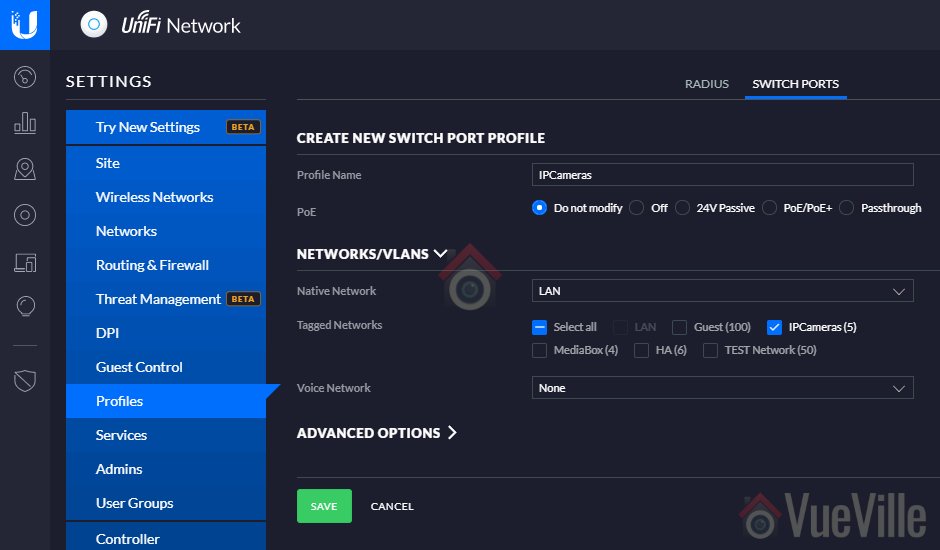
Adding the Reolink to QNAP Surveillance Station
The C1 Pro supports ONVIF, so I was easily able to add it to my QNAP TS-253A’s Surveillance Station app. I first created an additional user for the NAS using the web admin page of the C1 Pro.
Performance
Okay so the C1 Pro is a 4 Megapixel camera that can do 30 frames per second, so its no surprise I found things ticking along nicely throughout the review with no slowdowns, frame stutters or any performance issue really.
Let’s look at the default settings the Reolink C1 Pro comes with from the factory:
Main stream: 4MP @ 15fps and 3Mbps
Now I think the default bitrate of 3Mbps is too low but since these are the defaults, I ran my day and night tests at these settings.
In the System>Performance section of the web admin page, I could see that while idling the processor usage ranged between 10% and 15%. When motion was detected this went up to around 40%, so there was always sufficient headroom for the camera’s processor.
Video quality
Video captured was crisp and clear both during the day time and in total darkness, in line with my expectations for a 4 Megapixel IP camera.
Here are the motion detection triggered videos recorded at the default 4Megapixel resolution, at 30 fps and 3 Mbps bitrate:
Daytime Indoors video
Night-time Indoors video
There was no blurring of the video and there were no dropped frames.
Motion detection
The C1 Pro is able to both pre-record and post-record. This means the camera is able to record not just what happens after motion was triggered but a few seconds before the trigger as well. This is a great feature and something that I always look for in a security camera. The post-record feature lets you decide how many seconds the camera should record after the last motion trigger. The default is 15 seconds.
Night vision
The Infrared LEDs are reasonably powerful and can light up a decent sized room. There are no settings to control the brightness of the LEDs and there are no advanced features to dynamically control the infrared light output.
Audio quality
Just like most indoor security camera, the C1 Pro supports 2-way audio. Usually the implementation in most manufacturers’ native apps mutes the audio when you activate the microphone. In other words they have half-duplex audio, not full-duplex. Ideally to use the camera as an intercom, you need 2-way full duplex audio.
Interestingly Reolink has not claimed full duplex audio, however the Reolink app doesn’t mute the incoming audio when you press the microphone button. You can continue to hear what the person at the other end is saying when you are speaking. So the C1 Pro actually supports full duplex audio.
So how well does it work in practice? The audio quality is great and the dual speakers do a great job in reproducing audio. But there is a noticeable lag, however slight, in audio playback and this makes the full duplex capability less useful. We found ourselves using the Reolink C1 Pro more like a walkie-talkie just like the Amcrest ProHD.
PTZ performance
If you are planning to use the C1 Pro as a baby monitor with 2-way audio, you are going to love how quiet it is. One complaint I do have with the Amcrest ProHD camera is how noisy the PT motion is, truly its loud enough to wake up my baby if he is sleeping lightly.
The C1 Pro hardly makes a sound and so is better suited as a baby monitor. There are no speed control settings though whereas the Amcrest ProHD does. One other drawback I found is that the motion detection stays active even when you use the Pan-Tilt controls which means the camera records a motion detection clip each time you use the PTZ controls.
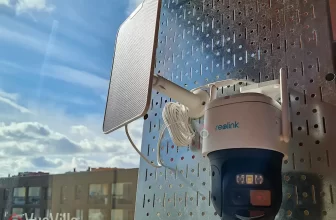
Wireless performance
So I tested the camera over both Ethernet and Wi-Fi. But you know Ethernet is easy for any camera in 2017. What really matters is how good the Wi-Fi connection and performance is. The C1 Pro boasts of 2T2R MIMO antennae for improved wireless performance. So I moved the camera to the farthest point in my house to see how the Wi-Fi did. Over both 2.4GHz and 5 GHz, the C1 Pro was stable and performed just as if it was connected over Ethernet.
Mobile app live view
I first installed the Reolink Android app on my phone when I reviewed the RLC-423 PTZ. I then added the Reolink Argus and now the Reolink C1 Pro. I have been quite impressed with the fluid intelligent design of the mobile app, its definitely something that Hikvision for example can learn from. Where the iVMS app is clunky and often doesn’t work, the Reolink app simply delivers.
Live view on the app can be by camera or you can simultaneously view multiple Reolink cameras. There is a handy PTZ joystick button and the camera is quite responsive when you move the joystick around. Over a remote connection, there was a 0.5 second delay between moving the PTZ controls and the video changing.
Mobile app push notifications
So what should you be looking for when it comes to push notifications? The speed and reliability of the push notifications reaching you. You want the camera to send you push notifications immediately after it detects motion. Especially if you have configured email alerts, SD card recording at 4 Megapixel recording and push notifications, inferior cameras may struggle but not the C1 Pro.
Inside my local network I got push notifications on my phone instantaneously and on remote networks there was a delay of just 1 second which is very impressive. The success rate of receiving the push notifications over multiple motion triggers was a solid 100%.
Reviewing recorded footage
So this is how you access the built-in NVR feature of the C1 Pro. Clips recorded on the microSD card can be accessed either via the web admin interface or the Reolink mobile app.
Using the web browser interface
You can choose a date to review and if motion triggered recording is enabled, all these clips will be shown on the timeline. You can roll the mouse wheel to zoom in and out of the timeline to select specific clips. Click anywhere on the timeline and it will jump to the next recorded clip and then keep playing one clip after the other sequentially.
There is a handy download button which lets you download multiple clips to your computer. Overall great implementation and a very useful feature.
Using the mobile app
The Android mobile app also can access the built-in NVR feature of the C1 Pro. It works just like the web interface – you can choose the date to review and either let it play one motion triggered clip after the other or pick a specific point on the timeline.
Verdict
There are lots of indoor security cameras available these days – hundreds and hundreds of obscure brands that all promise to meet your indoor security needs. But there are a few brands that stand out – Reolink & Amcrest.
The super quiet Pan-Tilt motion of the camera calls for special mention, its ideal for discreet use cases or where you don’t want to wake up a baby in light sleep!
The Amcrest ProHD is available with PoE whereas the Reolink doesn’t have PoE. It would be nice to have the option of choosing between PoE and Wi-Fi.
8.4Total Score
Review: Reolink C1 Pro Pan-Tilt IP Security Camera
Great indoor security camera with a very quiet pan-tilt motion and tons of features.
Performance
8
Features
7.5
Quality
9
Value for Money
9
PROS
Easy setup through mobile app
Very good image and audio quality
Very quiet and smooth Pan-Tilt motion
Full duplex 2-way audio
Built-in NVR feature
Dual band Wi-Fi
Support for ONVIF & RTSP
On-board microSD storage
Pre-record and post-record feature
Alarm sound feature
Great value
CONS
No Power over Ethernet
Slight lag in audio
Pan-Tilt speed cannot be adjusted
User Rating: 3.28 (39 votes)
Where to buy
[easyazon_link identifier=”B07CPNNT56″ locale=”US” tag=”vueville.com-eaz-20″]Check Price on your local Amazon site[/easyazon_link]
(* = affiliate link / image source: Amazon Associates Program)
I am Daniel and VueVille is where I document my DIY smart home journey. I focus on 100% local-processing and local-storage because that’s the only way to secure my family’s safety and privacy. Oh and I don’t like monthly subscriptions!
Great review!
I am looking to buy the C1 Pro camera and use it as a baby monitor. In that context I am interested if the camera supports an AP mode. I would like to connect to the camera directly when travelling with the baby without relying on the hotel WiFi network.
Thanks Vassil, I am using the C1 Pro as a baby monitor too and I’m pretty satisfied. Does your access point have an Ethernet port? If not, I don’t think the camera can connect to it as it requires a physical connection to the router/access point during setup.
I finally got them all to work. Turns out I missed a step. I scanned the bar code but then forgot to have the cam scan the phone. Nothing wrong with the camera. I ordered a few more yesterday 😁
Thanks for the review, very helpful.
I have a camera and impressed. One question you found the wi fi worked at the limit of your house but did not say how far.. I have set up in a church and find Wi-fi only working to about 20 feet I want 40 +
Thanks, I have the C1 Pro working over 30 feet away from my Wi-Fi router through 4 walls and they are on different floors. So you should definitely be getting more than 20 feet in an open area. Consider upgrading your Wi-Fi router to a more powerful model such as the Netgear Nighthawk.


Great review!
I am looking to buy the C1 Pro camera and use it as a baby monitor. In that context I am interested if the camera supports an AP mode. I would like to connect to the camera directly when travelling with the baby without relying on the hotel WiFi network.
Thanks!
Thanks Vassil, I am using the C1 Pro as a baby monitor too and I’m pretty satisfied. Does your access point have an Ethernet port? If not, I don’t think the camera can connect to it as it requires a physical connection to the router/access point during setup.
I finally got them all to work. Turns out I missed a step. I scanned the bar code but then forgot to have the cam scan the phone. Nothing wrong with the camera. I ordered a few more yesterday 😁
Mine will NOT work with wifi unless connected with the ethernet cable. Most annoying…
I haven’t had this problem, have you considered returning the camera for another unit?
Thanks for the review, very helpful.
I have a camera and impressed. One question you found the wi fi worked at the limit of your house but did not say how far.. I have set up in a church and find Wi-fi only working to about 20 feet I want 40 +
Should it be better?
Thanks
Thanks, I have the C1 Pro working over 30 feet away from my Wi-Fi router through 4 walls and they are on different floors. So you should definitely be getting more than 20 feet in an open area. Consider upgrading your Wi-Fi router to a more powerful model such as the Netgear Nighthawk.