Category: Home Security

  • Best 12 Megapixel Security Cameras

    Best 12 Megapixel Security Cameras

    Best 12 Megapixel Security Camera - VueVille

    4K cameras may be all the hype right now, but what if they just don’t cut it for your specific needs? Want to step up to the best 12 MP CCTV cameras on the market? We got you covered.

    We rounded up the best 12MP IP cameras on the market that offer both stellar daytime detail and outstanding night time performance with no compromise on features.

    Of course, the price band these premium IP cameras occupy is a step above the 4K cameras but that’s to be expected.

    The Best 12 Megapixel Security Cameras

    [wpsm_toplist]

    Hikvision DS-2CD4AC5F-IZH – Outdoor Bullet with Motorized Zoom, Audio and Heater

    Hikvision DS-2CD4AC5F-IZH-VueVille

    What list of high-end IP cameras would be complete without Hikvision on the list? Let’s start with the Hikvision DS-2CD4AC5F-IZH. Just like the Dahua, this IP camera also sports a 1/1.7″ CMOS sensor. The lens is a more standard 2.8 – 12 mm motorized varifocal with f/1.4. The lens also has the Smart Focus with auto-iris feature. The viewing angle ranges from 31.8° to 93.6°.

    H.264 H.264+ and H.265 encoding are supported. It can only do 15 fps at 12MP resolution, which is a slight letdown.

    Night vision range of 50 metres is provided by the onboard EXIR style IR LEDs.

    Compared to the Dahua above, the Hikvision also supports line crossing (tripwire), intrusion detection, and abandoned/missing object, face detection, people counting, and a heat map feature.

    Local storage of images and motion detection clips is supported with an SD card slot that takes up to 128 GB cards. For cameras with such high pixel counts, the SD card is more suited as a fail-over video recording destination in case of network outage.

    On the connectivity front, IEEE 802.3af PoE is present. The -S in the model name indicates the 1x audio in and outs, and 1x alarm in / 1x out ports.

    A standout feature is the built-in heater for starting the camera in low temperature operation. This is indicated by the -H in the model name.

    On the list of downsides, I would mention the lack of 120dB WDR, the 15 fps frame rate max for 12MP recording and lack of 2-way full-duplex audio.

    httpv://www.youtube.com/watch?v=2lO_u1aq8gE
    [wpsm_divider top=”20px” bottom=”20px” style=”clear”]

    [wpsm_divider top=”20px” bottom=”20px” style=”clear”][wpsm_column size=”one-half”]Features:

    • 12MP CMOS image sensor
    • Motorized varifocal lens, 2.8 – 12 mm
    • Automatic IR cut filter
    • PoE support, 12V DC, or 24V AC
    • -H: built in heater, -S: audio/alarm IO
    • 1x audio in/out ports
    • 1x alarm in/out ports
    • Up to 128GB microSD card for Edge recording
    • IP67 metal housing
    • Works from -30°C to 60°C (-22°F to 140°F)
    • Dimensions – 348.38 × 114.18 ×111.73 mm (13.72″ × 4.5″ × 4.4″)

    [/wpsm_column][wpsm_column size=”one-half” position=”last”]Verdict:

    • Local storage available: Yes
    • Advanced motion detection: Yes, both video and audio
    • Cloud reliant: No
    • Battery backup: No
    • Smart home compatibility: ONVIF Profile S & G, API

    [/wpsm_column]

    [easyazon_link identifier=”B07NWLPZQ6″ locale=”US” tag=”vueville.com-eaz-20″]Check price at Amazon[/easyazon_link]

    Check price at B&H Photo

    Dahua NK8BB7Z – Outdoor Bullet with Motorized Zoom, Audio & Heater

    Dahua NK8BB7Z - Best 12MP IP Camera - VueVille

    Dahua is a great security camera brand so let’s see if they have an answer to the Hikvision above. The IP camera that I have picked is the Dahua NK8BB7Z. This IP camera also uses a very large and highly sensitive 1/1.7″ Sony Starvis sensor with 12MP resolution. It also has a motorized zoom range of 4.1 mm to 16.4 mm. An auto iris feature based on the Hall effect sensor is also provided.

    The camera can encode 4000×3000 resolution at 20fps which is better than the comparable Hikvision models. Both H.264 and H.265 encoding are supported. There is also a feature called Smart H.265+ whereby the camera uses a scene-adaptive strategy to reduce bitrate and storage requirements qithout compromising quality.

    The f-stop is F1.53 at the wide end. The viewing angle ranges from 35° to 85° at 12MP resolution.

    One feature frequently missing from high MP cameras is an on-board IR illuminator. Fear not, this Dahua has 4 EXIR LEDs giving it a stellar night vision range of 50m (164 feet).

    I always rave about security cameras with advanced motion detection ability because they can drastically reduce false alerts. Like all top-end Dahua IP cameras, this camera also supports line crossing (tripwire), intrusion detection, and abandoned/missing object. On top of that, it also has face detection, people counting, and a heat map feature.

    Local storage of images and motion detection clips is supported with an SD card slot that takes up to 128 GB cards. For cameras with such high pixel counts, the SD card is more suited as a fail-over video recording destination in case of network outage.

    On the connectivity front, IEEE 802.3af PoE is present, as is 1x audio in and outs. 2x alarm in / 1x out are also provided.

    Just like the Hikvision model, there’s a built-in heater for cold start situations.

    The downsides in this model are lack of WDR, no audio detection features and the 2-way audio is only half-duplex (like a walkie-talkie).

    [wpsm_divider top=”20px” bottom=”20px” style=”clear”][wpsm_column size=”one-half”]Features:

    • 12MP Starvis CMOS image sensor
    • Motorized varifocal lens, 4.1 – 16.4 mm
    • Automatic IR cut filter
    • PoE support, 12V DC, or 24V AC
    • 1x audio in/out ports
    • 2x alarm in/ 1x out ports
    • microSD card for Edge recording
    • IP67 and IK10 impact resistant metal housing
    • Works from -40 °C to +60 °C (-40 °F to +149 °F)
    • Dimensions – 273.2mm×95.0mm×95.0mm (10.76″×3.74″×3.74″)

    [/wpsm_column][wpsm_column size=”one-half” position=”last”]Verdict:

    • Local storage available: Yes
    • Advanced motion detection: Yes, video only
    • Cloud reliant: No
    • Battery backup: No
    • Smart home compatibility: ONVIF Profile S & G, API

    [/wpsm_column]

    [easyazon_link identifier=”B07KXX7YJV” locale=”US” tag=”vueville.com-eaz-20″]Check price on Amazon[/easyazon_link]

    Check price on B&H Photo

    Hikvision DS-2CD55C5G0-IZHS – Outdoor Dome with Zoom & Heater

    Hikvision DS-2CD55C5G0-IZHS - Best 12MP IP Camera - VueVille

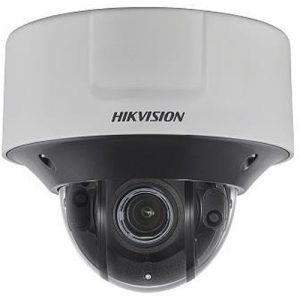
    If you prefer the vandal resistance of a dome form factor, this Hikvision DS-2CD41C5F-IZ has you covered. This dome has most of the same features as the Hikvision bullet we saw earlier. So I will focus on the differences. The 1/1.7” Progressive Scan CMOS is not the Starvis type. Still it can do a minimum of 0.008 Lux when zoomed out and with IR, it can work in complete darkness of 0 Lux.

    The semi-manual varifocal lens goes from 2.8-12mm and has viewing angle ranges from 36.1° to 101°.

    H.264, H.264+, H.265 and H.265+ encoding are supported. It can do 20 fps at 12MP resolution, which is very good.

    Night vision range of 30 metres is provided by the on-board EXIR style 850nm IR LEDs.

    Local storage of images and motion detection clips is supported with an SD card slot that takes up to 256 GB cards, but edge recording is not available.

    On the connectivity front, IEEE 802.3af PoE is present. The -S in the model name indicates the 1x audio in and outs, and 1x alarm in / 1x out ports.

    The -H in the model name means there is a built-in heater for cold start applications

    On the list of downsides, I would mention the lack of 120dB WDR and lack of 2-way full-duplex audio.

    [wpsm_divider top=”20px” bottom=”20px” style=”clear”][wpsm_column size=”one-half”]Features:

    • 12MP CMOS image sensor
    • Semi-manual optical zoom, 2.8 – 12 mm
    • Automatic IR cut filter
    • PoE support, 12V DC
    • -H: built in heater, -S: audio/alarm IO
    • 1x audio in/out ports
    • 1x alarm in/out ports
    • Up to 256GB microSD card for Edge recording
    • IP67, IK10 vandal-resistant metal housing
    • Works from -30°C to 60°C (-22°F to 140°F)
    • Dimensions – Φ162 × 140.3 mm (Φ6.4″ × 5.5″)

    [/wpsm_column][wpsm_column size=”one-half” position=”last”]Verdict:

    • Local storage available: Yes
    • Advanced motion detection: Yes, both video and audio
    • Cloud reliant: No
    • Battery backup: No
    • Smart home compatibility: ONVIF Profile S & G, API

    [/wpsm_column]

    [easyazon_link identifier=”B07JYNQF49″ locale=”US” tag=”vueville.com-eaz-20″]Check price on Amazon[/easyazon_link]

    Check price on B&H Photo

    Dahua NK8BL7Z – Outdoor Dome with Motorized Zoom & Heater

    Dahua NK8BL7Z - Best 12MP IP Camera - VueVille

    So let’s look at this alternative to the Hikvision dome above. The Dahua NK8BL7Z also has a similarly large and highly sensitive 1/1.7″ Sony Starvis sensor with 12MP resolution. It also has a motorized zoom range of 4.1 mm to 16.4 mm.

    Both H.264 and H.265 encoding are supported. It can also do 20 fps at 12MP resolution and 30fps at 4K (8MP) resolution). The f-stop is F1.53 at the wide end. The viewing angle ranges from 35° to 105° at 12MP resolution. The auto iris is motorized and is the Hall effect type.

    This Dahua dome has 3 EXIR LEDs giving it very good night vision range of 50m or 164 feet.

    Like all top-end Dahua IP cameras, this camera also supports line crossing (tripwire), intrusion detection, and abandoned/missing object. On top of that, it also has face detection, people counting, and a heat map feature.

    Local storage of images and motion detection clips is supported with an SD card slot that takes up to 128 GB cards. For cameras with such high pixel counts, the SD card is more suited as a fail-over video recording destination in case of network outage.

    On the connectivity front, IEEE 802.3at PoE+ is present, as are 1x audio in/out and 1x alarm in/out connections.

    On the list of downsides, I would mention the lack of 120dB WDR, lack of 2-way full-duplex audio and audio detection alert events.

    [wpsm_divider top=”20px” bottom=”20px” style=”clear”][wpsm_column size=”one-half”]Features:

    • 12MP Starvis CMOS image sensor
    • Motorized varifocal lens, 4.1 – 16.4 mm
    • Auto-iris is motorized (Hall effect)
    • Automatic IR cut filter
    • PoE+ support, 12V DC
    • 1x audio in/out ports
    • 1x alarm in/out ports
    • microSD card for Edge recording
    • IP67 and IK10 impact resistant metal housing
    • Works from -40 °C to +60 °C (-40 °F to 140 °F)
    • Dimensions: ø159.10 mm x 117.90 mm (ø6.26″ x 4.64″)

    [/wpsm_column][wpsm_column size=”one-half” position=”last”]Verdict:

    • Local storage available: Yes
    • Advanced motion detection: Yes, video only
    • Cloud reliant: No
    • Battery backup: No
    • Smart home compatibility: ONVIF Profile S & G, API

    [/wpsm_column]

    [easyazon_link identifier=”B07D94V4YJ” locale=”US” tag=”vueville.com-eaz-20″]Check price on Amazon[/easyazon_link]

    Check price on B&H Photo

    Vivotek MS8391-EV Outdoor Panoramic Security Camera

    Vivotek MS8391-EV - Best 12MP IP Camera - VueVille

    Vivotek is a high-end security camera manufacturer that typically caters to the commercial integrator market. But they do sell retail and you can pick up one of their amazing cameras pretty easily.

    The MS8391-EV is a unique outdoor vandal-resistant panoramic camera that can do a resolution of 7552 x 1416. The panoramic term refers to its amazing 180 degree field-of-view. It does this by putting together the images from the 4 discrete 3MP sensors.

    Each sensor has a 6mm lens with f/1.6 aperture. It has night vision through the 4 Smart IR LEDs that are built-in. The range is a good 98 feet.

    Enhanced Wide Dynamic Range (WDR) is available to avoid areas such as shadows getting under-exposed. 2-way audio is available and as with most Vivotek cameras, this is the full-duplex variety. No walkit-talkie business here!

    A microSD/SDHC/SDXC slot is available for edge recording. The only downside is the maximum frame rate of 7 fps at 12MP resolution. Smart stream technology is included to optimise bandwidth usage.

    Power input is via either 24 VAC or 802.3at PoE connection.

    [wpsm_divider top=”20px” bottom=”20px” style=”clear”][wpsm_column size=”one-half”]Features:

    • 12MP (4x3MP) CMOS image sensors
    • 6mm fixed lens, f/1.6, 180 degree field of view
    • Automatic IR cut filter
    • PoE+ support, or 24V AC
    • 1x audio in/out ports
    • 1x alarm in/out ports
    • microSD card for Edge recording
    • IP66 and IK10 impact resistant metal housing
    • Works from -58 to 140°F / -50 to 60°C
    • Dimensions – 10.8″ x 5″ x 4.8″ (275 x 126 x 123 mm)

    [/wpsm_column][wpsm_column size=”one-half” position=”last”]Verdict:

    • Local storage available: Yes
    • Advanced motion detection: Yes, video only
    • Cloud reliant: No
    • Battery backup: No
    • Smart home compatibility: ONVIF, API

    [/wpsm_column]

    [easyazon_link identifier=”B01EAXVY7U” locale=”US” tag=”vueville.com-eaz-20″]Check price on Amazon[/easyazon_link]

    Check price on B&H Photo

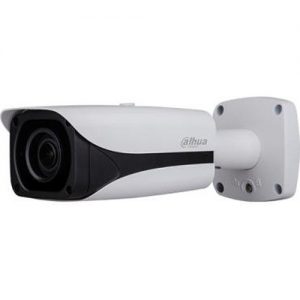
    Dahua IPC-HFW81230E-ZE – Outdoor Bullet Camera with Motorized Zoom

    [easyazon_image align=”center” height=”400″ identifier=”B07SFLMZZX” locale=”US” src=”https://images-na.ssl-images-amazon.com/images/I/21l5lOE1mLL.jpg” tag=”vueville.com-eaz-20″ width=”400″]

    httpv://www.youtube.com/watch?v=H_rXBbJvVpQ
    [wpsm_divider top=”20px” bottom=”20px” style=”clear”]
    The IPC-HFW81230E-ZE is an affordable performer from the Dahua IP camera stables. It sports a very large and highly sensitive 1/1.7″ Starvis sensor with 12MP resolution. It also has a motorized zoom range of 4.1 mm to 16.4 mm. An auto iris feature based on the Hall effect sensor is also provided.

    Both H.264 and H.265 encoding are supported. It can also do 20 fps at 12MP resolution. The f-stop is F1.53 at the wide end. The viewing angle ranges from 35° to 105° at 12MP resolution.

    One feature frequently missing from high MP cameras is an on-board IR illuminator. Fear not, this Dahua has 4 EXIR LEDs giving it a stellar night vision range of 50m or 164 feet.

    I love security cameras with advanced motion detection ability. Like all top-end Dahua IP cameras, this camera also supports line crossing (tripwire), intrusion detection, and abandoned/missing object. On top of that, it also has face detection, people counting, and a heat map feature.

    Local storage of images and motion detection clips is supported with an SD card slot that takes up to 128 GB cards. For cameras with such high pixel counts, the SD card is more suited as a fail-over video recording destination in case of network outage.

    On the connectivity front, IEEE 802.3af PoE is present, as is 1x audio in and outs. 2x alarm in / 1x out are also provided.

    [wpsm_divider top=”20px” bottom=”20px” style=”clear”][wpsm_column size=”one-half”]Features:

    • 12MP Starvis CMOS image sensor
    • Motorized varifocal lens, 4.1 – 16.4 mm
    • Automatic IR cut filter
    • PoE support, 12V DC, or 24V AC
    • 1x audio in/out ports
    • 2x alarm in/ 1x out ports
    • microSD card for Edge recording
    • IP67 and IK10 impact resistant metal housing
    • Works from -40 °C to +60 °C (-40 °F to +149 °F)
    • Dimensions – 273.2mm×95.0mm×95.0mm (10.76″×3.74″×3.74″)

    [/wpsm_column][wpsm_column size=”one-half” position=”last”]Verdict:

    • Local storage available: Yes
    • Advanced motion detection: Yes, video only
    • Cloud reliant: No
    • Battery backup: No
    • Smart home compatibility: ONVIF Profile S & G, API

    [/wpsm_column]

    [easyazon_link identifier=”B07SFLMZZX” locale=”US” tag=”vueville.com-eaz-20″]Check price on Amazon[/easyazon_link]

    What to look for in a 12 Megapixel Security Camera

    At the high-end of the security camera market populated by the 12 Megapixel IP cameras, there are features that you just wouldn’t see elsewhere.

    So a slightly different set of criteria need to be set before you select your 12MP camera:

    • Indoor or Outdoor – Outdoor cameras should have at least an IP66 rating for weather protection
    • Wired connections – At 12 Megapixel resolution of 4000×3000, you have to use a wired connection. Wi-Fi simply doesn’t have the bandwidth required to carry that much data. 802.3at PoE (also called Poe+) is fine but an SFP fibre-optic slot is even better due to its ability to cover long distances.
    • Local storage for Edge Recording – As a failover mechanism in case of link failure, an SD card can be a life-saver.
    • Smart motion detection methods such as line crossing, intrusion detection, face detection and even heat maps should come as standard. Less common is audio event detection.
    • If 2-way audio is important to you, look for full-duplex support as opposed to half-duplex. Otherwise you will be having an 80s style walkie-talkie conversation through your very expensive 12MP IP camera!
    • Smart home compatibility – Make sure the camera has ONVIF support for inter-operability with other brands and hardware

    Conclusion

    The 12 Megapixel CCTV cameras that we have reviewed above are the cream of the crop when it comes to high-resolution security cameras. The added features such as heaters and optical zoom allow you to cover large areas without giving up video quality.

  • Lorex vs. Swann – The Most Popular IP Cameras Compared

    Lorex vs. Swann – The Most Popular IP Cameras Compared

    If you are just stepping into the world of home security cameras, the first brands you will come across are probably Lorex and Swann.

    These two brands are commonly found in big box stores across the country and sport attractive price tags compared to the likes of Hikvision and Dahua IP cameras. They also have a strong online presence.

    So should you spend your had earned cash on one of these budget brands? What, if anything, are you sacrificing for that super budget-friendly price? Let’s find out.

    [wpsm_titlebox title=”Contents” style=”main”][contents h2][/wpsm_titlebox]

    A quick note: As an Amazon Associate I earn from qualifying purchases. This post contains affiliate link(s). An affiliate link means I may earn advertising or referral fees if you make a purchase through my link, at no extra cost to you.

    Lorex vs Swann - The most popular IP Cameras Compared - VueVille

    Lorex vs. Swann – the Stories behind the Brands

    Lorex (now owned by Dahua)

    Lorex was founded in 1993 and has head offices in Markham, Ontario, Canada and in Linthicum, Maryland, USA. They have product warehouses in Markham, Indiana and California.

    But first let’s start with the company FLIR, better known as the high-end camera manufacturer who revolutionized thermal imaging for the military and industrial markets. They acquired Lorex in 2012 for around $60 million seeking to lower the cost of thermal imaging and open it up to the retail market.

    So for the next 6 years they tried to penetrate the DIY and SMB markets. During this period, their main OEM supplier was Dahua. In February 2018, however, FLIR exited the DIY security camera space by selling Lorex to Dahua. They currently operate as a subsidiary of Dahua. So think of Lorex as a Dahua brand.

    Swann

    Swann was created by David Swann way back in 1987 in his family garage in Australia. David grew the business to its international presence across 40 countries. In 2014, Swann was bought by the American surveillance equipment manufacturer Infinova Group which is headquartered in Monmouth Junction, New Jersey, USA. The $87.5 million deal saw Swann gaining access to the high-end industrial sector. Most Swann cameras are rebranded Hikvisions.

    8MP 4K IP Camera Duel – Lorex LNB8111BW vs. Swann NHD-885MSFB

    I usually compare the 4MP versions of various brands because really 4MP is well above what most people will need in resolution. However the only common megapixel resolution between both brands is 2MP (1080p), 3MP and 8MP (4K). 2MP and 3MP are just too low, so I have opted to compare the most popular 8MP models from Lorex (LNB8111BW) and Swann (NHD-885MSFB). These are also 4K cameras as well.

    Here’s a summary in a nice and easy table:

    [table id=58 responsive=”scroll” /]

    The Biggest Difference between Lorex and Swann IP Cameras

    Just like the lower resolution Lorex models, the high resolution 8K Lorex cameras do not have onboar storage – so they are not capable of standalone operation. You have to connect it to another device to record the video footage.

    But all Lorex cameras now support ONVIF, so you can use them with any ONVIF-compatible NVR. Not just Lorex NVRs, but any NVR that supports ONVIF or even to a DIY NAS NVR system.

    Just like the Lorex, Swann cameras do not have onbaord storage either. So they are also incapable of standalone operation. Moreover, Swann has decided not to enable ONVIF on their cameras. So you are forced to use a Swann NVR if you want to buy their IP cameras. This is the main reason that we at VueVille do not recommend Swann for DIY security camera enthusiasts. Swann’s ideology is 100% against the ethos of openness and inter-operability that I champion here at VueVille.

    EDIT: It may be possible to crack/hack the Swann cameras to make it work as a standalone camera, either to access just the RTSP stream or add it to your non-Swann NVR using the ONVIF standard. This is not supported by Swann and may not work for you. We do not recommend tampering with your cameras in any case, as this may void any warranty!

    Hardware features

    The Lorex has a large CMOS sensor, a 1/2.5″ progressive scan CMOS sensor. The closest we have seen is Reolink which has a slightly smaller 1/2.7″ sensor. Swann doesn’t provide any specifications for its image sensor.

    The size of the sensor has a huge bearing on the low light ability of a camera. The larger the sensor, the greater its ability to gather light and so do well in low light conditions. But as you cram in more and more pixels into the same size sensor, they get smaller and smaller, which adds noise. Noise is the bane of low light video and reduces the detail that you can get out of your video. So while security camera manufacturers have pushed pixel count from 3MP to 4MP and beyond, they have not really increased the sensor size.

    Next up is WDR or Wide Dynamic Range. This is a feature that enhances the level of detail an IP camera can pick out in shadows. Unfortunately neither IP camera supports it. Not entirely surprising given the budget nature of the cameras though. However, Lorex claims High Dynamic Range (HDR) support. While I doubt it’s close to the real thing, it is better than nothing which is what Swann comes up with on this front.

    Next up is low light performance. While most cameras are good in daylight, decent night-time performance is tricky to achieve.

    The Lorex sports colour night vision – this is a very interesting feature and does set the Lorex brand apart. However be aware that the camera will switch back to black & white IR night vision below 1 lux to ‘ensure optimal low-light image quality’ as Lorex puts it.

    The Swann cameras have only standard black and white Infrared night vision. However, the floodlights on the Swann are bright enough to switch the day/night sensor to day mode and provide colour vision. Just don’t count on being able to capture much detail this way though.

    So far we see the Swann lagging behind a bit. But watch out – Swann has a few nifty features that Lorex doesn’t: a PIR sensor, on-board floodlight LEDs, an on-board microphone and built-in speaker! Swann uses the heat-sensing PIR sensor to power its TrueDetect feature which can reduce false alerts. A good touch and a rare one too!

    Software features

    The three software features that make a great IP camera are ONVIF/RTSP support, built-in NVR feature, and the advanced motion detection features that help reduce false alerts.

    Here, the main differences between the Lorex and the Swann are that:

    • Lorex supports ONVIF, Swann doesn’t.
    • Swann has advanced motion detection methods such as line crossing, intrusion detection, person detection and even face detection.

    Both Lorex and Swann do not support standalone operation. This is because neither camera can expose a public IP address that you can use to connect to the camera and pull an RTSP stream.

    RTSP allows even non-ONVIF equipment (such as software) to access the security camera’s video stream. Examples are video players like the popular VLC player, and BLue Iris PC NVR software.

    Neither IP camera has the much coveted built-in NVR feature, and neither have on-board storage.

    Its worth noting that Lorex supports H.265 encoding to keep file sizes under control.

    Motion Detection ability

    While Lorex supports basic motion detection only, Swann supports full video analytics. I can’t emphasize enough the importance of these advanced motion detection methods in reducing false motion alerts.

    Neither camera can send out motion detected alerts or emails by themselves – remember, no standalone operation. This is something that Hikvision, Dahua, Reolink and Amcrest can all do.

    Warranty

    Lorex has a 2 year warranty as standard, but can be extended to 3 years or 5 years for an extra fee.

    Swann has only a 1 year warranty as standard, but can be extended online by 6 months to cover mechanical failure for free.

    Verdict

    I have a strong dislike for IP cameras that are crippled on purpose to work only with the manufacturer’s own NVRs. So Swann even with its swanky features loses out big time due to its lack of ONVIF support and ZERO inter-operability with other brands.

    So Lorex is the clear choice here. You can add it to any NVR that supports ONVIF. It has all the basic hardware features that you would expect and has colour night vision and HDR to boot.

    For IP cameras that are not designed to lock you into a particular brand, check out the other recommendations on our best outdoor IP cameras list.

    Where to buy

    • Lorex LNB8111BW at [easyazon_link identifier=”B077PC2R3C” locale=”US” tag=”vueville.com-eaz-20″]Amazon[/easyazon_link]
    • Swann NHD-885MSFB at [easyazon_link identifier=”B07J4GKZV9″ locale=”US” tag=”vueville.com-eaz-20″]Amazon[/easyazon_link]

    (* = affiliate link / image source: Amazon Associates Program)

  • Reolink vs. Lorex – The Most Popular IP Cameras Compared

    Reolink vs. Lorex – The Most Popular IP Cameras Compared

    Recently a reader asked me how the Reolink cameras compare to the Lorex and Swann ones. A lot has changed with Lorex recently, so let’s look at that comparison first.

    Until 2020, Lorex cameras were intended to be used only with their own NVRs. In other words, you were not allowed to venture outside their ecosystem. This was totally against the ethos of openness and inter-operability that I champion here at VueVille. That’s why I never recommended them in our outdoor and indoor IP camera roundups.

    But in late 2020, Lorex released the latest version of their IP cameras and surprise surprise, they now support ONVIF Profile S. Dahua acquiring Lorex from FLIR) in 2018 seems to have triggered this happy development. Of course, Lorex cameras are rebranded Dahuas so they were always capable of it.

    Sadly that didn’t last long. Recent Lorex cameras do not have ONVIF or RTSP support anymore (datasheets and Lorex Q&A confirm this). In November 2022, Dahua announced that it is selling Lorex to Skywatch, a privately held cloud services company in Taiwan.

    For this comparison I have picked the most popular and affordable 8 Megapixel 4K-capable models from both brands – Reolink RLC-810A and the comparable Lorex E892ABW.

    [wpsm_titlebox title=”Contents” style=”main”][contents h2][/wpsm_titlebox]

    A quick note: As an Amazon Associate I earn from qualifying purchases. This post contains affiliate link(s). An affiliate link means I may earn advertising or referral fees if you make a purchase through my link, at no extra cost to you.

    Reolink vs. Lorex – the Stories behind the Brands

    Reolink vs Lorex - The Most Popular IP Cameras Compared - VueVille

    Reolink

    Reolink is a popular brand that is only a few years old. But they are not exactly new to the surveillance camera industry. The brand Reolink is owned by Reolink Innovation Limited (earlier known as Shenzhen Baichuan Security Technology Co., Ltd.) who are a manufacturer of security cameras and other surveillance equipment. What’s the source? I simply emailed them and asked. Simple as that.

    So Reolink is not a rebranded Hikvision or Dahua as some have claimed online. Therefore they are not subject to the Federal government ban imposed through the National Defense Authorization Act (NDAA). This is a huge positive for Reolink.

    Lorex

    Lorex was founded in 1993 and has head offices in Markham, Ontario, Canada and in Linthicum, Maryland, USA. They have product warehouses in Markham, Indiana and California.

    But first let’s start with the company FLIR, better known as the high-end camera manufacturer who revolutionized thermal imaging for the military and industrial markets. They acquired Lorex in 2012 for around $60 million seeking to lower the cost of thermal imaging and open it up to the retail market.

    So for the next 6 years they tried to penetrate the DIY and SMB markets. During this period, their main OEM supplier was Dahua. In February 2018, however, FLIR exited the DIY security camera space by selling Lorex to Dahua. Until November 2022, they operated as a subsidiary of Dahua. So effectively, Lorex was a Dahua brand between February 2018 and November 2022.

    As mentioned in my intro above, Dahua has now sold Lorex to Skytech, a Taiwanese cloud services company. The disappearance of ONVIF and RTSP support from recent Lorex models is probably a sign of things to come.

    8MP 4K IP Camera Duel – Reolink RLC-810A vs. Lorex E892ABW

    Right off the bat, I need to point out that the biggest difference between Reolink and Lorex is that Reolink cameras can work either in standalone mode or with Reolink NVRs, or even any NVR that is ONVIF compliant.

    But Lorex cameras will work only with Lorex NVRs and that too select Lorex NVRs. In other words, Lorex cameras work only within the Lorex eco-system.

    This is the polar opposite of the Reolink cameras which will work with any 3rd party ONVIF/RTSP compliant system. Okay, now that’s out of the way, let’s get into the details.

    Hardware features

    The Reolink RLC-810A has a 1/2.5″ sensor, that’s slightly larger than the Lorex’s 1/2.8″ sensor.

    The size of the sensor has a huge bearing on the low light ability of a camera, whether it be a camcorder or a security camera. The larger the sensor, the greater its ability to gather light and so do well in low light conditions. But as you cram in more and more pixels into the same size sensor, they get smaller and smaller, which adds noise. Noise is the bane of low light video and reduces the detail that you can get out of your video. So while security camera manufacturers have pushed pixel count from 8 Megapixels and beyond, the sensor size has not always kept up. Kudos to Reolink for bucking the trend here.

    Next up is WDR or Wide Dynamic Range. This is a feature that enhances the level of detail an IP camera can pick out in shadows. Unfortunately neither camera supports WDR. Not entirely surprising given the budget nature of these brands. However Lorex claims to support true HDR but does not provide any further details about it.

    While most cameras are good in daylight, decent night-time performance is tricky to achieve. Neither Reolink nor Lorex specify a lux rating without InfraRed (IR) illumination. Okay but how do they work in low light? Both cameras have an automatic IR cut filter that will switch to black and white infrared vision when it gets dark. So far, that’s standard IP camera behaviour.

    However, Lorex claims a ‘colour night vision’ feature whereby you still get colour video under low light conditions. So this feature still requires external illumination. So I fail to see how this is something special – the Reolink has a larger sensor and probably even better low light colour vision ability! I see this so-called feature as a marketing gimmick and nothing more.

    What about the Lorex’s LED lights though? They look like LED spotlights that you can leave permanently on through the night, but actually they are only warning LEDs that are motion-activated or activated on-demand in the mobile app. If these lights were at least proper spotlights, then the colour night vision claim would make more sense (Reolink has such models).

    The Lorex has 2-way audio using an onboard microphone and speaker combo, with the speaker doubling up as a siren deterrent. This particular Reolink gets only a microphone.

    Both cameras have on-board SD card for local storage of video clips and snapshots.

    Winner: Reolink

    Software features

    The three software features that make a great IP camera are ONVIF/RTSP support, built-in NVR feature, and the advanced motion detection features that help reduce false alerts.

    Only the Reolink supports ONVIF & RTSP. While ONVIF/RTSP is conspicuously absent from Reolink’s spec sheets and their marketing material, Reolink has confirmed that their non-battery powered IP cameras do have ONVIF and RTSP support.

    Lorex has recently removed all mentions of ONVIF support on their product pages (their datasheets never mentioned it anyway). Lorex has also confirmed in their website Q&A section that this camera doesn’t support ONVIF.

    Why is ONVIF support important? ONVIF support ensures that your camera will work with ONVIF-compliant equipment from 3rd party manufacturers. This is why you can add a Reolink camera to your ONVIF-compatible NVR or DIY NAS NVR.

    RTSP allows even non-ONVIF equipment (such as software) to access the security camera’s video stream. Examples are video players like the popular VLC player, and Blue Iris PC NVR software.

    Both Reolink and Lorex have on-board storage but only Reolink cameras have the built-in NVR feature – because Reolink cameras are designed for standalone operation (don’t need an NVR).

    The Reolink IP cameras can all do basic motion detection, smart motion detection (person/vehicle/pet) and can send email/push alerts. The Lorex cameras cannot do any of this on its own. It is just an IP camera with no smart features unless its connected to an NVR. More on that later.

    Motion Detection ability

    I classify motion detection ability into three:

    1. Basic motion detection – this is detecting just simple pixel changes, results in false alerts.
    2. Advanced motion detection – like line crossing, intrusion detection, which result in fewer false alerts.
    3. Smart detection – person / face / vehicle / pet detection, the best method for eliminating false alerts.

    Both Reolink and Lorex IP cameras support basic and smart motion detection methods. But as mentioned earlier, the Reolink is capable of standalone operation. It can record motion detection triggered clips, take snapshots, and send out email alerts and push notifications to the Reolink app on mobile devices without an NVR or PC.

    The Lorex can do none of this by itself, you have to buy a compatible Lorex NVR for that.

    Winner: Reolink

    Warranty

    Reolink IP cameras come with a limited 2-Year warranty as standard. Lorex has a 2 year warranty as standard, but can be extended to 3 years or 5 years for an extra fee.

    Detailed Comparison Table

    Here’s a summary in a nice and easy table:

    [table id=57 responsive=”scroll” /]

    Verdict – Reolink vs. Lorex

    Reolink is the clear choice for DIY security camera enthusiasts because Lorex has regressed in the core feature set (ONVIF and RTSP support removed). Reolink cameras are also capable of standalone operation thanks to the built-in NVR functionality. If you would like to research more about IP cameras, do check out the other recommendations on my best outdoor and indoor IP cameras list.

    Where to buy

    • Reolink RLC-810A at [easyazon_link identifier=”B07K74GWX5″ locale=”US” tag=”vueville.com-eaz-20″]Amazon[/easyazon_link] or Reolink.com
    • Lorex E892ABW at [easyazon_link identifier=”B086BXC2R4″ locale=”US” tag=”vueville.com-eaz-20″]Amazon[/easyazon_link]

    Related Comparisons

  • The 3 Best IP Camera Apps for Android Devices

    The 3 Best IP Camera Apps for Android Devices

    If you have a mish-mash of IP cameras from different brands in your DIY Home Security Camera System like me, an IP camera viewer app can be quite handy.

    Of course, there are a few different ways to monitor all your cameras in a single place.

    But a single app on your Android smartphone or tabloid is arguably the most convenient. The only requirement is that all your IP cameras should ideally support the ONVIF industry standard, or at least provide an RTSP/MJPEG stream. ONVIF allows you to mix and match cameras from different manufacturers.

    [wpsm_titlebox title=”Contents” style=”main”][contents h2 h3][/wpsm_titlebox]

    A quick note: As an Amazon Associate I earn from qualifying purchases. This post contains affiliate link(s). An affiliate link means I may earn advertising or referral fees if you make a purchase through my link, at no extra cost to you.


    The Best IP Camera Apps for Android

    1. tinyCAM Monitor

    tinyCAM Monitor Pro - VueVille

    • 2-way audio on selected models
    • Motion detection (both in-app and on-camera), face detection
    • Video recording (local storage, time-lapse, FTP/FTPS, Amazon Drive, Dropbox, Google Drive, Microsoft OneDrive, ownCloud)
    • Background/DVR mode (background recording and motion detection)
    • Internal web server for remote recordings playback and live view
    • Android Wear app & Google Cast (Chromecast) support
    • TV support (Android TV, Amazon Fire TV) Home screen and lock screen widgets
    • Floating windows
    • Tasker automation plugin support

    This app really stands out for a variety of reasons. It has a beautiful interface that’s been thoughtfully designed. But its not form over function. The plethora of features is simply mind-blowing. This app is simply one of the best I have used on Android.

    It is also very responsive and has been super stable over the past 4 years that I have been using it on a wide range of Android devices.

    Apart from supporting ONVIF, the camera can automatically detect and set up over 10,000 different camera models. FOr example, the automatic scan detected my Reolink C1 Pro IP camera which didn’t happen with the other 2 apps I tested.

    For matrix or multi-camera view, you can pick any of the 17 different layouts. Most of them also auto-rotate when you rotate your device to portrait (vertical) or landscape (horizontal) mode. This is how the portrait 3-camera view looks like on my Samsung Galaxy A5:

    How to access your DIY security cameras remotely using a NAS VPN server - tinyCAM Monitor Pro - VueVille

    There is an ad-supported free version with limited features and a paid pro version. We recommend choosing the pro app because of all the additional features at a super low price of less than $5.

    On my Galaxy A5, the app automatically picked the hardware acceleration option for my Reolink C1 Pro. It can comfortably do 10 fps for 4 cameras simultaneously on the sub-stream.

    I use the app as my baby monitor app and the advanced audio features such as audio amplification are a great touch.

    Smart Home Checklist

    • Cloud reliant: No
    • Smart home compatibility: ONVIF, RTSP, Tasker and Web server built-in
    • Subscription fees: None, one-time purchase

    2. IP Cam Viewer Pro

    IP Camera Viewer Pro - VueVille

    • 1600+ devices supported including NVRs and DVRs
    • RTSP, ONVIF, MMSH supported
    • MPEG4/H265/H264/MJPEG codec support
    • Controls PTZ (Pan/Tilt/Zoom) cameras
    • Camera grouping, auto sequence
    • Automatic camera detection
    • Home screen and lock screen widgets
    • 2-way audio and background audio support for many devices
    • In-app motion detection
    • Record mode for 24/7 recording of all cameras
    • Embedded web server for remote control of app, Tasker integration, or use as a transcoder/proxy
    • Chromecast and Android Wear support

    While this app is certainly functional, the interface is a letdown compared to our app of choice, tinyCAM. The feeling I got was of using an app from the early years of Android. There’s no material design here. Large blocky buttons and huge fonts dominate. The designer seems to have taken a very workmanlike approach to designing the UI. But the app undeniably does do what it claims to do.

    Apart from supporting ONVIF, the camera can automatically detect and set up over 1726 different cameras. The automatic scan however could not detect my Reolink C1 Pro IP camera.

    There is an ad-supported free version with limited features and a paid pro version.

    Smart Home Checklist

    • Cloud reliant: No
    • Smart home compatibility: ONVIF, RTSP, Tasker and Web server built-in
    • Subscription fees: None, one-time purchase

    3. ONVIF IP Camera Monitor (Onvifer)

    ONVIF IP Camera Monitor (Onvifer)-  VueVille

    • Supports ONVIF, RTSP/MJPEG/H.264
    • Records MP4 clips
    • Can auto-discover all ONVIF devices instantly
    • Supports PTZ cameras
    • Has snapshot preview widgets on Android home screen
    • Supports viewing multiple cameras simultaneously

    While this app is nowhere as popular as tinyCAM, its a decent effort. The user interface is not as polished as tinyCAM but still quite good. Its not as rich in feature either, but it does all the basics well.

    There is an ad-supported free version with limited features and a paid pro version.

    Smart Home Checklist

    • Cloud reliant: No
    • Smart home compatibility: ONVIF, RTSP
    • Subscription fees: None, one-time purchase

    Comparison Table

    [table id=56 responsive=scroll /]


    What are the pros and cons of using an IP camera viewer app?

    While there are quite a few ways to view all your cameras in one place, the smartphone camera viewer app is a popular option.

    Here are the pros and cons of using a security camera viewer app:


    What to look for in an IP Camera app

    Automatically detect ONVIF compliant cameras
    Some apps can automatically scan your network and detect supported IP cameras. You just need to type in the username and password. This feature can save you a lot of time and the hassle of typing in IP addresses and port numbers. This will work only for ONVIF compliant cameras by the way.

    RTSP and P2P camera support
    The industry standard for streaming CCTV video is the Real Time Streaming Protocol (RTSP) protocol. The beauty of RTSP is that as  long as an IP camera can provide an RTSP stream and your viewing software supports RTSP, all you need is the RTSP stream URL and login details. The viewing software doesn’t have to support the camera itself, making it possible for you to use a wide variety of IP cameras with a single viewer software or app. Exactly what we want!

    These days, some IP camera manufacturers enable P2P support in their cameras. This means each camera has a Unique Identifier (UID) code. You need only this single code to add the camera to your camera viewing app. What’s more, it will work outside your home network without any additional configuration. No IP address, port forwarding etc. to bother with. But P2P uses a third-party service, so your security and privacy is lower than when using your own secure VPN tunnel.

    Preset settings for popular IP cameras
    While ONVIF support is sufficient to view your camera in your camera viewer app, you may want to take advantage of some additional features of your camera that doesn’t work over ONVIF. A good example is the PTZ controls of your ONVIF-compatible PTZ camera such as the Reolink RLC-423. Another example is detecting alerts sent by PIR sensors on your indoor IP camera.

    So what’s the solution? Some IP camera apps come with additional presets for the most popular IP cameras. That means you can use most of the features your camera’s native app has. Win-win!

    Motion detection and 24/7 recording
    If some of your IP cameras do not have motion detection or are not great at it, you can have the viewer app perform it instead. Some apps can both perform their own motion detection or use the motion detection triggers from the camera itself.

    Some apps can also do 24/7 recording to an SD card or to a network device like a NAS. Recording to a separate network device is recommended because SD card will wear out rapidly under continuous recording conditions.

    Switch camera stream
    For most smartphones and tablets, decoding multiple 1080p or higher streams is too resource intensive. What usually happens is dropped frames, or blank screens.

    Thankfully, any good IP camera will have both a high quality stream and a lower quality mobile-optimized stream. a good viewer app will let you switch between the high quality and low quality streams.

    What’s more the best apps will automatically choose the mobile-optimized stream if you are on a 3G/4G mobile network. This will also keep your data usage low.

    2-way audio
    If your IP camera supports 2-way audio and has both a speaker and a microphone, you can use the viewer app to chat with someone at the other end. Of course your camera needs to support full-duplex audio to have a natural 2-way conversation. On the other hand, if your camera is most cameras and has only half-duplex audio, your conversations are going to be of the walkie-talkie variety sadly.

    Background audio and recording support
    If you are using your IP cameras as baby monitor or DVR/NVR, the last thing you want is to keep you mobile phone screen on or even worse, the viewer app active on screen at all times. So the answer is background audio support – which keeps the app recording and sound from your cameras playing, even if you are looking at other apps or even lock/switch off the phone screen.

    Chromecast and Android Wear support
    Got a wearable device? Then Android Wear support is super cool. Chromecast support lets you turn your TV into a giant CCTV monitor! Such fun!

    API and/or Web server for remote control
    Integrating home security camera systems with home automation is the holy grail for DIY enthusiasts like me. What really helps is getting the viewer app to do certain actions when triggered by the home automation system or vice versa.

    An API or HTTP web server running on the Android device enables such functionality.

    Reliability
    It goes without saying, you want a stable reliable app that will keep going day in and day out. This is especially important if you will rely on it for baby monitoring, 24/7 recording etc.

    Cost
    While there are dozens of free IP camera viewer apps, most of them are riddled with ads and other nasties you don’t want on your computer. So this is one area where you definitely get what you pay for.


    Conclusion

    With most free IP camera apps being low quality, and the super affordable prices of paid apps, it is a no-brainer to choose a paid IP camera app. Our choice is the excellent tinyCam Monitor Pro app and we trust you will be happy with it too.

  • How to: Fix Hikvision Live View not working in your favourite browser

    How to: Fix Hikvision Live View not working in your favourite browser

    If you have a Hikvision IP camera or NVR and have tried to login to the admin page using Firefox, Chrome, or Microsoft Edge, you are probably familiar with this error message:

    “Please click here to download and install the plugin-in”

    Hikvision Live View Error - Please install web plugin - VueVille

    So you close your browser, install the plugin, restart your browser and….nothing. You get the same message again and again.

    There are two simple solutions to this problem:

    1. Install the IE-Tab extension
    2. Use the Pale Moon browser instead

    Install the IE-Tab extension

    If you want to make your IP camera live-view or configuration page work with Chrome or Firefox, your best bet is the IE Tab extension for Chrome.

    The IE Tab Chrome extension lets you run legacy web apps such as Hikvision and other brands’ web admin and live-view pages. With over 4 million users currently, this is by far the best option.

    How does it work? Once upon a time, Chrome used to be able to display these legacy web apps. It did this by supporting a technology called NPAPI (the Netscape Plugin API). But Chrome removed NPAPI support last year, and IE Tab restores this feature to Chrome.

    If you use Firefox, check out the ‘Open in IE’ extension.

    But what if your Hikvision or other IP camera still refuses to co-operate? Then try our next suggestion.

    Use the Pale Moon Browser

    The Pale Moon browser is a fork of Firefox/Mozilla that retains support for legacy plugins such as the one that Hikvision asks you to install. Getting the Hikvision web plugin to work on the older Internet Explorer browser is difficult and the current crop of browsers such as Firefox, Chrome, Opera and Microsoft Edge do not even support the plugin at all.

    Step 1: Install the Pale Moon Browser.

    Step 2: Enter the IP address of your Hikvision IP camera or NVR.

    Step 3: Enter your username and password and login.

    Step 4: Enjoy your live view!

    If you haven’t installed the plugin previously in some other browser, you will see the message asking you to download the plugin. Download it, close your browser, install the plugin and then open Pale Moon again. You should now be able to access the Live View of your Hikvision camera or NVR.

    How-to fix Hikvision IP Camera NVR live view not working - VueVille
  • Review: Reolink C2 Pro 5MP Wireless Indoor PTZ IP Camera

    Review: Reolink C2 Pro 5MP Wireless Indoor PTZ IP Camera

    While there are many pan-tilt indoor security cameras on the market, there has been a distinct lack of reliable yet affordable PTZ options. The Reolink C1 Pro is a great indoor pan-tilt camera, but it doesn’t have optical zoom. Reolink has now plugged that gap with their latest Reolink C2 Pro model which is a highly affordable indoor PTZ security camera.

    Reolink kindly provided a sample for our thorough hands-on review and just like the C1 Pro, I found it to be a very capable DIY security camera. With its easy rapid setup, SD card slot, NVR features, full duplex 2-way audio, and dual-band WiFi, its yet another option to consider for your DIY home security system, especially if you don’t want to be reliant on any cloud service.

    And a timely review this is too, personally. I have been using the Amcrest ProHD 1080p as my younger son’s baby monitor but it finally gave up the ghost. I was looking for a suitable replacement and had settled on the C1 Pro. So I will be comparing the C2 Pro to the C1 Pro also.

    [wpsm_titlebox title=”Contents” style=”main”][contents h2][/wpsm_titlebox]

    A quick note: As an Amazon Associate I earn from qualifying purchases. This post contains affiliate link(s). An affiliate link means I may earn advertising or referral fees if you make a purchase through my link, at no extra cost to you.

    Review - Reolink C2 Pro PTZ Indoor Security Camera

    Specifications

    [table id=55 responsive=scroll /]

    Unboxing

    The Reolink C2 Pro comes in an attractively packed box with a very good level of cushioning inside. The model name of the camera, and its main specs are clearly listed on a sticker on the outside of the box along with the default login details.

    What’s in the box

    Review - Reolink C2 Pro PTZ Indoor Security Camera - What's in the box - VueVille
    • Reolink C2 Pro PTZ Camera
    • DC 5V wall adaptor
    • Mini USB cable
    • Ethernet cable (1 metre long)
    • Wall mounting bracket
    • Quick Start guide
    • What’s next booklet
    • Drilling templates
    • CD-ROM with software and manuals
    • Reolink surveillance notification sticker
    • Screws and rawl plugs

    Design & Features

    The C2 Pro is the spitting image of its 4 Megapixel Pan-Tilt cousin, the C1 Pro. While the C1 Pro came only in black, the C2 Pro is available in only one colour too – white.

    Review - Reolink C2 Pro vs. C1 Pro - Front View - VueVille

    Just like the C1 Pro, the C2 Pro can also be divided into three parts – the base, the body and the lens mounting which contains the lens itself. A chrome trim runs around the base, lending it a high-end look and feel.

    Review - Reolink C2 Pro PTZ Indoor Security Camera - Front View - VueVille

    The base has blue indicator LEDs on the front (see above) and the connectivity ports on the back. You will find the 10/100 Mbps Ethernet port, a microSD card slot and a micro-USB port which serves as the power input. Yes the camera runs on 5V DC which means that you can easily plug it into a USB port to power it. How much amperage would you need? Power = Voltage x Current. Since the camera is rated for a maximum of 6W power usage and runs at 5V, the current requirement is 1.2A. If your USB port is rated for charging devices, its 1.5A rating is more than sufficient to power the camera.

    The dual-band Wi-Fi antennae are also fixed to the back of the base. Now 5 Ghz Wi-Fi is a great feature to have as most of the C2 Pro’s competitors are still sporting just 2.4 GHz Wi-Fi. The higher bandwidth capacity of the 5 Ghz band comes with a significant range disadvantage though. The antennae are adjustable and so you can orient it to get the strongest Wi-Fi signal.

    Review - Reolink C2 Pro PTZ Indoor Security Camera - Back View - VueVille

    You will also find a handy reset pin hole on the side of the base.

    Review - Reolink C2 Pro PTZ Indoor Security Camera - Side View - VueVille

    The body is the part that rotates around the vertical axis, and has a 355 degree freedom of motion, just like the C1 Pro. The body also contains the dual speakers, one on each side as you can see below. The built-in microphone can be found on the front of the body just under the lens mount.

    Review - Reolink C2 Pro PTZ Indoor Security Camera - Side View - VueVille

    The lens mounting piece is free to rotate about the horizontal plane with 105 degrees of movement. The daylight sensor is integrated into the ring-type Infrared LEDs concealed smartly around the lens. If you look carefully you can see the red tinge of the Infrared LEDs under the darkened glass surrounding the lens.

    All in all, the camera feels solid in construction and the matte finish of the white plastic makes it look more expensive than it really is.

    Installation & Setup

    The Reolink C2 Pro comes with a very good quick start guide which is a double-sided glossy booklet, just like the Reolink C1 Pro and the Reolink Argus I have reviewed. The general introduction section illustrates and labels the different parts of the camera such as the daylight sensor, the built-in mic, the speaker, the indicator LEDs and the various connections.

    There is also a helpful camera connection guide for those who are new to security cameras. Just like the C1 Pro, initial setup needs the C2 Pro to be connected to your router via an Ethernet cable. While this method is easier, the Argus had an even simpler setup process. Nope, there’s no voice guiding you through the setup process like the Argus either.

    Since the C2 Pro doesn’t support PoE, you have to use the included power adapter. The camera uses a standard USB power plug so you may be able to power it using alternative power sources too. The blue power LED will lit up when I turned on the power.

    So you have two options for setting up the camera:

    1. Setup using a phone or tablet – the smart device method as Reolink calls it, or
    2. Setup using a laptop

    I suspect most people would opt for the smart device setup, so that’s what I did.

    1. Install the Reolink mobile app. I had it already installed since I use the Reolink C2 Pro and the Argus.
    2. When I opened the mobile app, it had already added the Reolink C2 Pro automatically. There was a red indicator next to the ‘Init’ button for the C2 Pro. So I turned to the quick start booklet and sure enough it said the camera would be automatically detected.
      Reolink App Initialization - Reolink C2 Pro Review Pan-Tilt Indoor Security Camera - VueVille
    3. Now its time to set up the Wi-Fi. I touched the Wi-Fi symbol for the C2 Pro, entered my Wi-Fi network details and then proceeded to perform the Wi-Fi test. The test was successful, so I backed out to the main devices page.
      Reolink App Wi-Fi - Reolink C2 Pro Review Pan-Tilt Indoor Security Camera - VueVille
    4. Next I clicked on the warning message saying ‘Create a password for your device’, and saved a password. The app then opened the camera’s dedicated page with all the control options including the PTZ button and Live View. Backing out to the main devices page showed that the warning message now changed to ‘Connection succeeded’.
      Reolink App Wi-Fi Success - Reolink C2 Pro Review Pan-Tilt Indoor Security Camera - VueVille
    5. Now the setup was complete and the Init button changed into a settings gear button.
      Reolink App Init Complete - Reolink C2 Pro Review Pan-Tilt Indoor Security Camera - VueVille

    Configuring the C2 Pro

    The most convenient way of setting up the camera is using the Reolink mobile app. This is partly because you don’t need to know the camera’s IP address to access it. The mobile app does that for you.

    The C2 Pro also has its own built-in web server where you can access the advanced settings. But to do this you need to know the IP address of the camera.

    Since the initial setup requires the camera to be connected physically to your router via the Ethernet cable and DHCP is enabled by default to help newbies, the camera is accessible via that interface’s IP address. You can scan the network using any number of apps to find out the ethernet interface’s IP address.

    If you have set up the Wi-Fi as well, that interface will have a separate IP address. Just like the Amcrest ProHD IP camera, both interfaces are live at the same time and you can choose to access the camera through either one. This is a very nice feature.

    The Web Admin page

    When you first log in to the web admin page, it takes you straight to the Live View page, which Reolink calls the ‘Preview’ page. Here you can control the PTZ function of the camera, switch between different resolution (clear/fluent/balanced), and access some of the OSD settings. You can also mute the camera audio if required. The C2 Pro’s web admin page still uses Adobe Flash just like the C1 Pro, I was really hoping for a more modern HTML5 interface.

    The playback tab is for accessing the built-in NVR feature of the C2 Pro. What is the built-in NVR feature? Basically, pop in a microSD card and the camera can record continuous or motion detection triggered video clips or snapshots to the SD card. You can login any time from anywhere to review the footage through a timeline view.

    This means that if you need only a single camera or two in your home , you don’t need to buy a separate NVR just to record video footage. The camera can also push notifications to the Reolink app on your mobile phone, send email alerts with attached snapshots or video clips and even upload them to an FTP server.

    Moving on to the settings page, the various configuration options are neatly laid out in logical sections. You can set the video resolution and frame rates separately for the main stream (called clear stream) or the secondary stream (called the fluent stream). The secondary stream is used for the mobile app live view feature.

    Review - Reolink C2 Pro vs. C1 Pro - Settings Encode - VueVille

    The network section lets you switch between static and dynamic IP allocation (DHCP), and also adjust many other settings such as the various ports used, set up a dynamic DNS ping, email notification setup, FTP settings, and push notifications. I was happy to see that uPNP is disabled by default – this is a great security feature. When ONVIF is available you really do not need uPNP.

    Okay but how does the Reolink app manage to access the C2 Pro and receive push notifications even when you are outside your local network? Well its got to be that favourite protocol of every security camera manufacturer, P2P! Except, Reolink doesn’t call it that – you are looking for the UID setting. It is on by default which is fine for making the camera super easy to set up but for power users like me, I don’t need the C2 Pro to poke a hole through my network and connect to Reolink’s P2P servers. I have my super secure way of accessing my local network remotely through OpenVPN, so I immediately turned off the UID P2P feature.

    Web Admin Page - Reolink C2 Pro Review Pan-Tilt Indoor Security Camera - VueVille

    Adding a microSD card for motion detection recording

    I inserted a microSD card into the SD card slot. I had to push the card all the way into the slot before it click-locked. I then formatted the card through the web admin page. The camera then automatically rebooted and the microSD card was ready for use.

    Web admin page - Reolink C2 Pro Review Pan-Tilt Indoor Security Camera - VueVille

    A word of warning here, by default the camera automatically will then start recording 24/7 to the SD card. I would have been happier to see the default set at ‘None’ or ‘Motion’ instead of ‘Normal’.

    Mobile Push Notifications

    Push notifications can be set up based on the time of the day. Remember that push notifications will not work outside your local network if you switch off P2P though.

    Web Admin Page - Reolink C2 Pro Review Pan-Tilt Indoor Security Camera - VueVille

    Adding the Reolink to QNAP Surveillance Station

    The C2 Pro supports ONVIF, so I was easily able to add it to my QNAP TS-253A’s Surveillance Station app. I first created an additional user for the NAS using the web admin page of the C2 Pro.

    Performance

    The C2 Pro is a 5 Megapixel camera that can do 25 frames per second, so its no surprise I found things ticking along nicely throughout the review with no slowdowns, frame stutters or any performance issue really.

    Let’s look at the default settings the Reolink C2 Pro comes with from the factory:

    Main stream: 5MP @ 25fps and 4Mbps

    The default bitrate of 4Mbps is better than the C1 Pro’s default rate of 3Mbps.

    Since these are the defaults, I ran my day and night tests at these settings.

    In the System>Performance section of the web admin page, I could see that while idling the processor usage ranged between 30% and 35%. When motion was detected this went up to around 50%, so there was always sufficient headroom for the camera’s processor.

    Video quality

    Video captured was super crisp and detailed both during the day time and in total darkness, in line with my expectations for a 5 Megapixel IP camera.

    Here are the motion detection triggered videos recorded at the default 5 Megapixel resolution, at 25 fps and 4 Mbps bitrate:

    [wpsm_tabgroup]
    [wpsm_tab title=”Daytime Indoors video”][wpsm_video]https://www.youtube.com/watch?v=btRGTOk5Tys[/wpsm_video][/wpsm_tab]
    [wpsm_tab title=”Night-time Indoors video”][wpsm_video]https://www.youtube.com/watch?v=o8LxXz59hWk[/wpsm_video][/wpsm_tab]
    [/wpsm_tabgroup]

    There was no blurring of the video and there were no dropped frames.

    Motion detection

    The C2 Pro is able to do both pre-recording and post-recording. This means the camera is able to record not just what happens after motion was triggered but 5 seconds before the trigger as well. This is a great feature and something that I always look for in a security camera.

    The post-record feature lets you decide how many seconds the camera should record after the last motion trigger. The default is 15 seconds.

    Night vision

    The Infrared LEDs are reasonably powerful and can light up a decent sized room. There are no settings to control the brightness of the LEDs and there are no advanced features to dynamically control the infrared light output.

    Audio quality

    Just like most indoor security camera, the C2 Pro supports 2-way audio. Usually the implementation in most manufacturers’ native apps mutes the audio when you activate the microphone. In other words they have half-duplex audio, not full-duplex. Ideally to use the camera as an intercom, you need 2-way full duplex audio.

    Interestingly Reolink has not claimed full duplex audio, however the Reolink app doesn’t mute the incoming audio when you press the microphone button. You can continue to hear what the person at the other end is saying when you are speaking. So the C2 Pro actually supports full duplex audio.

    So how well does it work in practice? The audio quality is great and the dual speakers do a great job in reproducing audio. But there is a noticeable lag, however slight, in audio playback and this makes the full duplex capability less useful. We found ourselves using the Reolink C2 Pro more like a walkie-talkie just like the Amcrest ProHD.

    PTZ performance

    If you are planning to use the C2 Pro as a baby monitor with 2-way audio, you will be interested in how much noise it makes while panning and zooming.

    Now the C1 Pro hardly makes a sound and so made a great baby monitor. Unfortunately the C2 Pro is a tad louder during the startup dance and for all PTZ motions. Not as loud as my Amcrest but definitely louder than the C2 Pro.

    One other drawback I found is that the motion detection stays active even when you use the Pan-Tilt controls which means the camera records a motion detection clip each time you use the PTZ controls.

    Wireless performance

    I tested the camera over both Ethernet and Wi-Fi. But you know Ethernet is easy for any camera in 2019. What really matters is how good the Wi-Fi connection and performance is. The C2 Pro boasts of 2T2R MIMO antennae for improved wireless performance. So I moved the camera to the farthest point in my house to see how the Wi-Fi did. Over both 2.4GHz and 5 GHz, the C2 Pro was stable and performed just as if it was connected over Ethernet.

    Mobile app live view

    I first installed the Reolink Android app on my phone when I reviewed the RLC-423 PTZ. I then added the Reolink Argus, the Reolink C1 Pro and now the C2 Pro. I have been quite impressed with the fluid intelligent design of the mobile app, its definitely something that Hikvision for example can learn from. Where the iVMS app is clunky and often doesn’t work, the Reolink app simply delivers.

    Reolink Android App PTZ Controls - Reolink C2 Pro Review Pan-Tilt Indoor Security Camera - VueVille

    Live view on the app can be by camera or you can simultaneously view multiple Reolink cameras. There is a handy PTZ joystick button and the camera is quite responsive when you move the joystick around. Over a remote connection, there was a 0.5 second delay between moving the PTZ controls and the video changing.

    Mobile app push notifications

    So what should you be looking for when it comes to push notifications? The speed and reliability of the push notifications reaching you. You want the camera to send you push notifications immediately after it detects motion. Especially if you have configured email alerts, SD card recording at 5 Megapixel recording and push notifications, inferior cameras may struggle but not the C2 Pro.

    Inside my local network I got push notifications on my phone instantaneously and on remote networks there was a delay of just 1 second which is very impressive. The success rate of receiving the push notifications over multiple motion triggers was a solid 100%.

    Reviewing recorded footage

    So this is how you access the built-in NVR feature of the C2 Pro. Clips recorded on the microSD card can be accessed either via the web admin interface or the Reolink mobile app.

    Using the web browser interface

    You can choose a date to review and if motion triggered recording is enabled, all these clips will be shown on the timeline. You can roll the mouse wheel to zoom in and out of the timeline to select specific clips. Click anywhere on the timeline and it will jump to the next recorded clip and then keep playing one clip after the other sequentially.

    There is a handy download button which lets you download multiple clips to your computer. Overall great implementation and a very useful feature.

    Using the mobile app

    The Android mobile app also can access the built-in NVR feature of the C2 Pro. It works just like the web interface – you can choose the date to review and either let it play one motion triggered clip after the other or pick a specific point on the timeline.

    Verdict

    If you need the extra level of detail that 5 Megapixels provide, then the Reolink C2 Pro is the best affordable indoor PTZ you can buy today. But if super-quiet operation is more important, go for the C1 Pro instead.

    The Amcrest ProHD is available with PoE whereas the Reolink doesn’t have PoE. It would be nice to have the option of choosing between PoE and Wi-Fi.

    [review]

    Where to buy

    [easyazon_link identifier=”B07LH2RS77″ locale=”US” tag=”vueville.com-eaz-20″]Check Price on your local Amazon site[/easyazon_link]

    (* = affiliate link / image source: Amazon Associates Program)

    10% off on Reolink.com

    [wpsm_offerbox button_link=”https://shareasale.com/r.cfm?b=853739&u=1208657&m=65309&urllink=reolink%2Ecom%2Fproduct%2Fc2%2Dpro%2F&afftrack=” button_text=”Get Offer Now!” title=”Use code vureo10off” description=”Reolink C2 Pro, 5MP indoor PTZ security camera” thumb=”https://cdn.reolink.com/wp-content/assets/2018/11/c2-pro.png” logo_thumb=”https://cdn.reolink.com/wp-content/uploads/2017/02/reolink-logo.png?sv=1556192927″ ]

  • Seagate IronWolf vs. Barracuda – Hard Drives Compared

    Seagate IronWolf vs. Barracuda – Hard Drives Compared

    One of the common hard drive comparison requests I get from my readers is for the Seagate IronWolf vs. the Seagate Barracuda.

    This is quite interesting because the IronWolf is a NAS-focused drive and the Barracuda is an internal hard drive for PCs. Both are available in 2.5″ and 3.5″ sizes and a wide range of capacities.

    Let’s take a closer look at how the Seagate IronWolf differs from the Barracuda.

    Seagate Ironwolf vs Barracuda Hard Drives Compared - VueVille

    A quick note: As an Amazon Associate I earn from qualifying purchases. This post contains affiliate link(s). An affiliate link means I may earn advertising or referral fees if you make a purchase through my link, at no extra cost to you.

    Seagate IronWolf NAS drive vs. Barracuda Internal Hard Drive – Comparison Table

    [table id=79 responsive=scroll /]

    (* = affiliate link / image source: Amazon Associates Program)

    Biggest difference

    The Barracuda uses the inferior SMR drive recording technology, whereas the IronWolf uses the much better CMR technology.

    Performance

    While comparing these drives, we should be mindful that these are very different drives, created for very different applications, and have different price points for the same capacity.

    Comparing real-life benchmarks of the Ironwolf 4TB vs. Barracuda 4TB, overall the IronWolf is much faster with an effective speed advantage of 30%.

    Reliability

    While we may not have specific reliability data for the Barracuda drives, one cloud storage provider regularly publishes drive failure data for all the drives it uses including the Ironwolf – Backblaze.

    Looking at the latest Backblaze data, we can see that Seagate’s reliability in general is a mixed bag. At lower capacities, they seem to be more reliable than other brands but at higher capacities they have higher failure rates.

    Source: BackBlaze

    Looking at the specs, the IronWolf has a much higher 27/7 operation workload of 180 TB/year vs the Barracuda’s 55 TB/year. Even if your data requirements are within the Barracuda’s rating, I wouldn’t recommend using it as a NAS drive. It uses SMR and that’s going to give you headaches when it comes to RAID rebuilding time.

    The Barracuda doesn’t have rotational vibration sensors, which the IronWolf does have. Also worth noting is the similar non-recoverable Read Errors Rate of both drives.

    Noise Levels

    Seagate doesn’t say how loud the Barracuda’s get but as they are desktop hard drives you would expect them to be louder than the IronWolf drives.

    VueVille Verdict

    If you are looking for hard drives to use in a NAS, my advice is to stick with the NAS-specific models such as IronWolf. These have a much higher workload cycle and have features such as rotational vibration sensors to prolong the drive’s life. They also have a higher quality warranty if things do go wrong.

    However if all you need is a desktop hard drive, the Seagate Barracuda will probably suffice. Just bear in mind that these drives are SMR. SMR technology renders these drives poor choices for heavy write applications. So if your application requires sustained write performance, go for CMR-based drives such as the IronWolf, IronWolf Pro, WD Red Plus or WD Red Pro.

    Where to Buy

    [easyazon_image align=”center” height=”160″ identifier=”B01LOOJBQY” locale=”US” src=”https://m.media-amazon.com/images/I/41rpJjBRX4L._SL160_.jpg” tag=”vueville.com-eaz-fbox-20″ width=”124″]
    Seagate IronWolf NAS Drive
    [easyazon_link identifier=”B01LOOJBQY” locale=”US” tag=”vueville.com-eaz-fbox-20″]Check Amazon Price*[/easyazon_link]
    [easyazon_image align=”center” height=”160″ identifier=”B0713R3Y6F” locale=”US” src=”https://m.media-amazon.com/images/I/41uV9lS1bKL._SL160_.jpg” tag=”vueville.com-eaz-fbox-20″ width=”128″]
    Seagate BarraCuda HDD
    [easyazon_link identifier=”B0713R3Y6F” locale=”US” tag=”vueville.com-eaz-fbox-20″]Check Amazon Price*[/easyazon_link]

    (* = affiliate link / image source: Amazon Associates Program)

  • Hikvision vs. Lorex – The Most Popular IP Cameras Compared

    Hikvision vs. Lorex – The Most Popular IP Cameras Compared

    Hikvision and Dahua are the two most common brands that DIY IP camera enthusiasts flock to. But for those who are more budget conscious, there are other brands such as Lorex, Swann, Amcrest, Reolink. These are also some of the IP camera brands that I get the most questions about.

    In this second post of the IP camera brand comparison series, I am going to do an in-depth comparison of Hikvision vs. Lorex. In case you missed the first post in this comparison series where I compared Hikvision vs. Dahua, do go and check that out too.

    Lorex has a complex history of shifting strategies when it comes to IP cameras. For the longest time, their IP cameras were intended to be used only with their own NVRs. In other words, you were not allowed to venture outside their ecosystem. This was totally against the ethos of openness and inter-operability that I champion here at VueVille. That’s why I never recommended them in our best outdoor and indoor IP camera roundups.

    Then in February 2018, Dahua acquired Lorex and soon afterwards Lorex cameras started supporting ONVIF and RTSP protocols. But recently they removed that support just as Dahua sold Lorex to Skywatch, a Taiwanese company.

    So we have a somewhat strange comparison on our hands – Hikvision with their IP cameras that are compatible with other brands, and Lorex with their proprietary IP cameras that work only with their own NVRs.

    [wpsm_titlebox title=”Contents” style=”main”][contents h2 h3][/wpsm_titlebox]

    A quick note: This article may contain affiliate links. If you click on one of these links and then purchase something, we may receive a fee. This does not cost you anything extra. Also note that Hikvision and Dahua do not consider certain platforms including Amazon as an authorized seller platform. So if you need warranty support please purchase from authorized resellers of Hikvision and Dahua products in your country.

    Hikvision vs Lorex - The Most Popular IP Cameras Compared - VueVille

    Hikvision vs. Lorex – the Stories behind the Brands

    Hikvision

    Unlike Lorex, Hikvision is not a retail brand. They are an OEM and primarily cater to professional installers. They are not really interested in retailing to the general public. But their affordable DIY IP cameras with powerful motion detection features and great build quality attracted DIY-ers like crazy. That’s also the reason I bought my first IP camera, the Hikvision DS-2CD2032-I back in 2015.

    A couple of years ago, they launched their retail brand EZVIZ. Confusingly, EZVIZ used to be the name of their cloud app as well. Anyway the EZVIZ models are dumbed down versions of the Hikvision cameras and are not worth spending any money on. What about HiLook? Same story. That’s why I am focusing on the main Hikvision brand.

    The biggest concern I have with Hikvision is not so much about their cameras, but who owns the company. The Chinese government owns at least a partial stake in Hikvision. This creates a few ethical and moral quandaries that I won’t go into here – you know what I’m talking about.

    If you live in the USA, there’s one more reason to avoid Hikvision cameras – the US government has recently banned the sale and import of new Hikvision products into the USA unless certain conditions are met. They are still being sold by their authorized retail seller BH Photo though. Of course, you can always get them from AliExpress as most of us have always done.

    From a technical standpoint, you should treat any security camera the same way – with maximum suspicion that they may be ‘dialing home’ to their manufacturer’s own servers and leaking your data. So lock them down using Virtual LANs (VLAN) and strict firewall rules like I have in my DIY home security camera system.

    Lorex

    Lorex was founded in 1993 and has head offices in Markham, Ontario, Canada and in Linthicum, Maryland, USA. They have product warehouses in Markham, Indiana and California.

    But first let’s start with the company FLIR, better known as the high-end camera manufacturer who revolutionized thermal imaging for the military and industrial markets. They acquired Lorex in 2012 for around $60 million seeking to lower the cost of thermal imaging and open it up to the retail market.

    So for the next 6 years they tried to penetrate the DIY and SMB markets. During this period, their main OEM supplier was Dahua. In February 2018, however, FLIR exited the DIY security camera space by selling Lorex to Dahua. Until November 2022, they operated as a subsidiary of Dahua. So effectively, Lorex was a Dahua brand between February 2018 and November 2022.

    As mentioned in my intro above, Dahua has now sold Lorex to Skytech, a Taiwanese cloud services company. The disappearance of ONVIF and RTSP support from recent Lorex models is probably a sign of things to come.

    8MP 4K IP Camera Duel – Hikvision DS-2CD2085G1-I vs. Lorex E892ABW

    Before we go any further, I need to point out that the biggest difference between Hikvision and Lorex is this: Hikvision cameras can work in standalone mode, or with Hikvision NVRs, or even any 3rd party NVR that is ONVIF compliant.

    On the other hand, Lorex cameras will work only with Lorex NVRs and that too select Lorex NVRs. Simply put, Lorex cameras work only within the Lorex eco-system.

    Hikvision cameras on the other hand which will work with any 3rd party ONVIF/RTSP compliant system. Okay now let’s get into the details.

    Hardware features

    The Hikvision camera I’ve selected has the term ‘Darkfighter’ in its marketing material and what gives it strong low light performance. This is really due to the 1/2″ sized CMOS sensor whereas the Lorex has a 1/2.8″ CMOS sensor. The Lorex is simply outclassed here by the much better Hikvision sensor.

    The size of the sensor has a huge bearing on the low light ability of a camera, whether it be a camcorder or a security camera. The larger the sensor, the greater its ability to gather light and so do well in low light conditions. But as you cram in more and more pixels into the same size sensor, they get smaller and smaller, which adds noise. Noise is the bane of low light video and reduces the detail that you can get out of your video.

    So while security camera manufacturers have pushed pixel count to 8MP and beyond, they have not always increased the sensor size proportionally. While the Hikvision has true 120dB Wide Dynamic Range (WDR) to help improve video quality, the Lorex doesn’t. This leaves the Lorex at somewhat of a disadvantage, even as it claims HDR support.

    When it comes to minimum illumination required, again we see divergence. Hikvision can do a minimum illumination of 0.01 lux and 0 lux with IR on. Lorex doesn’t provide this information. Both cameras have an automatic IR cut filter that will switch to black and white infrared vision when it gets dark. So far, that’s standard IP camera behaviour.

    However, Lorex claims a ‘colour night vision’ feature whereby you still get colour video under low light conditions. So this feature still requires external illumination. So I fail to see how this is something special – the Hikvision has a much larger sensor and probably even better low light colour vision ability! I see this so-called feature as a marketing gimmick and nothing more.

    What about the Lorex’s LED lights though? They look like LED spotlights that you can leave permanently on through the night, but actually they are only warning LEDs that are motion-activated or activated on-demand in the mobile app. If these lights were at least proper spotlights, then Lorex’s colour night vision claim would make more sense (Hikvision has such models).

    The Lorex has 2-way audio using an onboard microphone and speaker combo, with the speaker doubling up as a siren deterrent. This Hikvision model however has neither.

    Both cameras have on-board SD card for local storage of video clips and snapshots.

    Winner: Hikvision

    Software features

    The three most important software features that the Hikvision has are ONVIF support, the built-in NVR feature, and the advanced motion detection features that help reduce false alerts.

    Hikvision cameras support ONVIF & RTSP. Lorex however has recently removed all mentions of ONVIF support on their product pages (their datasheets never mentioned it anyway). Lorex has also confirmed in their website Q&A section that this camera doesn’t support ONVIF.

    Why is ONVIF support important? ONVIF support ensures that your camera will work with ONVIF-compliant equipment from 3rd party manufacturers. ONVIF ensures that your camera will work with standards-compliant equipment from 3rd party manufacturers. This is why you can add a Hikvision camera to your ONVIF-compatible NVR or DIY NAS NVR.

    RTSP allows even non-ONVIF equipment (such as software) to access the security camera’s video stream. Examples are video players like the popular VLC player, and Blue Iris PC NVR software.

    So this is a slam dunk for Hikvision.

    Both Hikvision and Lorex have on-board storage but only Hikvision cameras have the built-in NVR feature – because Hikvision cameras are designed for standalone operation (don’t need an NVR).

    The Hikvsion IP cameras can do basic motion detection, advanced motion detection, dace detection and can send email/push alerts – all without an NVR. This is local processing in action. The Lorex cameras cannot do any of this on its own. It is just an IP camera with no smart features unless its connected to an NVR.

    Motion Detection ability

    I classify motion detection ability into three categories:

    1. Basic motion detection – this is detecting just simple pixel changes, results in false alerts.
    2. Advanced motion detection – like line crossing, intrusion detection, which result in fewer false alerts.
    3. Smart detection – person / face / vehicle / pet detection, the best method for eliminating false alerts.

    Hikvision supports basic, advanced and 1 single smart motion detection method of face detection.

    The Lorex doesn’t have the wide array of advanced motion detection alerts that Hikvision has, such as line crossing, intrusion detection etc. which are all great for reducing false motion detection alerts But it does have person and vehicle detection. These are equally effective at reducing false alerts.

    But as mentioned earlier, the Hikvision is capable of standalone operation. It can record motion detection triggered clips, take snapshots, and send out email alerts and push notifications to the Hikvision app on mobile devices without an NVR or PC.

    The Lorex can do none of this by itself, you have to buy a compatible Lorex NVR.

    The Hikvision camera I have selected doesn’t have the AcuSense feature which reduces false alarms by ignoring birds, animals, lights and movement of trees.

    As part of a DIY NVR system that uses QNAP QVR Pro, Blue Iris or Home Assistant, only Hikvision fits the bill.

    Winner: Hikvision

    Warranty

    Hikvision products come with a 3-Year Warranty from authorized dealers only. Lorex has a 2 year warranty as standard, but can be extended to 3 years or 5 years for an extra fee.

    Detailed Comparison Table

    Here’s a summary in a nice and easy table:

    [table id=54 responsive=”scroll” /]

    Verdict – Hikvision vs. Lorex

    The Hikvision handily beats the Lorex thanks to its flexibility of operation modes in a DIY CCTV system – standalone, with a Hikvision NVR, or with any 3rd party NVR system. It also has advanced motion detection methods that Lorex doesn’t have.

    Also check out the other recommendations on our best outdoor IP cameras list.

    Where to buy

    • Hikvision DS-2CD2085G1-I at BH Photo (authorized retailer).
    • Lorex E892ABW at [easyazon_link identifier=”B086BXC2R4″ locale=”US” tag=”vueville.com-eaz-20″]Amazon[/easyazon_link]

    (* = affiliate link / image source: Amazon Associates Program)

    Related Comparisons