A few years ago we reviewed the Reolink C1 Pro, a 4 Megapixel wireless pan-tilt indoor security camera. We loved it so much that it became our main nursery baby monitor. Now Reolink has launched another 4MP Pan-Tilt, the E1 Pro which is an even more affordable option than the C1 Pro. What’s more, it supports person and pet detection and even auto-tracking!
So how does the E1 Pro perform, what features if any have been sacrificed and ultimately should you buy it? To find out, we put a review sample that Reolink provided through its paces in this hands-on review.

A quick note: As an Amazon Associate I earn from qualifying purchases. This post contains affiliate link(s). An affiliate link means I may earn advertising or referral fees if you make a purchase through my link, at no extra cost to you.
Specifications
[table id=61 responsive=scroll /]Unboxing


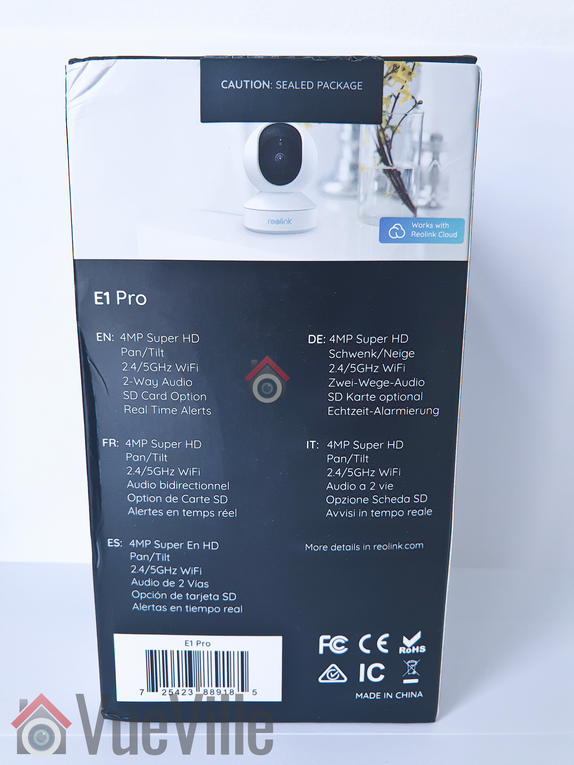
What’s in the box


- Reolink E1 Pro PT Indoor Wireless Security Camera
- DC 5V wall adaptor
- Power cable
- Wall mounting bracket
- Quick Start guide
- What’s next booklet
- Drilling templates
- Reolink surveillance notification sticker
- Screws and rawl plugs
Design & Features

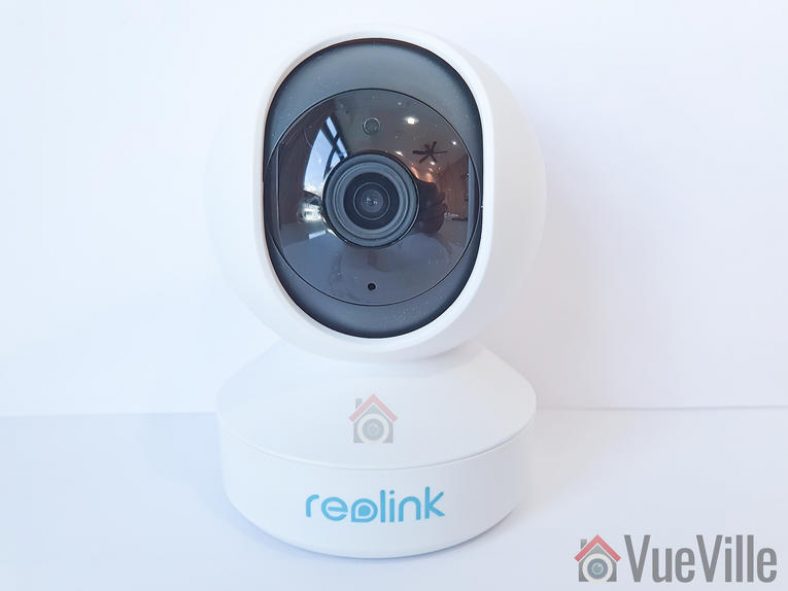
The E1 Pro is different from any other Reolink camera I have seen. It is very compact and weighs just 200 grams.
The camera can be divided into 3 parts – the black lens housing, the white tennis ball shaped body, and the white base. The tennis ball design of the body which surrounds the black lens housing is a neat design. Overall, the high-quality fit and finish of the camera exudes a premium aura that belies its budget price.
So how does this Pan-Tilt camera work? When panning, the entire upper body revolves around the base. When tilting, only the black lens housing rotates up or down.
The black lens housing has a matte design and is super smooth to the touch. The daylight sensor is integrated into the ring-type 8 Infrared LEDs concealed smartly around the lens. If you look carefully you can see the red tinge of the Infrared LEDs under the darkened glass surrounding the lens.
The built-in microphone is placed just under the lens. The SD card slot and the reset button are also placed here, which is actually a genius idea. When the camera is in its default position of looking straight ahead, the SD card slot and the reset button are totally concealed! Tilt the lens up all the way using the Reolink mobile app or PC Client software and you can access the slot and the reset button.


The left and right sides of the body are bare but you will find the built-in speaker on the back of the lens housing.

The base of the E1 Pro has just the AC power input. Unusually this is not a microUSB design.
Update: Reolink has recently added an Ethernet port to the E1 camera lineup, and so the E1 Pro can also be used as a wired camera.
Flip the camera over and you will find the slot for fitting the wall bracket and a sticker with the QR code for setting up the camera in the Reolink mobile app.

The dual-band Wi-Fi antennae are prominent by their absence. Yes, the antennae are built-in but in my testing this doesn’t seem to affect range noticeably. Just like the C2 Pro, the 5 Ghz Wi-Fi is a great feature to have as most of the competitors are still sporting just 2.4 GHz Wi-Fi. The higher bandwidth capacity of the 5 Ghz band comes with a significant range disadvantage though.
All in all, the camera feels light yet solid in construction. The contrasting colours and the matte finish of the black lens housing really makes the E1 Pro look and feel far more expensive than it really is.
Installation & Setup
The Reolink E1 Pro comes with a very good quick start guide which is a double-sided glossy booklet, just like the other Reolink cameras I have reviewed. The general introduction section illustrates and labels the different parts of the camera such as the daylight sensor, the built-in mic, the speaker, the indicator LEDs and the various connections.
There is also a helpful camera connection guide for those who are new to security cameras. The setup is voice guided (just like the Reolink Argus) and can be done fully wireless. I would expect most people to use the camera’s Wi-Fi option rather than the Ethernet port, so that’s what I have also done in this review.
So you have two options for setting up the camera:
- Setup using a smartphone or tablet using the Reolink app, or
- Setup using a laptop and the Reolink Client software for PC
Reolink recommends the smartphone app method, so that’s what I did.
- Install the Reolink mobile app. I had it already installed since I use the Reolink C2 Pro, C1 Pro and the Argus all of which I have reviewed in the past.
- Power on the E1 Pro. You will hear a voice message ‘Please run the Reolink app and add the camera to set it up’.
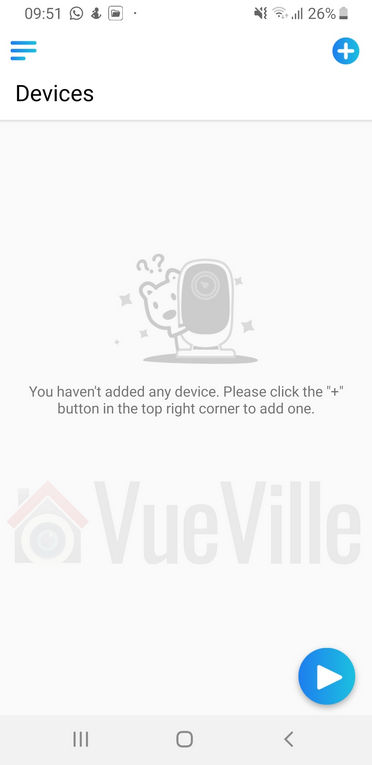
- In the Reolink app, click the plus button at the top right to add the camera, and choose the ‘Connect to Wi-Fi option’.

- I was not happy to see the app asking for location access, feel free to deny it – the setup will continue successfully anyway.
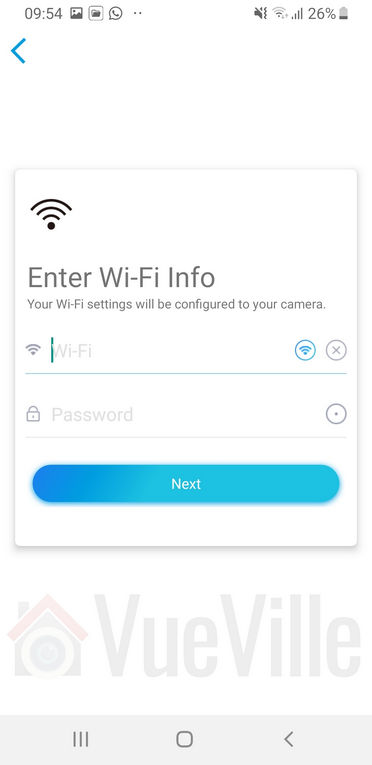
- Enter your Wi-Fi info into the app. The app will then transfer it to the camera in the next step.
- Scan the QR code on the bottom of the camera base.
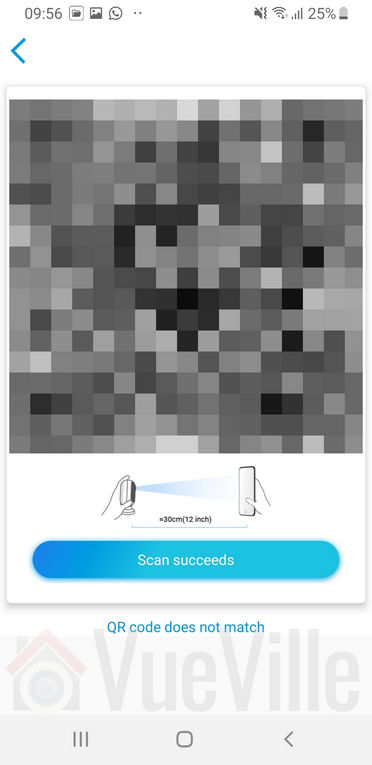
- The camera will then attempt to connect to your Wi-Fi network.

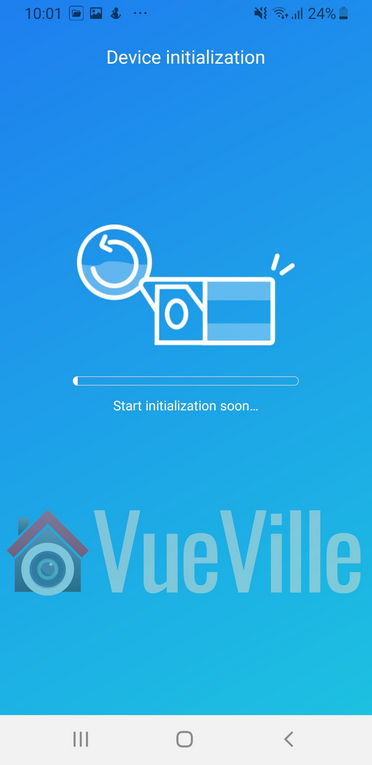
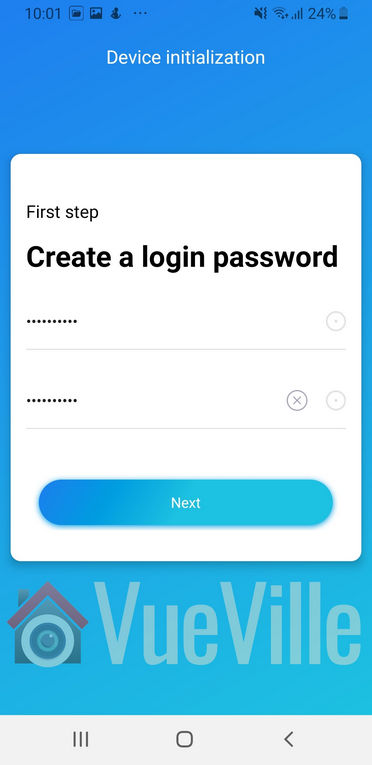
- After the camera has initialized, create a login password to complete the setup process.
Configuring the E1 Pro
The only way of configuring the camera is using the Reolink mobile app. Unlike the C1 Pro, the E1 Pro does not have a built-in web server where you can access the advanced settings. In that respect it is more like the Reolink Argus. In the next section, I will cover the camera configuration also.
Using the Reolink mobile app
The Reolink mobile app has always been a reliable and well-designed app. I have never experienced the app crashing on my Samsung Galaxy S9.
As Reolink started introducing cameras such as the Argus without a built-in web server, it became essential for the app to be able to fully configure the camera. The E1 Pro leverages the app very well and the app allows you almost full control over the camera.

When you open the app after setting up the camera, you are greeted with the familiar camera selection list with a static preview image. What’s new in the app is the ability to group cameras together and apply Scenes or quick modes to them quickly – this is a great feature if you have multiple Reolink cameras but dont have an NVR. You can create custom scenes, say, ‘Arm alarm’ to instantly enable motion detection recording, push/email alerts, and audio buzzer alarms when you leave the home. Then when you return you can just activate a ‘Disarm alarm’ scene to deactivate all alarms/alerts.
Touching the camera preview image takes you to the Live-view screen of the E1 Pro. Here you can adjust the Pan-Tilt camera position, use the 2-way audio talk feature, record a clip or take a snapshot. There’s also a nifty audio buzzer button that will briefly sound the camera alarm buzzer. Its not very loud but should be enough to scare away an intruder!
The playback button at the bottom right is for accessing the built-in NVR feature of the E1 Pro. More on that later. Back in the app home page, you can touch the gear icon of the E1 Pro to access the camera settings.
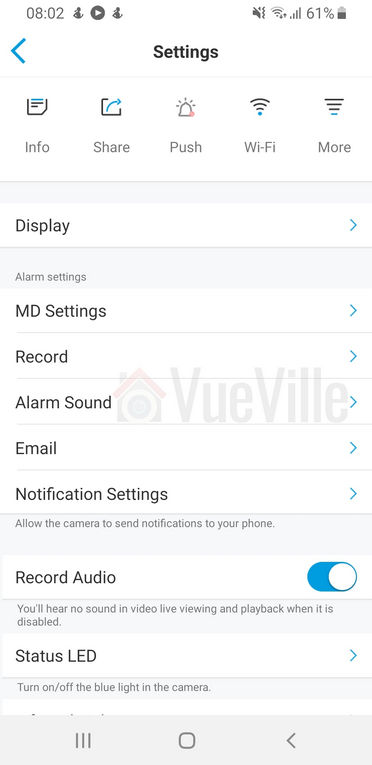
You can either activate/deactivate individual alert settings or use the Scenes feature mentioned earlier to control the camera behaviour. This is my favourite way of managing the alert settings of the E1 Pro.
Under Display, you can adjust the video stream settings – you can choose between 4MP, 3MP, 1080p and 720p for the main stream. 4MP is the default.

You can also perform user management here, such as setting up additional users for your family members’ smartphones.
The E1 Pro has the usual P2P and UID features but the app doesn’t give access to these settings. If you want to change these and other advanced settings such as port numbers, you can do it through the Reolink Client PC app.
Built-in NVR Feature
The built-in NVR feature of the E1 Pro allows you to record video clips without having to buy a separate NVR. What is this built-in NVR feature? Basically, pop in a microSD card and the camera can record motion detection triggered video clips or snapshots to the SD card.
This means that if you need only a single camera or two in your home , you don’t need to buy a separate NVR just to record video footage (although I strongly recommend it ). The camera can also push notifications to the Reolink app on your mobile phone, send email alerts with attached snapshots or video clips.
Adding a microSD card for motion detection recording
I inserted a microSD card into the SD card slot. I had to push the card all the way into the slot before it click-locked. I then formatted the card through the Reolink mobile app. The camera then automatically rebooted and the microSD card was ready for use.
You have several options to control the motion detection recording behaviour. First up is sensitivity, you can go for the default single setting or set up multiple settings for different times of the day.


You can also define the area that the camera should monitor for motion.

The two features above will go a long way in reducing false motion detection alerts.
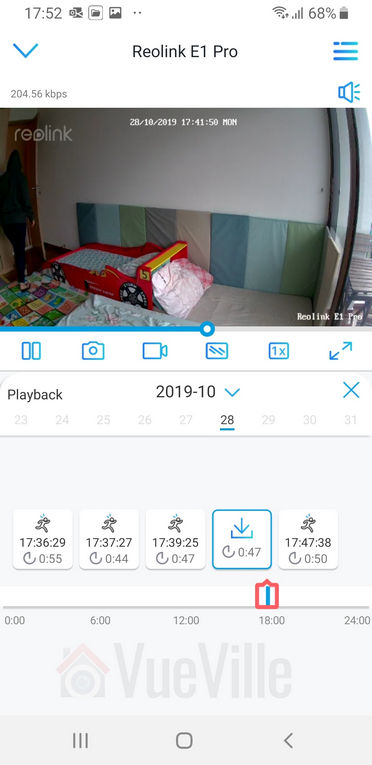
Reviewing recorded footage
There are three ways to view the recorded footage – the Reolink mobile app, the Reolink Client PC software, and manually accessing the clips on the microSD card with a laptop.
Using the mobile app, you can login any time from anywhere to review the footage through a timeline view. The mobile app also identifies each motion detection event so that you can just play those without having to scrub through the timeline.
At first I thought were only the sub-stream clips could be downloaded to the phone and not the main stream. But Reolink guided me to the picture quality icon – tap it and change it to 4MP and you can download the 4MP clips!
You can also do all of the above through the Reolink Client app or remove the SD card and take the video clips off it with a laptop.
Mobile Push Notifications
Use the Scenes feature to control when and how push notifications are delivered to your smartphone.

Remember that push notifications will not work outside your local network if you switch off P2P though.
Adding the Reolink to QNAP Surveillance Station
The E1 Pro supports both ONVIF and RTSP, so I was easily able to add it to my QNAP TS-253A’s Surveillance Station app. I first created an additional user for the NAS using the admin section of the camera app.
The ONVIF port is port 8000, the media port is 9000, RTSP is available at port 554 and RTMP at port 1935.
Performance
The E1 Pro has a 4MP sensor which can record at up to 2560 x 1440 resolution. The maximum bitrate of 4Mbps is lower than the usual 8Mbps of other Reolink cameras.
Let’s look at the default settings the Reolink E1 Pro comes with from the factory:
Main stream: 4MP @ 15fps and 3Mbps
Since these are the defaults, I ran my day and night tests at these settings.
Video quality
Video captured was sharp and detailed both during the day time and in total darkness, in line with my expectations for a 4 Megapixel IP camera.
Here are the motion detection triggered videos recorded at the default settings:
There was no blurring of the video and there were no dropped frames.
Motion detection
The E1 Pro is able to do both pre-recording and post-recording. This means the camera is able to record not just what happens after motion was triggered but 5 seconds before the trigger as well. This is a great feature and something that I always look for in a security camera.
The post-record feature lets you decide how many seconds the camera should record after the last motion trigger. The default is 15 seconds.
Night vision
The 8 InfraRed LEDs placed around the lens in a ring pattern are reasonably powerful and can light up a decent sized room with no trouble.
There are no settings to control the brightness of the LEDs and there are no advanced features to dynamically control the infrared light output.
Audio quality
Just like the other Reolink indoor security cameras, the E1 Pro supports 2-way audio. Usually the implementation in most manufacturers’ native apps mutes the audio when you activate the microphone. In other words they have half-duplex audio, not full-duplex. Ideally to use the camera as an intercom, you need 2-way full duplex audio.
Interestingly Reolink has not claimed full duplex audio, but the Reolink app doesn’t mute the incoming audio when you press the microphone button. You can continue to hear what the person at the other end is saying when you are speaking. So the E1 Pro actually supports full duplex audio.
So how well does it work in practice? The audio quality is great and the dual speakers do a great job in reproducing audio. But there is a noticeable lag, however slight, in audio playback and this makes the full duplex capability less useful. We found ourselves using the Reolink E1 Pro more like a walkie-talkie just like the Amcrest ProHD cameras.
PT performance
If you are planning to use the E1 Pro as a baby monitor with 2-way audio, you will be interested in how much noise it makes while panning and zooming.
I was pleased to find that the E1 Pro just like the C1 Pro hardly makes a sound while starting up, panning or tilting. So it makes for a great baby monitor.
A long-standing issue I have seen in Reolink cameras is that the motion detection stays active even when you use the Pan-Tilt controls. This means the camera records a motion detection clip each time you use the PTZ controls. The E1 Pro is no different here and exhibits the same behaviour.
Wireless performance
The E1 Pro (just like the C2 Pro) boasts 2T2R MIMO antennae for improved wireless performance. So I moved the camera to the farthest point in my house to see how the Wi-Fi performed. Over both 2.4GHz and 5 GHz, the E1 Pro was stable and performed just as if it was connected over Ethernet.
Mobile app push notifications
So what should you be looking for when it comes to push notifications? The speed and reliability of the push notifications reaching you. You want the camera to send you push notifications immediately after it detects motion.
Especially if you have configured email alerts, SD card recording at 4 Megapixel recording and push notifications, inferior cameras may struggle with the workload.
The E1 Pro performed like a champ. Inside my local network I got push notifications on my phone instantaneously and on remote networks there was a delay of just 1 second which is very impressive. The success rate of receiving the push notifications over multiple motion triggers was a solid 100%.
Verdict
The E1 Pro is a stylish yet budget-friendly DIY security camera that simply gets the job done. With its easy voice-guided setup, smart person detection, on-board microSD storage, built-in NVR feature, full duplex 2-way audio, push alerts and dual-band WiFi, the E1 Pro offers fantastic bang for the buck.
DIY enthusiasts will appreciate the availability of RTSP streams & ONVIF compliance which allows the E1 Pro to work with a DIY NAS NVR. Kudos to Reolink for supporting this feature even in this entry-level camera. But they may not be too happy about no web browser access and the max 4Mbps bitrate. Still that’s a small price to pay for this much value.
[review]
Where to buy
(* = affiliate link / image source: Amazon Associates Program)
Leave a Reply