When you are new to the world of smart homes and home automation, controlling your smart home through your smartphone seems super cool.
But once the novelty wears off, you might start missing the simplicity of physical switches. Or you may want to change home alarm modes or run scenes with just a single touch of a button, instead of pulling out your smartphone each time.
After all, a smart home is all about convenience and improving your quality of life.
That’s where the [easyazon_link identifier=”B01NCEJAOD” locale=”US” tag=”vueville.com-eaz-20″]Aeotec Wallmote Quad[/easyazon_link] comes in.
Aeotec used to belong to Aeon Labs, the company founded in 2006 and based out of Silicon Valley. But that’s no longer the case. Aeotec also have another brand that’s popular in the smart home market – Popp. They also are an OEM for Oomi.
Un-boxing
The Aeotec Wallmote Quad is comes in a blue and grey box. As always with Aeotec, the box is no larger than it needs to be and avoids needless plastics and packaging. The front of the box just hsows the Wallmote itself and the rear highlights Z-Wave Gen 5 compatibility and the Z-Wave Plus chipset used. The model number is also mentioned – I got the ZW130-C which is the 868.42 MHz version.
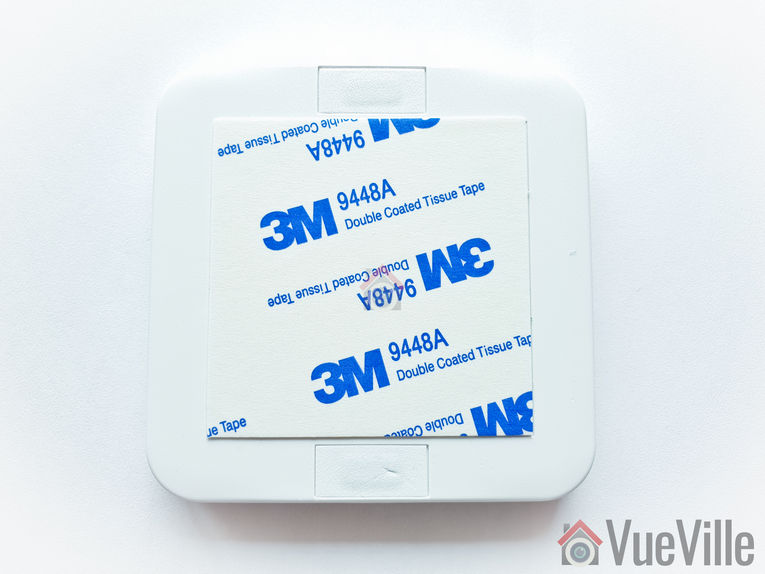
Opening the box yields the Wallmote Quad, a mounting plate for wall mounting , a concise quick start guide, warranty note and a USB cable.
Here’s what the mounting plate looks like:
Specifications
4 touch-sensitive button areas
Multi-colour RGB LED
Sound and haptic feedback (vibration)
Model number: ZW130
Power supply: Rechargeable lithium battery, 3.7 V, 640mAh
Battery charger input: Micro USB port, DC 5V±0.5V, max 1A
Operating temperature: 0°C to 40°C
Relative humidity: 8% to 80%
Operating distance: Up to 394 feet/120 metres outdoors
Design and Hardware Features
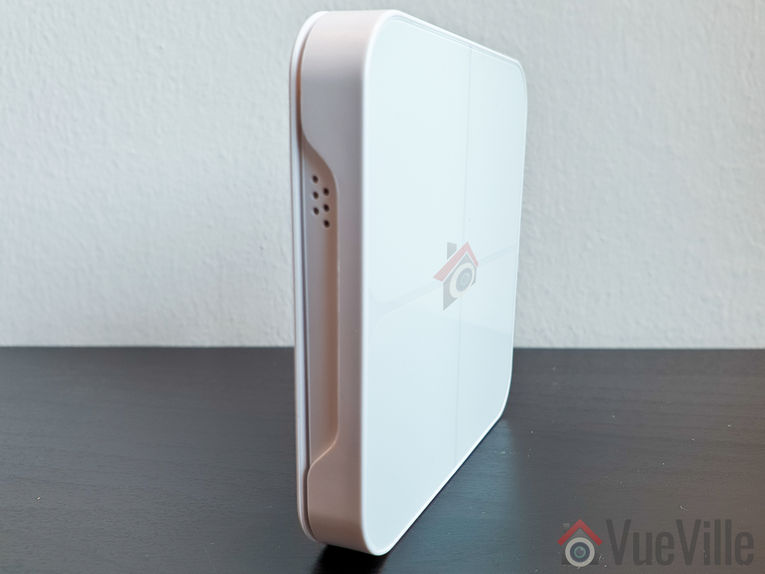
The Wallmote Quad measures just 7.7cm wide and 1.9cm deep (3.0 x 0.4 inches). The front face of the Wallmote Quad is divided into 4 squares, each representing a button area. An RGB LED separates the four buttons and indicates a successful press along with haptic feedback and a beep sound.
The four button areas are capacitive, they do not depress and do not need pressure to activate.
The bottom of the Wallmote has a speaker grill.
The rear of the Wallmote has the Action button, and the micro-USB port for charging the built-in battery.
Software Features
OTA Firmware Updates
The WallMote Quad supports Over The Air (OTA) feature for firmware upgrades. You will need an [easyazon_link identifier=”B00X0AWA6E” locale=”US” tag=”vueville.com-eaz-20″]Aeotec Z-Stick USB controller[/easyazon_link] to use this feature.
My Z-Wave controller software, HomeSeer HS3 supports the Wallmote Quad. Samsung SmartThings doesn’t officially support this remote, but you can make it work by setting up a device handler in the SmartThings IDE.
How to use the Wallmote Quad
The Wallmote Quad can be used to control Z-Wave devices or activate scenes by touching, long pressing or sliding any of the four button areas.
The buttons act as toggle switches when you do a single touch action. Touch once to turn the switch on and touch again to turn the switch off.
When you activate any of the 4 buttons on the front face, the RGB LED will blink blue to indicate successful transmit and receipt of the command by your HA hub. If the command was not acknowledged by the hub, the LED will blink blue to indicate successful transmit but then blink red once because the command was not acknowledged by the hub.
If the battery is low, it will just blink orange. Plug in Wallmote with the USB cable and it will glow solid orange indicating that the battery is being charged.
You can either install the Wallmote in the wall and keep it permanently powered over USB or use it as a portable remote control. This is possible thanks to the 640mAh built-in rechargeable battery.
Installation and Setup
Installing the Wallmote Quad
Select a place or wall to install the WallMote Quad.
Clean the surface with a damp towel to remove any dirt or oils present. When the surface has completely dried, peel the tape backing on the mounting plate away and attach it to the surface.
Now simply attach the Wallmote Quad to the backing plate using the built-in magnets. That’s it.
Pairing the Wallmote Quad
As per the quick start guide, I set HomeSeer HS3 into ‘Inclusion mode’. For this I navigated to Plugins > Z-Wave > Controller Management. Under Actions, I selected ‘Add/Include a Node’ and clicked the Start button.
Then I pushed the ‘Action’ button on the back of the Wallmote Quad.
At first it was solid green for a couple of seconds as per the manual.
It then started flashing orange. HS3 took a minute to set up the Quad and then reported that it had successfully been added to the Z-Wave network.
However the Quad kept flashing orange for some more time before eventually stopping. It did not turn solid green for 2 seconds as the manual said. Nevertheless all the buttons show up in HS3 and work as intended.
In HomeSeer HS3, I now have four switch devices, four dimmer devices (multi-level switch type), a central scene device , a battery status device and a power management device. The central scene device detects press and hold/release actions.
My experience over 2 months of daily use
I tested the Wallmote Quad with an [easyazon_link identifier=”B00X0AWA6E” locale=”US” tag=”vueville.com-eaz-20″]Aeotec Z-Stick Gen5[/easyazon_link] to control my [easyazon_link identifier=”B00VQISQW4″ locale=”US” tag=”vueville.com-eaz-20″]Aeotec LED Bulb 6[/easyazon_link], and an [easyazon_link identifier=”B07PB2HN6D” locale=”US” tag=”vueville.com-eaz-20″]Aeotec Doorbell 6[/easyazon_link].
Performance
The Wallmote was quite responsive and never missed any button presses. By this I mean that whenever the Wallmote beeped and lit up and vibrated to indicate a succesfu button press, HS3 always received the command. The delay between a successful button press and a command being executed, such as turning on a light, was instantaneous.
I used the single press and long press functions. I did not try the sliding gestures, as I don’t see myself using it that way. But if you want to use gestures to simulate a lamp dimmer or fan speed control, you can.
If there’s one quibble I have with the Wallmote, it is this: if you are using it as a portable remote control device, its difficult to say which way is up just by looking at it. There is a slight recess on the lower side where the speaker grill is, so you either have to feel it out or look at the back to figure out which way is up. A solution exists though – use a marker to write on the buttons. I would rather not do this because the device is so pretty.
Wireless Range
My current home is of solid concrete construction and so Z-Wave signals do struggle in general. The mesh network design of Z-Wave networks is how my whole home is reachable with just one Aeotec Z-Stick. Every powered Z-Wave device acts as a repeater.
So I was able to use the Aeotec Wallmote Quad throughout my home without any issues.
Battery life
I charge the wallmote once in 2 weeks on average. This is with light-medium usage (especially as my kids love turning certain scenes on and off).
Verdict
[review]
Where to Buy
Buy the Aeotec Wallmote Quad from [easyazon_link identifier=”B01NCEJAOD” locale=”US” tag=”vueville.com-eaz-20″]your local Amazon store[/easyazon_link].
As the dust settles from Black Friday and Cyber Monday is about to begin, what are the best-selling wireless security cameras? We saw very healthy levels of traffic on our website this weekend and we hope you got some great deals.
Wireless security cameras are great for home monitoring and surveillance. They can be used as baby monitors, pet monitors, or simply to watch your property for peace of mind, especially when you are away. Most of the best-sellers here are indoor cameras, but can also be potentially used outdoors under a porch or somewhere it is not exposed to the elements.
Well, if a lot of people are buying a particular camera, you are going to find a lot more user reviews on the Internet. Also, Amazon who provides the information used in this best-sellers list is bound to have more user reviews as well.
All those users will be using their cameras in different ways for different applications and this will give you a more varied and better understanding of the product than any controlled test or single review can. So check out the list below and we hope you find a camera that suits your needs the most. As always, if you need help choosing a camera for your specific needs, just get in touch with us through the comments section and we would be glad to assist.
Unless otherwise noted, all these cameras are wireless(usually WiFi) and support email alert notifications and/or push notifications.
We have not mentioned prices as they would quickly become outdated. This is because the selling price varies day-to-day and also depends on the deals available. You can click on the ‘Check price on Amazon’ link to see the current offer price and check out detailed user reviews.
Sricam Baby Monitor and Home Security Camera is the best-seller this November and you can see why. Its a 720p HD IP Camera with built-in IR LEDs for night vision, a microSD card slot, a built-in microphone and speakers. It has Wi-Fi and supports the Onvif 2.4 protocol, which makes it possible to add it to an existing DVR/NVR system. As a baby monitor, you will need to use your smartphone to view the video stream. It can also send motion detection email alerts and push notification alerts to your smartphone. The Sricam Baby monitor also has an SD card slot has very good reviews on Amazon.
[easyazon_link identifier=”B075VPKKRJ” locale=”US” tag=”vueville.com-eaz-20″]View on Amazon[/easyazon_link]
Amcrest ProHD 1080P WiFi Indoor Wireless IP Security Camera
The Amcrest ProHD security camera is a massively popular camera and has a 4.5/5 review rating over 455 reviews. The free Amcrest View Lite app lets you easily set up the camera using the QR code on the camera. The high quality Sony image sensor is responsible for the very good image quality this camera can produce. It comes with 4 hours of free cloud storage at the moment but also supports microSD cards which is great if you do not want to use the cloud.
[easyazon_link identifier=”B0145OQTPG” locale=”US” tag=”vueville.com-eaz-20″]View on Amazon[/easyazon_link]
Infant Optics DXR-8 Video Baby Monitor with wireless screen and PTZ
[easyazon_image align=”center” height=”498″ identifier=”B00ECHYTBI” locale=”US” src=”https://m.media-amazon.com/images/I/41YMe3DHAZL.jpg” tag=”vueville.com-eaz-20″ width=”500″]
This baby monitor is a complete set – it comes with a camera and a wireless monitor. The camera is quite unique – it comes with interchangeable lenses. This means that you can choose the lens most appropriate for the area you are trying to cover. A lens with lower focal length will give you a wider area of coverage whereas a lens with a higher focal length will let you zoom in on a specific area. The DXR-8 camera also supports Pan Tilt and Zoom functions from the monitor.
[easyazon_link identifier=”B00ECHYTBI” locale=”US” tag=”vueville.com-eaz-20″]View on Amazon[/easyazon_link]
D-Link Indoor Wireless Network Camera (DCS-932L)
[easyazon_image align=”center” height=”500″ identifier=”B004P8K24W” locale=”US” src=”https://m.media-amazon.com/images/I/41hxnTc4BSL.jpg” tag=”vueville.com-eaz-20″ width=”500″]
D-link is a company that has been around for a long time producing branded affordable wireless home security cameras. This model has a local recording option in the form of either an SD card or a dedicated mini-NVR. If you are confident that you do not need a more elaborate home CCTV system based on industrial grade cameras such as a Hikvision, we recommend the D-Link Camera and Video Recorder kit which lets you:
simultaneously record video and
view real-time or play back recorded video from up to 4 mydlink cameras.
[easyazon_link identifier=”B004P8K24W” locale=”US” tag=”vueville.com-eaz-20″]View on Amazon[/easyazon_link]
Arlo Smart Security – Outdoor HD Camera Security System
[easyazon_image align=”center” height=”234″ identifier=”B00TU7S4LG” locale=”US” src=”https://m.media-amazon.com/images/I/41O55mgGHlL.jpg” tag=”vueville.com-eaz-20″ width=”500″]
The Arlo from Netgear is unique in being battery powered and thus truly wireless. However this is its biggest weakness as well. Security cameras need to be 100% reliable and you just can’t get that from battery powered cameras. So while it is a best-seller, we cannot recommend it as a home monitoring system. If you have a very specific purpose where battery powered wireless cameras are the only option, these are a good bet. Eg. bird-watching, or spying on wildlife in the garden.
[easyazon_link identifier=”B00TU7S4LG” locale=”US” tag=”vueville.com-eaz-20″]View on Amazon[/easyazon_link]
Amcrest HDSeries 720P Indoor WiFi IP Surveillance Camera System
[easyazon_link identifier=”B017L1JOX4″ locale=”US” tag=”vueville.com-eaz-20″]View on Amazon[/easyazon_link]
Foscam FI9821P Indoor Security Camera
[easyazon_image align=”center” height=”500″ identifier=”B07DJ5RSTM” locale=”US” src=”https://m.media-amazon.com/images/I/31YKMYdTgvL.jpg” tag=”vueville.com-eaz-20″ width=”500″]
Foscam is a brand that is well-known to most home security hobbyists. This American company has found great success in the wireless security camera niche and have capitalised on homeowners looking for smart cameras. As a first step into the world of home surveillance, the indoor Foscam cameras are a good choice. However many of our readers have found that for a little more money you can get industrial grade IP cameras that are much more reliable and feature-rich – an example is the very popular [easyazon_link identifier=”B07M9KNJCJ” locale=”US” tag=”vueville.com-eaz-20″]B07M9KNJCJ[/easyazon_link] which has much better image quality thanks to its larger 4 megapixel sensor.
[easyazon_link identifier=”B07DJ5RSTM” locale=”US” tag=”vueville.com-eaz-20″]View on Amazon[/easyazon_link]
Foscam FI8910W Pan & Tilt Wireless Indoor Security Camera
[easyazon_image align=”center” height=”500″ identifier=”B006ZP8UOW” locale=”US” src=”https://m.media-amazon.com/images/I/41-aJHRnlkL.jpg” tag=”vueville.com-eaz-20″ width=”500″]
A solid 4/5 star review rating on Amazon across more than 6000 reviews is proof that this camera delivers at a shockingly low price. It has true night vision thanks to its IR cut filter (the technical name being Infrared-Cut Removable or ICR Filter). An IR cut filter is a mechanical filter that lets the camera see infrared rays in the night time. During the day time, the filter lets the camera function normally thus providing good quality colour images. Always buy a security camera which has an IR cut filter. This is key to getting good quality night videos and photos.
[easyazon_link identifier=”B006ZP8UOW” locale=”US” tag=”vueville.com-eaz-20″]View on Amazon[/easyazon_link]
Samsung SmartCam HD Pro 1080p Full-HD Wi-Fi Camera
Though its not strictly a wireless home security camera, the new Canary all-in-one security device belongs on the best-sellers list because it does so much more. It is proof that a simple integrated security system is of great attraction. We feel that this is still too much of a gadget as its size and form factor does limit your positioning and placement options.
[easyazon_link identifier=”B00NW31YSE” locale=”US” tag=”vueville.com-eaz-20″]View on Amazon[/easyazon_link]
Dropcam Pro Wi-Fi Wireless Video Monitoring Security Camera
No surprise seeing the Dropcam Pro in the top wireless 15 cameras, customers love the simplicity of setup and operation as much as they do the gorgeous styling. Home security can be glamorous too! What we don’t like is the complete lack of local storage options, and the requirement of a cloud subscription for video archives of any length. Cloud storage of something so private like surveillance footage of your home and what happens inside it is simply not our cup of tea. We recommend a local storage option such as the other cameras on this list that have an SD card slot or a dedicated Network Video Recorder (NVR).
[easyazon_link identifier=”B00F9FCW7K” locale=”US” tag=”vueville.com-eaz-20″]View on Amazon[/easyazon_link]
D-Link DCS-5009L Wireless Pan & Tilt Network Camera
Another Pan-Tilt enabled wireless camera, the D-link is priced competitively against the Foscam FI8910W Pan & Tilt. Both models are very similar and support VGA resolution and the faster Wireless-N standard. The D-link website does mention the presence of an IR cut filter, so it matches the Foscam there.
[easyazon_link identifier=”B00M5BX5P4″ locale=”US” tag=”vueville.com-eaz-20″]View on Amazon[/easyazon_link]
Bringing up the tail end of the most popular wireless home security camera list is one of the many other brands that make up this hugely diverse industry. However this camera sets itself apart with its 720p HD resolution, SD card option, 360 degree rotation flexibility and a stylish Dropcam-like shape. The free MiCam IOS and Android app is a standard live-view app. Night vision is missing and apparently the notification that is sent any time someone logs into the camera cannot be switched off, but at this price, can you really complain?
[easyazon_link identifier=”B014FC5QXO” locale=”US” tag=”vueville.com-eaz-20″]View on Amazon[/easyazon_link]
What do you think about these wireless home security camera top-sellers? Did you bag one during Black Friday or planning to on Cyber Monday? Leave a comment below – we love hearing from you!
Here’s this week’s round-up of news articles and blog posts that I have been reading. Most have to do with home security, smart homes, technology in general, but may also relate to my other passions of blogging, investing and personal finance.
I was recently invited to contribute to the Porch blog. Porch is an online service that connects homeowners with local home improvement contractors. This resulted in me being part of the Home Security System Q&A: What Every Homeowner Should Know article.
Some of my favourite questions answered in the article are:
How do I prevent a smart lock from being hacked?
How to choose a pet-friendly home security system?
How important are outdoor sirens??
Yes, this last one was answered by yours truly, so head on over to the Porch blog post to see my answer!
What do you think about the article? Leave a comment below! Have a great weekend everyone!
News
Do Tech Companies Watch Your Home Security Camera Footage? – Consumer Reports
A Paranoid Guide to Fighting the ‘Bugging Epidemic’ – NYT
Turning to Tech: The growing popularity of home security to stay safe – NBC
Wyze and Guardzilla Security Cameras Have Security Risks, Consumer Reports Finds – ConsumerReports
Is your Airbnb host spying on you with a hidden camera? Use this simple trick to find out – Business Insider
How self-monitored home security cameras crack down on crime in Rutherford County – Daily News Journal
In Praise of Ugly and Conspicuous Security Cameras – Wired
SC police turn to Ring, other security cameras that critics call ‘beyond dangerous’ – The Post and Courier
They’ll be watching you: Welcome to SLO’s surveillance state – New Times Slo
Smart Spaces Are Only As Smart As The Sum Of Their Parts – Forbes
US sanctions blur Chinese dominance in security cameras – Nikkei Asian Review
Products & Services
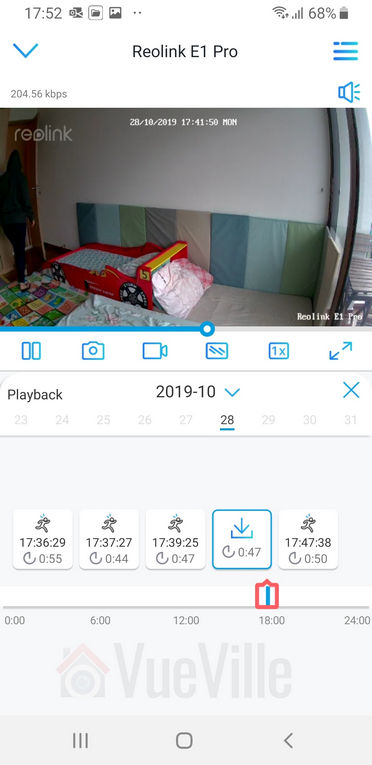
Review: Reolink E1 Pro 4MP Wireless Indoor Pan-Tilt Security Camera – VueVille
UniFi Video G-3 Micro Camera review: The connected camera for security snobs – AndroidCentral
20% Off Plugins | 15% Off Cameras & Interfaces | 50% Off Software | 15-33% Off Hubs at HomeSeer.com
Up to 34% off SimpliSafe 9 Piece Wireless Home Security System w/HD Camera
35% off TP-Link 5 Port Gigabit Ethernet Network Switch
20% off Google Wi-Fi
25% off GE Enbrighten Z-Wave Plus Smart Plug
14% off GE Enbrighten Z-Wave Plus Smart Light Switch
25% off NETGEAR 16-Port Gigabit Ethernet Unmanaged Switch (GS316)
Canary View IP WiFi Home Monitor + 1-Year Premium Service Plan
20% off Beats Solo 3
18% off Aeotec Z-Stick Gen5 USB Z-Wave Stick
15% off Foscam E1 1080P WiFi Outdoor Security Camera System with Rechargeable Battery
8% off First Alert Z-Wave Smoke & Carbon Monoxide Detector Alarm
7% off Kwikset Smart Lock
Reolink RLC-420-5MP
8% off Reolink E1 Pro on Reolink.com
[wpsm_offerbox button_link=”http://shrsl.com/1y37q” button_text=”Get Offer Now!” title=”Use code vuereo8off” description=”8% off Reolink E1 Pro, 4MP indoor PT wireless security camera” thumb=”https://cdn.reolink.com/wp-content/assets/2019/05/e1-pro-340.png?v=1573206170914″ logo_thumb=”https://cdn.reolink.com/wp-content/uploads/2017/02/reolink-logo.png?sv=1556192927″ ]
10% off at Reolink.com
[wpsm_offerbox button_link=”http://shrsl.com/1y8t6″ button_text=”Get Offer Now!” title=”10% off at Reolink.com” description=”10% off selected Reolink security cameras” thumb=”https://cdn.reolink.com/wp-content/assets/2019/05/e1-pro-340.png?v=1573206170914″ logo_thumb=”https://cdn.reolink.com/wp-content/uploads/2017/02/reolink-logo.png?sv=1556192927″ ]
A few years ago we reviewed the Reolink C1 Pro, a 4 Megapixel wireless pan-tilt indoor security camera. We loved it so much that it became our main nursery baby monitor. Now Reolink has launched another 4MP Pan-Tilt, the E1 Pro which is an even more affordable option than the C1 Pro. What’s more, it supports person and pet detection and even auto-tracking!
So how does the E1 Pro perform, what features if any have been sacrificed and ultimately should you buy it? To find out, we put a review sample that Reolink provided through its paces in this hands-on review.
A quick note: As an Amazon Associate I earn from qualifying purchases. This post contains affiliate link(s). An affiliate link means I may earn advertising or referral fees if you make a purchase through my link, at no extra cost to you.
Specifications
[table id=61 responsive=scroll /]
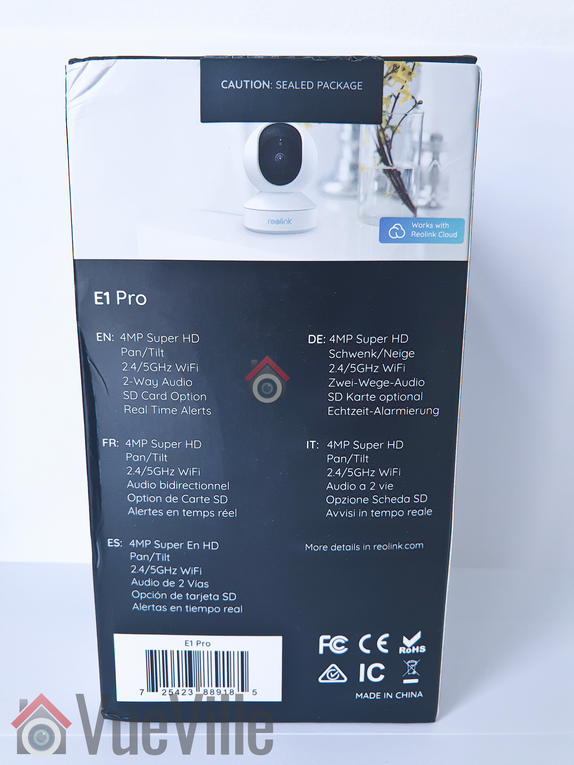
Unboxing
What’s in the box
Reolink E1 Pro PT Indoor Wireless Security Camera
DC 5V wall adaptor
Power cable
Wall mounting bracket
Quick Start guide
What’s next booklet
Drilling templates
Reolink surveillance notification sticker
Screws and rawl plugs
Design & Features
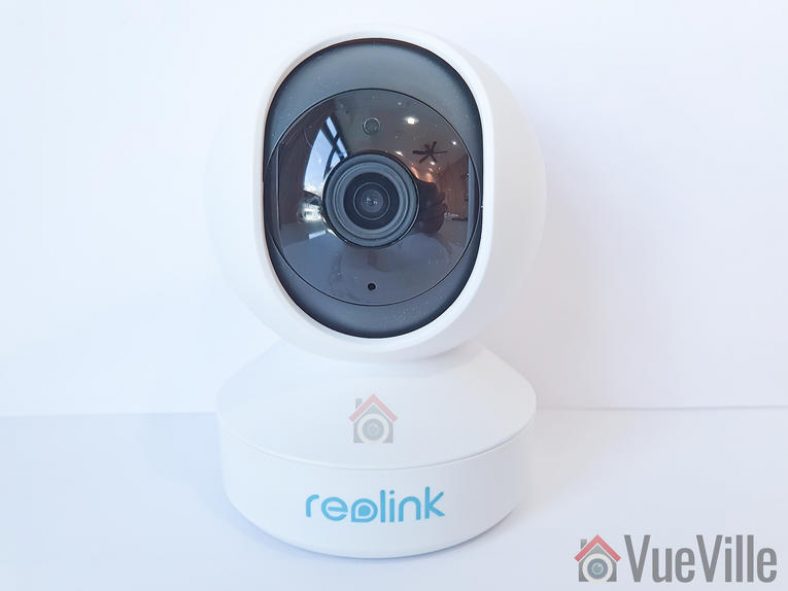
The E1 Pro is different from any other Reolink camera I have seen. It is very compact and weighs just 200 grams.
The camera can be divided into 3 parts – the black lens housing, the white tennis ball shaped body, and the white base. The tennis ball design of the body which surrounds the black lens housing is a neat design. Overall, the high-quality fit and finish of the camera exudes a premium aura that belies its budget price.
So how does this Pan-Tilt camera work? When panning, the entire upper body revolves around the base. When tilting, only the black lens housing rotates up or down.
The black lens housing has a matte design and is super smooth to the touch. The daylight sensor is integrated into the ring-type 8 Infrared LEDs concealed smartly around the lens. If you look carefully you can see the red tinge of the Infrared LEDs under the darkened glass surrounding the lens.
The built-in microphone is placed just under the lens. The SD card slot and the reset button are also placed here, which is actually a genius idea. When the camera is in its default position of looking straight ahead, the SD card slot and the reset button are totally concealed! Tilt the lens up all the way using the Reolink mobile app or PC Client software and you can access the slot and the reset button.
The left and right sides of the body are bare but you will find the built-in speaker on the back of the lens housing.
The base of the E1 Pro has just the AC power input. Unusually this is not a microUSB design.
Update: Reolink has recently added an Ethernet port to the E1 camera lineup, and so the E1 Pro can also be used as a wired camera.
Flip the camera over and you will find the slot for fitting the wall bracket and a sticker with the QR code for setting up the camera in the Reolink mobile app.
The dual-band Wi-Fi antennae are prominent by their absence. Yes, the antennae are built-in but in my testing this doesn’t seem to affect range noticeably. Just like the C2 Pro, the 5 Ghz Wi-Fi is a great feature to have as most of the competitors are still sporting just 2.4 GHz Wi-Fi. The higher bandwidth capacity of the 5 Ghz band comes with a significant range disadvantage though.
All in all, the camera feels light yet solid in construction. The contrasting colours and the matte finish of the black lens housing really makes the E1 Pro look and feel far more expensive than it really is.
Installation & Setup
The Reolink E1 Pro comes with a very good quick start guide which is a double-sided glossy booklet, just like the other Reolink cameras I have reviewed. The general introduction section illustrates and labels the different parts of the camera such as the daylight sensor, the built-in mic, the speaker, the indicator LEDs and the various connections.
There is also a helpful camera connection guide for those who are new to security cameras. The setup is voice guided (just like the Reolink Argus) and can be done fully wireless. I would expect most people to use the camera’s Wi-Fi option rather than the Ethernet port, so that’s what I have also done in this review.
So you have two options for setting up the camera:
Setup using a smartphone or tablet using the Reolink app, or
Setup using a laptop and the Reolink Client software for PC
Reolink recommends the smartphone app method, so that’s what I did.
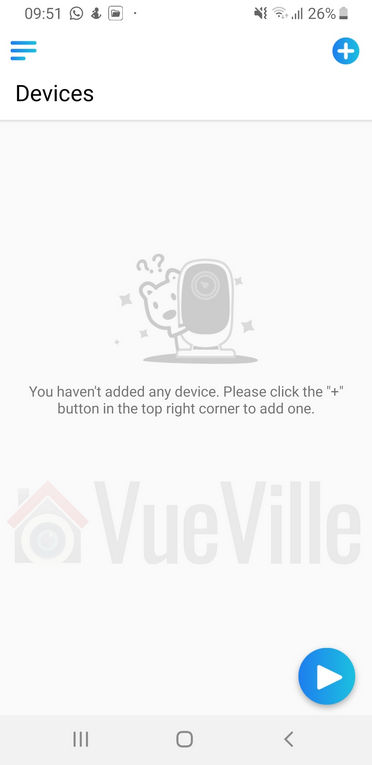
Install the Reolink mobile app. I had it already installed since I use the Reolink C2 Pro, C1 Pro and the Argus all of which I have reviewed in the past.
Power on the E1 Pro. You will hear a voice message ‘Please run the Reolink app and add the camera to set it up’.
In the Reolink app, click the plus button at the top right to add the camera, and choose the ‘Connect to Wi-Fi option’.
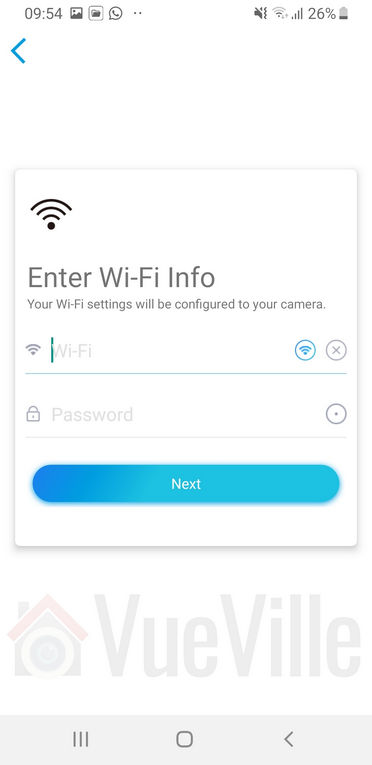
I was not happy to see the app asking for location access, feel free to deny it – the setup will continue successfully anyway.
Enter your Wi-Fi info into the app. The app will then transfer it to the camera in the next step.
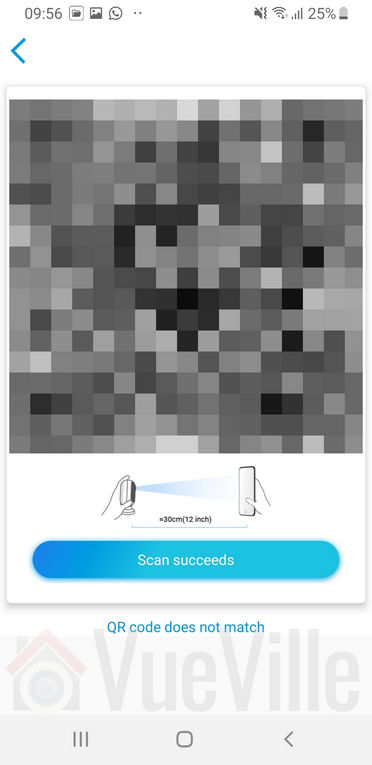
Scan the QR code on the bottom of the camera base.
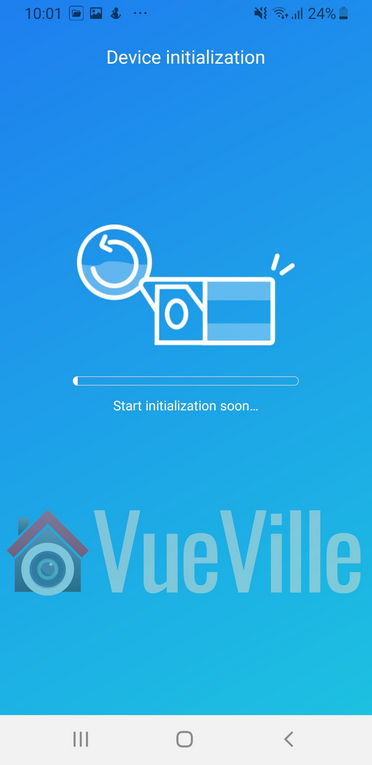
The camera will then attempt to connect to your Wi-Fi network.
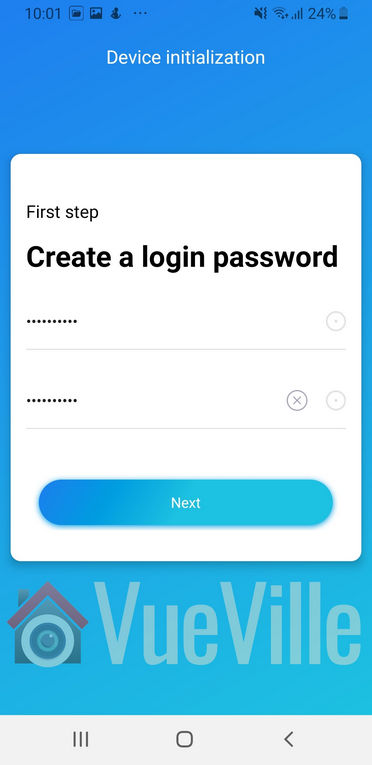
After the camera has initialized, create a login password to complete the setup process.
Configuring the E1 Pro
The only way of configuring the camera is using the Reolink mobile app. Unlike the C1 Pro, the E1 Pro does not have a built-in web server where you can access the advanced settings. In that respect it is more like the Reolink Argus. In the next section, I will cover the camera configuration also.
Using the Reolink mobile app
The Reolink mobile app has always been a reliable and well-designed app. I have never experienced the app crashing on my Samsung Galaxy S9.
As Reolink started introducing cameras such as the Argus without a built-in web server, it became essential for the app to be able to fully configure the camera. The E1 Pro leverages the app very well and the app allows you almost full control over the camera.
When you open the app after setting up the camera, you are greeted with the familiar camera selection list with a static preview image. What’s new in the app is the ability to group cameras together and apply Scenes or quick modes to them quickly – this is a great feature if you have multiple Reolink cameras but dont have an NVR. You can create custom scenes, say, ‘Arm alarm’ to instantly enable motion detection recording, push/email alerts, and audio buzzer alarms when you leave the home. Then when you return you can just activate a ‘Disarm alarm’ scene to deactivate all alarms/alerts.
Touching the camera preview image takes you to the Live-view screen of the E1 Pro. Here you can adjust the Pan-Tilt camera position, use the 2-way audio talk feature, record a clip or take a snapshot. There’s also a nifty audio buzzer button that will briefly sound the camera alarm buzzer. Its not very loud but should be enough to scare away an intruder!
The playback button at the bottom right is for accessing the built-in NVR feature of the E1 Pro. More on that later. Back in the app home page, you can touch the gear icon of the E1 Pro to access the camera settings.
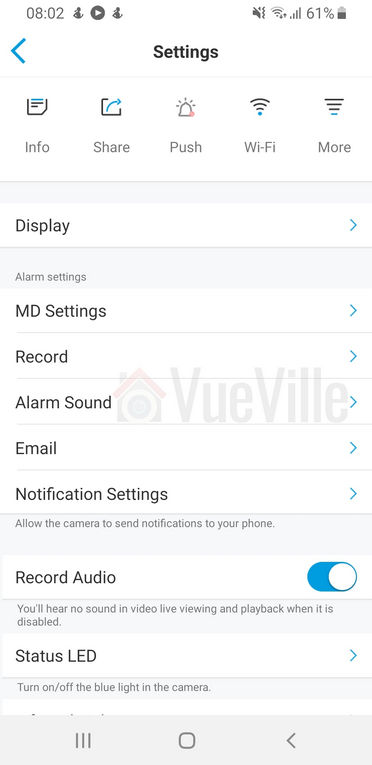
You can either activate/deactivate individual alert settings or use the Scenes feature mentioned earlier to control the camera behaviour. This is my favourite way of managing the alert settings of the E1 Pro.
Under Display, you can adjust the video stream settings – you can choose between 4MP, 3MP, 1080p and 720p for the main stream. 4MP is the default.
You can also perform user management here, such as setting up additional users for your family members’ smartphones.
The E1 Pro has the usual P2P and UID features but the app doesn’t give access to these settings. If you want to change these and other advanced settings such as port numbers, you can do it through the Reolink Client PC app.
Built-in NVR Feature
The built-in NVR feature of the E1 Pro allows you to record video clips without having to buy a separate NVR. What is this built-in NVR feature? Basically, pop in a microSD card and the camera can record motion detection triggered video clips or snapshots to the SD card.
This means that if you need only a single camera or two in your home , you don’t need to buy a separate NVR just to record video footage (although I strongly recommend it ). The camera can also push notifications to the Reolink app on your mobile phone, send email alerts with attached snapshots or video clips.
Adding a microSD card for motion detection recording
I inserted a microSD card into the SD card slot. I had to push the card all the way into the slot before it click-locked. I then formatted the card through the Reolink mobile app. The camera then automatically rebooted and the microSD card was ready for use.
You have several options to control the motion detection recording behaviour. First up is sensitivity, you can go for the default single setting or set up multiple settings for different times of the day.
You can also define the area that the camera should monitor for motion.
The two features above will go a long way in reducing false motion detection alerts.
Reviewing recorded footage
There are three ways to view the recorded footage – the Reolink mobile app, the Reolink Client PC software, and manually accessing the clips on the microSD card with a laptop.
Using the mobile app, you can login any time from anywhere to review the footage through a timeline view. The mobile app also identifies each motion detection event so that you can just play those without having to scrub through the timeline.
At first I thought were only the sub-stream clips could be downloaded to the phone and not the main stream. But Reolink guided me to the picture quality icon – tap it and change it to 4MP and you can download the 4MP clips!
You can also do all of the above through the Reolink Client app or remove the SD card and take the video clips off it with a laptop.
Mobile Push Notifications
Use the Scenes feature to control when and how push notifications are delivered to your smartphone.
Remember that push notifications will not work outside your local network if you switch off P2P though.
Adding the Reolink to QNAP Surveillance Station
The E1 Pro supports both ONVIF and RTSP, so I was easily able to add it to my QNAP TS-253A’sSurveillance Station app. I first created an additional user for the NAS using the admin section of the camera app.
The ONVIF port is port 8000, the media port is 9000, RTSP is available at port 554 and RTMP at port 1935.
Performance
The E1 Pro has a 4MP sensor which can record at up to 2560 x 1440 resolution. The maximum bitrate of 4Mbps is lower than the usual 8Mbps of other Reolink cameras.
Let’s look at the default settings the Reolink E1 Pro comes with from the factory:
Main stream: 4MP @ 15fps and 3Mbps
Since these are the defaults, I ran my day and night tests at these settings.
Video quality
Video captured was sharp and detailed both during the day time and in total darkness, in line with my expectations for a 4 Megapixel IP camera.
Here are the motion detection triggered videos recorded at the default settings:
There was no blurring of the video and there were no dropped frames.
Motion detection
The E1 Pro is able to do both pre-recording and post-recording. This means the camera is able to record not just what happens after motion was triggered but 5 seconds before the trigger as well. This is a great feature and something that I always look for in a security camera.
The post-record feature lets you decide how many seconds the camera should record after the last motion trigger. The default is 15 seconds.
Night vision
The 8 InfraRed LEDs placed around the lens in a ring pattern are reasonably powerful and can light up a decent sized room with no trouble.
There are no settings to control the brightness of the LEDs and there are no advanced features to dynamically control the infrared light output.
Audio quality
Just like the other Reolink indoor security cameras, the E1 Pro supports 2-way audio. Usually the implementation in most manufacturers’ native apps mutes the audio when you activate the microphone. In other words they have half-duplex audio, not full-duplex. Ideally to use the camera as an intercom, you need 2-way full duplex audio.
Interestingly Reolink has not claimed full duplex audio, but the Reolink app doesn’t mute the incoming audio when you press the microphone button. You can continue to hear what the person at the other end is saying when you are speaking. So the E1 Pro actually supports full duplex audio.
So how well does it work in practice? The audio quality is great and the dual speakers do a great job in reproducing audio. But there is a noticeable lag, however slight, in audio playback and this makes the full duplex capability less useful. We found ourselves using the Reolink E1 Pro more like a walkie-talkie just like the Amcrest ProHD cameras.
PT performance
If you are planning to use the E1 Pro as a baby monitor with 2-way audio, you will be interested in how much noise it makes while panning and zooming.
I was pleased to find that the E1 Pro just like the C1 Pro hardly makes a sound while starting up, panning or tilting. So it makes for a great baby monitor.
A long-standing issue I have seen in Reolink cameras is that the motion detection stays active even when you use the Pan-Tilt controls. This means the camera records a motion detection clip each time you use the PTZ controls. The E1 Pro is no different here and exhibits the same behaviour.
Wireless performance
The E1 Pro (just like the C2 Pro) boasts 2T2R MIMO antennae for improved wireless performance. So I moved the camera to the farthest point in my house to see how the Wi-Fi performed. Over both 2.4GHz and 5 GHz, the E1 Pro was stable and performed just as if it was connected over Ethernet.
Mobile app push notifications
So what should you be looking for when it comes to push notifications? The speed and reliability of the push notifications reaching you. You want the camera to send you push notifications immediately after it detects motion.
Especially if you have configured email alerts, SD card recording at 4 Megapixel recording and push notifications, inferior cameras may struggle with the workload.
The E1 Pro performed like a champ. Inside my local network I got push notifications on my phone instantaneously and on remote networks there was a delay of just 1 second which is very impressive. The success rate of receiving the push notifications over multiple motion triggers was a solid 100%.
Verdict
The E1 Pro is a stylish yet budget-friendly DIY security camera that simply gets the job done. With its easy voice-guided setup, smart person detection, on-board microSD storage, built-in NVR feature, full duplex 2-way audio, push alerts and dual-band WiFi, the E1 Pro offers fantastic bang for the buck.
DIY enthusiasts will appreciate the availability of RTSP streams & ONVIF compliance which allows the E1 Pro to work with a DIY NAS NVR. Kudos to Reolink for supporting this feature even in this entry-level camera. But they may not be too happy about no web browser access and the max 4Mbps bitrate. Still that’s a small price to pay for this much value.
Win the amazing Samsung Gear S2 Smartwatch with VueVille this September!
We are giving away the amazing Samsung Gear S2 Smartwatch this September! Enter our sweepstakes below to win the Samsung Gear S2 Smartwatch. The winner will be selected at random at the end of the sweepstakes.
Can’t wait a month to try and win it? Buy it now from Amazon:
[easyazon_link identifier=”B075XRMPM4″ locale=”US” tag=”vueville.com-eaz-20″]Check your local Amazon site[/easyazon_link]
How To Participate
You must be a US resident who is 18 or older.
Complete at least one of the given tasks below.
You can use your email or login with your Facebook/Twitter/Youtube accounts.
Refer friends to get extra entries.
Come back daily and claim the daily bonus entry until the giveaway ends on 30 September 2019.
The more entries you have, the more chances you can gain to win. All the best!
GIVEAWAY (“GIVEAWAY”) SPONSORED BY VueVille.com (“SPONSOR”) AND ADMINISTERED BY Gleam.io. (“ADMINISTRATOR”). GIVEAWAY BEGINS ON 2019-09-02 AT 00:00:00 hours AND ENDS ON 2019-09-30 AT 23:59:59 hours Pacific Time. (“GIVEAWAY PERIOD”). NO PURCHASE NECESSARY TO ENTER OR WIN.
Only the actions specified in the giveaway as entry methods are required. By participating, entrants agree to be bound by these Official Rules and the decisions of the Sponsor and Administrator. Void where prohibited by law. Giveaway is open to legal residents of the United States who have reached the age of majority in their respective province or territory of residence at the time of entry. Employees or contractors of the Sponsor(s) and immediate family members of, and any persons domiciled with any such employees or contractors, are not eligible to enter.
1 winner will be chosen at random using the Gleam widget. The odds of winning will depend on the number of entries received. The winner will be sent an email and will have forty-eight hours to respond with information proving their eligibility to participate in this giveaway. If no response is received within forty-eight hours, another winner will be chosen. Administrators are not responsible for prize fulfillment nor for any technical failures. Winning entry will be verified. A list of winners will be displayed on the giveaway widget on the original giveaway post. Prizes will be dispatched by Amazon direct to the address provided by the winner.
Facebook, Instagram, Pinterest, Twitter and/or Google+ are in no way associated with this giveaway. If applicable, social media posts (such as but not limited to tweets and Instagram posts) must be PUBLIC to be eligible. If you sign up for newsletters as entries, you must confirm your subscription for those entries to count.
Administrators and sponsors reserve the right to publish winner’s first name and last initial. Contact information for sponsor(s), if applicable, can be found in the giveaway website links. Retail value of prizes is listed in the giveaway text. Images included in the giveaway post may not depict the exact prize, and are for illustrative purposes only. We reserve the right to change the prize and/or replace it with a cash prize if we are unable to procure the advertised prize. Please contact the Sponsor for any questions using the contact page at VueVille.com
If you are planning to build your own DIY Z-Wave gateway with a laptop or Raspberry Pi and home automation software such as HomeSeer HS3, openHAB, Home Assistant or Domoticz, you will need a USB Z-Wave stick/adapter/dongle.
These USB Z-Wave sticks are not a solution in and of themselves. They are just a tool to enable your Home Automation software to send and receive Z-Wave signals to/from your Z-Wave devices.
When I moved from the Vera Plus to HomeSeer, I got an Everspring SA413 USB stick off eBay. The Everspring is actually a ‘Sigma Designs UZB’ and that’s how my HA software, HomeSeer HS3 identifies it too. It served me well all these years and has always been very reliable.
So when Aeotec kindly sent me the latest model of their [easyazon_link identifier=”B00X0AWA6E” locale=”US” tag=”vueville.com-eaz-20″]Z-Stick Z-Wave Gen5 USB stick[/easyazon_link] which has several innovations such as a built-in rechargeable battery, I was keen to put it through its paces.
Aeotec used to belong to Aeon Labs, the company founded in 2006 and based out of Silicon Valley. But Aeotec no longer belongs to Aeon Labs. They also have another brand that’s popular in the smart home market – Popp.
Aeotec are also an OEM for other brands such as Oomi.
Unboxing
The Aeotec Z-Stick Gen5 comes in an attractive sleek package. It is no larger than it needs to be and avoids needless plastics and packaging. The front of the box highlights the main features such as the built-in diagnostic tool and the multi-coloured signal strength LED.
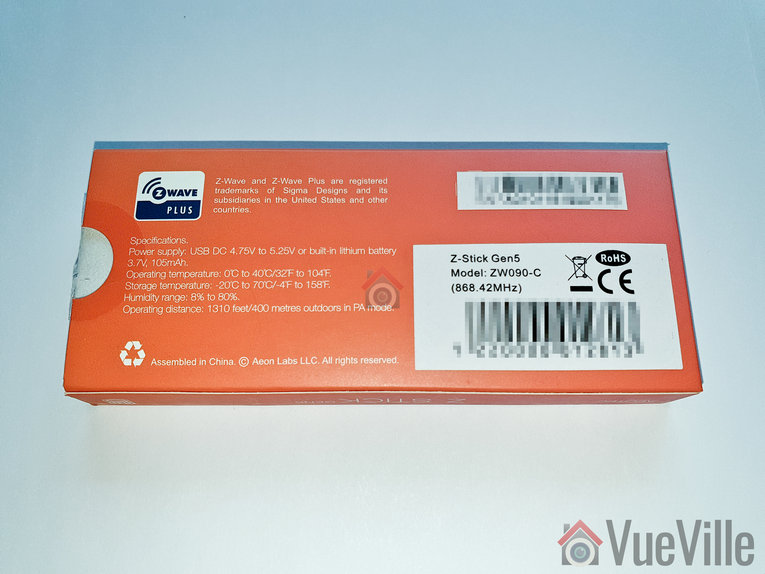
The rear side lists the specifications and model number of the Z-Stick.
As you can see, the ZW090-C model above is for countries using the Z-Wave frequency 868.4 MHz. This includes Europe and some Asian countries. The ZW090-A model is designed for countries using the 908.42 MHz Z-Wave frequency such as the USA.
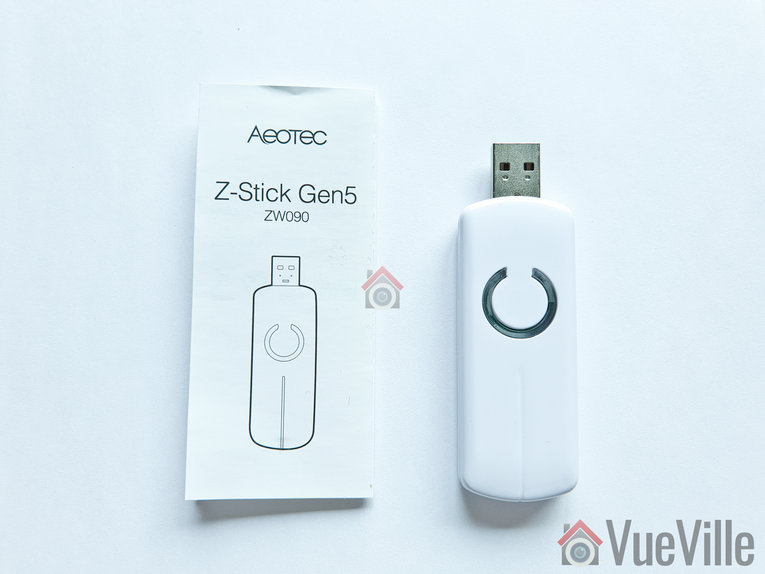
Opening the box yields the Z-Stick and a concise quick start guide.
Specifications
Z-Wave Gen5 chipset
Brand Name: Aeotec
Product Identifier: ZW090-C
Z-Wave hardware platform: ZM5101
Z-Wave Plus Version: 1
AES-128 bit encryption
Can control up to 232 Z-Wave devices
Over the air firmware updates for Z-Wave devices
Built-in Z-Wave network diagnostic tool
Z-Wave signal strength LED
Power Supply: USB DC 4.75V to 5.25V;
Built-in rechargeable lithium battery 3.7V, 105mAh, 15 days backup power
Max Standby Current: 30uA
Max Operating Current: 98mA in PA mode or 40mA in normal mode
Operating Temperature: 0 to 40°C
Storage Temperature: -20 to 70°C
Operating Distance: Up to 492 feet/150 metres outdoors in normal mode, 1310 feet/400 metres outdoors in PA mode.
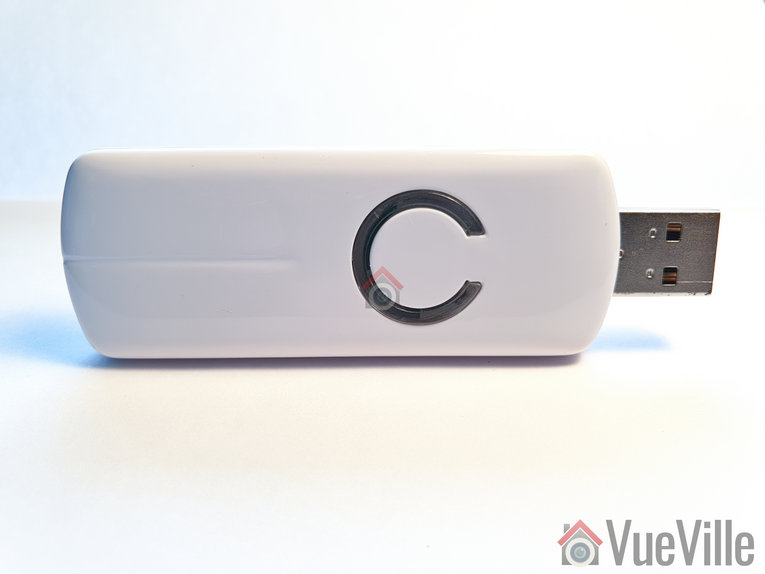
Design and Hardware Features
The Z-Stick Gen 5 differentiates itself visually with the unique LED on its top face which surround the action button. According to the manual, the LED behaves differently depending on what you are doing:
When you press the Action button, the LED blinks blue slowly
When you are including a device to your Z-Wave network, it will blink blue fast during discovery and stay solid on successful inclusion
When you remove a device from your Z-Wave network, the LED will blink orange
Troubleshooting network issues
In my experience with HomeSeer HS3, the LED has done only two things though: cycle through red, blue and amber all the time, and turn solid red if a Z-Wave command failed to reach a device.
The bottom of the Z-Stick has a physical reset button.
Software Features
Z-Wave features
The Aeotec Z-Stick is a self-powered Z-Wave USB adapter with remote network creation capabilities. This means it can function independent of external power and a host system such as a computer. This is all thanks to the 105mAh built-in rechargeable battery.
Being able to remotely include or remove Z-Wave devices greatly simplifies Z-Wave network installation. For devices that are far away from your main controller, you can unplug the Z-Stick from USB and take it to the device that you want to include.
Z-Wave network troubleshooting
In Serial API Mode and acting as a primary controller, it can measure the network health for each device in the network – the colour indicating the signal quality between the Z-Stick Controller and devices in the network.
When the Z-Stick acts an independent/secondary controller that has been unplugged from USB, it can measure the health of your Z-Wave network. The LED colour indicates the communication quality between the Central Controller and the current location of Z-Stick in the network. This is great for troubleshooting your device and is why it has a battery built-in.
OTA Firmware Updates
One of the reasons you may want to get the Z-Stick is to update the firmware of other devices such as the [easyazon_link identifier=”B0151Z8ZQY” locale=”US” tag=”vueville.com-eaz-20″]Aeotec Multisensor 6[/easyazon_link].
Compatibility with HA Software
HomeSeer HS3 natively supports Aeotec Z-Stick and has a specific selection for it in the Z-Wave interfaces list. Moreover Aeotec has tested and confirmed compatibility of the Z-Stick with HS3, InControl and Indigo7. The openHAB and Home Assistant community have developed plugins to allow the Z-Stick to work with their software too.
Installation and Setup
The Z-Stick works in 3 different modes: Inclusion-Mode (standalone), Removal-Mode (standalone) and Serial API Mode (plugged into USB of your HA gateway).
In the following setup process, I had the Z-Stick plugged into my HA laptop running HomeSeer HS3 all the time i.e. in Serial API mode.
Setting up the Z-Stick with HomeSeer HS3
As I have just moved home, I wanted to set up my home automation system again from scratch. This meant a fresh install of HomeSeer HS3 – what better time to test a new Z-Wave USB stick!
So after installing HS3, I activated the official Z-Wave plugin. I then plugged in the Z-Stick into a USB3.0 Hub. Windows recognized the Z-Stick immediately and assigned the COM-3 port to it. The COM port number Windows assigns depends on the USB port you lug the Z-Stick into. So if you switch USB ports, that will be why your HA software can’t find the Z-Wave dongle any more.
Now as we saw earlier, HS3 fully supports the Aeotec Z-Stick so setting it up was a breeze.
I clicked ‘Add a Z-Wave Interface’, gave it a name, selected the Z-Stick from the drop-down menu and selected the only COM port shown – COM3.
On clicking the ‘Add’ button, HS3 started initializing the Z-Stick.
After a few seconds, HS3 displayed a success message. I clicked on the activate interface green tick box and setup was complete!
Now I expected the flashing red, blue and amber LEDs on the Z-Stick would then become a solid green or at least stop flashing. But they didn’t.
I couldn’t find any reference to this in the user manual, so I asked Aeotec. They replied that this flashing behaviour of the LED indicates normal operation. Also, if the Z-Stick is under heavy load, the LED will flicker between 2 different LED colors rapidly. This is potentially useful if you have a large Z-Wave network with hundreds of devices that need polling.
In my testing, the LED also became solid red momentarily if a Z-Wave command was sent to a Z-Wave device but it didn’t respond.
I tested the Z-Stick by adding an [easyazon_link identifier=”B00VQISQW4″ locale=”US” tag=”vueville.com-eaz-20″]Aeotec LED Bulb 6[/easyazon_link] to my Z-Wave network. These are the steps I took:
As per the quick start guide, I inserted the LED Bulb 6 into a table lamp.
I then had to set HS3 into ‘Inclusion mode’. For this I navigated to Plugins > Z-Wave > Controller Management. Under Actions, I selected ‘Add/Include a Node’ and clicked the Start button.
I turned on the power to the LED Bulb 6. It turned solid yellow for a few seconds and then did a colour dance, flashing rapidly between white and green. At the same time I could see that HS3 had added the LED Bulb 6 as a new node. Then the bulb turned solid yellow again.
As per the manual, the bulb had been successfully included in my Z-Wave network.
Performance
I tested the Z-Stick Gen5 extensively with the [easyazon_link identifier=”B00VQISQW4″ locale=”US” tag=”vueville.com-eaz-20″]Aeotec LED Bulb 6[/easyazon_link], an [easyazon_link identifier=”B01NCEJAOD” locale=”US” tag=”vueville.com-eaz-20″]Aeotec Wallmote Quad[/easyazon_link], and an [easyazon_link identifier=”B07PB2HN6D” locale=”US” tag=”vueville.com-eaz-20″]Aeotec Doorbell 6[/easyazon_link].
Wireless Range
The Z-Stick has very good range is and comparable to the Everspring SA-413 I was previously using. My current home is of solid concrete construction and the Z-Wave signal could penetrate 2 solid concrete walls successfully. The mesh network design of Z-Wave networks is how my whole home is reachable with just one Z-Wave controller. Every powered Z-Wave device acts as a repeater.
Responsiveness and Reliability
I observed no noticeable delays or issues during the course of testing.
Compatibility
All the Z-Wave devices I used were successfully included and there were no compatibility issues at all.
Verdict
[review]
Where to Buy
Buy the Aeotec Z-Stick Gen 5 from [easyazon_link identifier=”B00X0AWA6E” locale=”US” tag=”vueville.com-eaz-20″]your local Amazon store[/easyazon_link].
Alternatives
[easyazon_link identifier=”B00VKEH1BQ” locale=”US” tag=”vueville.com-eaz-20″]Z-Wave.me USB Stick[/easyazon_link]
[easyazon_link identifier=”B01GJ826F8″ locale=”US” tag=”vueville.com-eaz-20″]GoControl Z-Wave/Zigbee USB Stick[/easyazon_link]
[easyazon_link identifier=”B07QMP1Y6G” locale=”US” tag=”vueville.com-eaz-20″]HomeSeer SmartStick+[/easyazon_link]
[easyazon_link identifier=”B07GNZ56BK” locale=”US” tag=”vueville.com-eaz-20″]Zooz USB Stick ZST10[/easyazon_link]
Having just recently compared Reolink and Lorex, let’s now throw in another popular DIY IP camera brand into the mix and compare them – Amcrest vs Lorex.
Reolink and Amcrest are similar in the type of products they market – good quality standalone IP cameras and NVRs that are ONVIF compliant and very affordable.
Lorex on the other hand has focused on selling NVR kits rather than IP cameras capable of standalone operation.
A quick note: As an Amazon Associate I earn from qualifying purchases. This post contains affiliate link(s). An affiliate link means I may earn advertising or referral fees if you make a purchase through my link, at no extra cost to you.
Amcrest vs. Lorex – the Stories behind the Brands
Amcrest
Foscam US re-branded themselves as Amcrest Technologies in early 2016. Foscam US (Foscam Digital Technologies) used to be an independent distributor for the Chinese manufacturer/supplie Foscam Shenzhen. However in 2016, the Chinese supplier allegedly started undercutting Foscam US. Foscam US says they had no choice but to cut all ties with Foscam Shenzhen and go it alone as Amcrest Technologies.
Foscam security cameras never had a great reputation and once Amcrest launched their own products, they have quickly overtaken Foscam both in quality, reliability, support service levels, and reputation. They are still around though.
Amcrest mostly re-brands Dahua cameras.
Lorex
Lorex was founded in 1993 and has head offices in Markham, Ontario, Canada and in Linthicum, Maryland, USA. They have product warehouses in Markham, Indiana and California.
But first let’s start with the company FLIR, better known as the high-end camera manufacturer who revolutionized thermal imaging for the military and industrial markets. They acquired Lorex in 2012 for around $60 million seeking to lower the cost of thermal imaging and open it up to the retail market.
So for the next 6 years they tried to penetrate the DIY and SMB markets. During this period, their main OEM supplier was Dahua. In February 2018, however, FLIR exited the DIY security camera space by selling Lorex to Dahua. They currently operate as a subsidiary of Dahua. So think of Lorex as a Dahua brand.
8MP 4K IP Camera Duel – Amcrest (IP8M-2496EB) and Lorex LNB8111BW
So Amcrest rebrands Dahua and Lorex is Dahua. So this is looking more like Dahua vs. Dahua isn’t it? Well Amcrest and Lorex used to target different DIY consumers, but that gap is narrowing as we shall see.
I have opted to compare the most popular 8MP models from Amcrest (IP8M-2496EB) and Lorex (LNB8111BW). These are 4K cameras.
The Biggest Difference between Amcrest and Lorex IP Cameras
If you thought the answer is ONVIF support, you would have been right…. last year.
But all Lorex cameras now support ONVIF, so you can use them with any ONVIF-compatible NVR. So you can add them to a non-Lorex NVR or to a DIY NAS NVR system.
Amcrest has always supported ONVIF.
So what is the biggest difference between Amcrest and Lorex? Amcrest IP cameras are capable of standalone independent operation without an NVR, wheras Lorex IP cameras cannot.
Amcrest has always made cameras that are capable of standalone operation. This means you do not need an NVR to make the camera work. That’s right they have the built-in NVR functionality just like Hikvision, Dahua and Reolink do. They can also detect motion, record video clips to a microSD card, send email and push notifications, even upload to an FTP server.
Lorex cameras cannot do any of this. Without an NVR or another device (like a NAS) to store the video, there’s no point in buying one. Now if you are going to use an NVR anyway, this is not an issue for you. Also since they have ONVIF support, they should theoretically work with any ONVIF-compliant NVR. Not just Lorex ones.
Hardware features
Both the Amcrest and Lorex cameras have a nice large 1/2.5″ progressive scan CMOS sensor. This is even better than Reolink’s which has a slightly smaller 1/2.7″ sensor. The Lorex uses a Sony Exmor R CMOS sensor whereas the Amcrest uses a Sony Starvis CMOS sensor.
The size of the sensor has a huge bearing on the low light ability of a camera. The larger the sensor, the greater its ability to gather light and so do well in low light conditions. But as you cram in more and more pixels into the same size sensor, they get smaller and smaller, which adds noise. Noise is the bane of low light video and reduces the detail that you can get out of your video. So while security camera manufacturers have pushed pixel count from 2MP to 5MP and beyond, most have not really increased the sensor size.
The Amcrest has a substantially wider viewing angle of 112° vs. the Lorex’s 88° angle of view.
On to low light performance. While most IP cameras are good in daylight, night-time performance is what separates the men from the boys. The Lorex sports colour night vision – this is a very interesting feature and does set the Lorex brand apart. However be aware that the camera will switch back to black & white IR night vision below 1 lux to ‘ensure optimal low-light image quality’ as Lorex puts it.
The Amcrest camera has only standard black and white infrared night vision. But the minimum illumination required is impressive, 0.06Lux without IR and 0Lux with IR on. The IR range is also 40 feet more than that of the Lorex.
Neither camera has special features such as PIR motion sensors, audio, or alarm connections. But the Amcrest does have a microSD card slot and the built-in NVR feature.
Software features
When it comes to video encoding, both cameras support the highly desirable H.265 option for lowering bandwidth usage and generating smaller video file sizes.
Next up is WDR or Wide Dynamic Range. This is a feature that enhances the level of detail an IP camera can pick out in shadows. Amcrest supports 120dB WDR. Lorex doesn’t have WDR, but instead claims High Dynamic Range (HDR) support. While I doubt they are comparable, it is better than nothing.
The three software features that make a great IP camera are ONVIF/RTSP support, built-in NVR feature, and the advanced motion detection features that help reduce false alerts.
Here, the main differences between the Amcrest and the Lorex are that:
Amcrest has the built-in NVR feature, as it is capable of standalone operation, but Lorex doesn’t.
Both Amcrest and Lorex have only basic motion detection but the Lorex can work only when it’s connected to an NVR.
Motion Detection ability
Neither camera has advanced motion detection methods which go a long way in reducing reducing false motion alerts.
Warranty
Lorex has a 2 year warranty as standard, but can be extended to 3 years or 5 years for an extra fee.
Amcrest has only a 1 year warranty as standard, but promises lifetime support.
Here’s a summary of all the differences in a nice and easy table:
[table id=59 responsive=”scroll” /]
Verdict
Lorex cameras are basically Dahuas that are locked down. You can still add them to any NVR that supports ONVIF. It has all the basic hardware features that you would expect and has colour night vision and HDR also. But they still are not as capable as Amcrest cameras. Lorex cameras are not an option if you want a standalone IP camera that can operate without an NVR.
So I would recommend Amcrest instead. Now if the Amcrest doesn’t meet your specific requirements, just opt for a Dahua IP camera. Simples.
For the longest time, I have been struggling to find a way to automate my split AC units. My home doesn’t have central air conditioning and so has split AC units in each room.
While I have been able to automate everything else, I just couldn’t find a way to do anything other than turn on and off my split units. So I was very excited to learn about the Ambi Climate unit when it was announced on Kickstarter.
Ambi has kindly provided me the new and improved Ambi Climate 2 for review and I have been putting it through its paces. I tested it extensively with my [easyazon_link identifier=”B07DY92WXG” locale=”US” tag=”vueville.com-eaz-20″]Daikin split units[/easyazon_link] and read on to find out how it fared.
A quick note: As an Amazon Associate I earn from qualifying purchases. This post contains affiliate link(s). An affiliate link means I may earn advertising or referral fees if you make a purchase through my link, at no extra cost to you.
So what is the Ambi Climate?
Think of the Ambi Climate device as an AI powered Infrared AC controller. If you don’t have a spanking new [easyazon_link identifier=”B076BW5SG3″ locale=”US” tag=”vueville.com-eaz-20″]smart AC unit with Wi-Fi[/easyazon_link], this is one of the few ways to integrate your existing ‘dumb’ AC units into your smart home system.
The Ambi Climate 2 also works with Amazon Alexa, Google Assistant and Google Home. So you could just say:
“Alexa tell Ambi Climate I’m cold” or
“Alexa, ask Ambi the temperature in Kitchen” or
“Hey Google, tell Ambi Climate it’s cold in Study”.
Unboxing
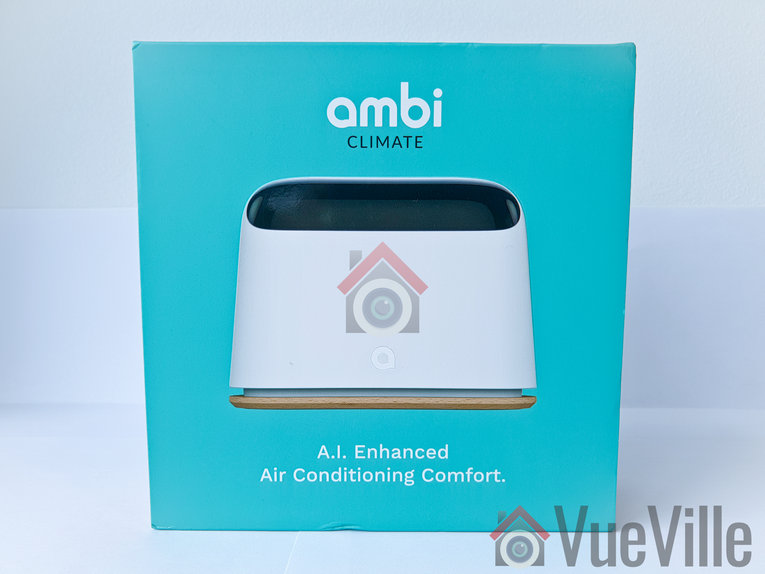
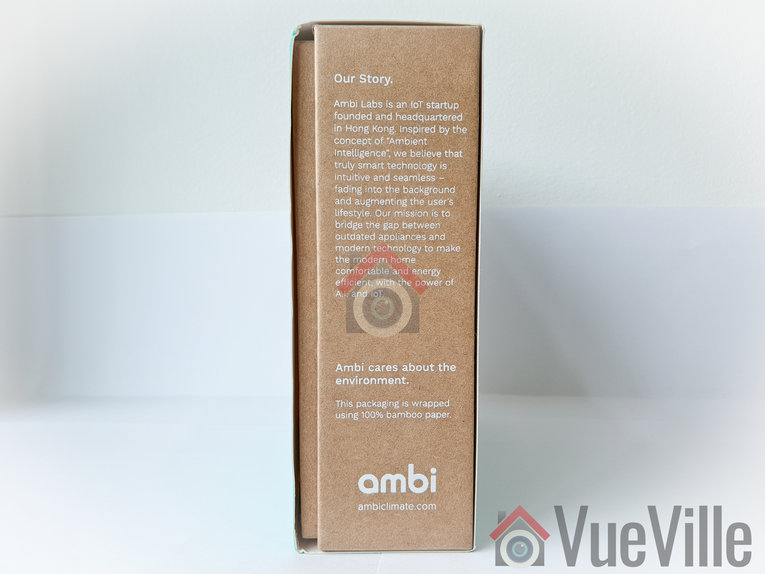
The Ambi Climate comes in a very smart packaging that tells the story of how this clever little device came to be.
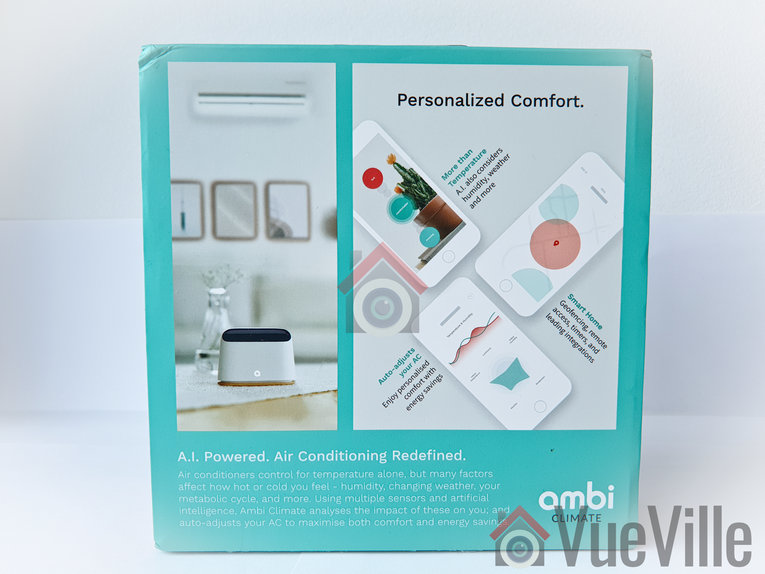
The package highlights the AI-powered features.
Opening up the box yields a well-protected Ambi Climate 2 inside. There is a quick step-by-step process printed just above the unit which is very thoughtful.
The box contents are:
Ambi Climate 2 device
USB power adaptor
microUSB cable
Quick start guide
Specifications
Wi-Fi support: 802.11b, 802.11g, and 802.11n-24
Dimensions: 10.8cm x 4.2cm x 8.1cm
Weight: 110 grams
Power: 5V DC, 1.0A via micro USB power cable
Transmission: 7 infrared transmitters for AC connection
RGB status LED
Languages supported: English, Traditional Chinese, Simplified Chinese, Japanese, Arabic
Requirements: Broadband internet connection with Wi-Fi network, 2.4 GHz
App compatibility: iOS: Version 9 or later; Compatible with iPod touch, iPhone and iPad, Android: Version 4.1 or later
Supports most infrared remote-controlled ACs, including over 50 brands and 1,200 models
Alexa, Google Assistant, Google Home and Homebridge plugin for Apple Homekit
IFTTT & Open API for home automation
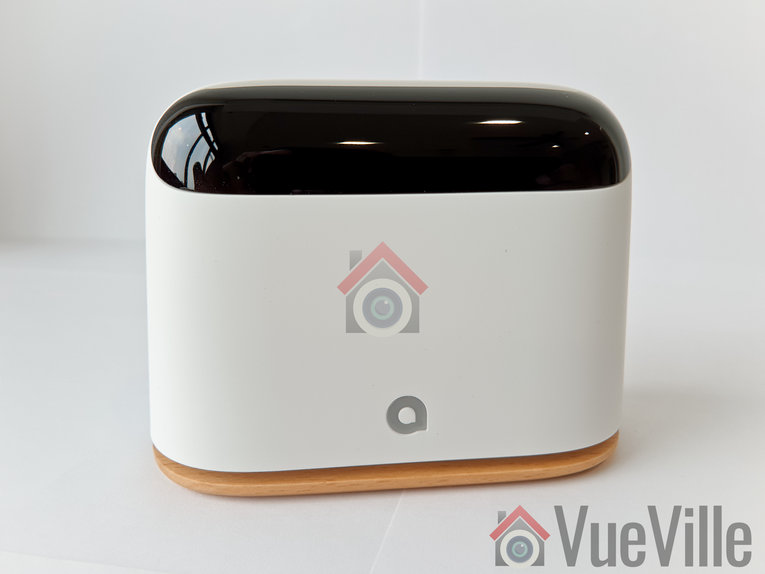
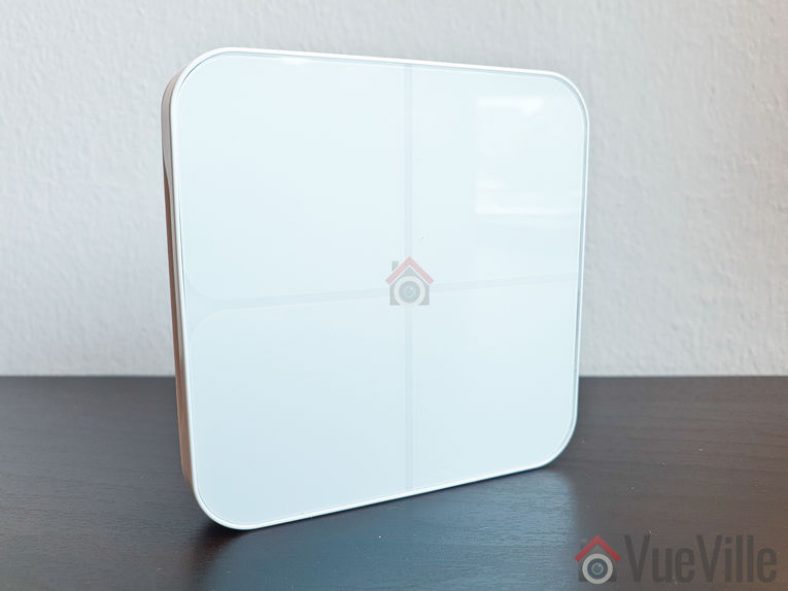
Design & Features
The Ambi Climate 2 has modern sleek looks. The base is made of wood which is a nice touch and a nod to its green credentials. The blacked out top part houses the 7 Infrared emitters that send controls to your AC.
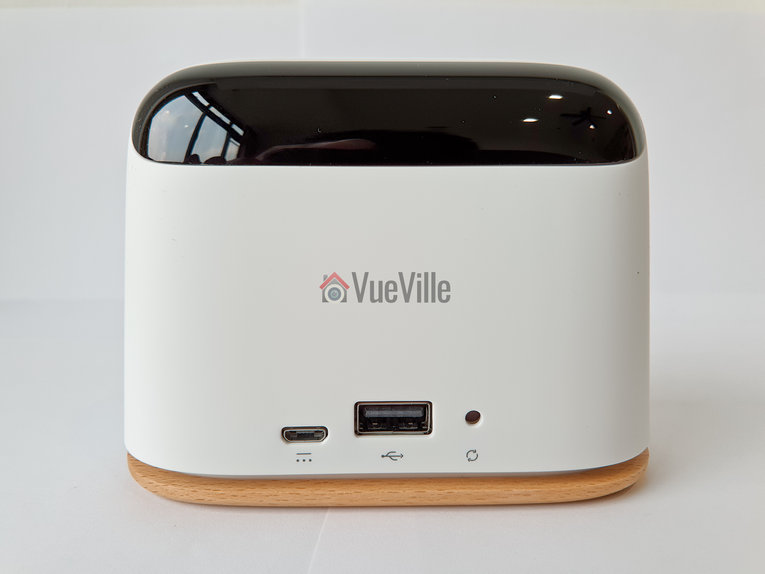
One the read, you will find the microUSB input for power, a USB port for debugging and a reset button. Sadly there is no Ethernet port provided, so you will have to rely on Wi-Fi.
Here’s a video that explains how the AI of this unit works: https://www.youtube.com/watch?v=HnhSGdNM7UI
The other interesting features of the Ambi are:
Geolocation – Ambi Climate’s geolocation features allows you to automatically switch on and off your air conditioner or heat pump based on the the location of your phone relative to location of your device.
Timers – You can set up to 20 timers that will turn on or off your AC at specified times of the day.
Ambi Climate App Setup
I positioned the Ambi unit under my living room split AC unit.
I plugged the Ambi unit into an AC socket and immediately heard a beep. The Ambi logo on the front started blinking orange. At the same time I noticed a new Wi-Fi network created by the Ambi device popped up in my laptop’s wireless network scan.
As per the quick start guide, I then installed the Ambi Climate app from the Google Play Store on my [easyazon_link identifier=”B079H6RLKQ” locale=”US” tag=”vueville.com-eaz-20″]Samsung Galaxy S9[/easyazon_link].
On opening the app, there were three options, Login, Sign up and Demo.
After signing up and verifying my email address, I was able to login.
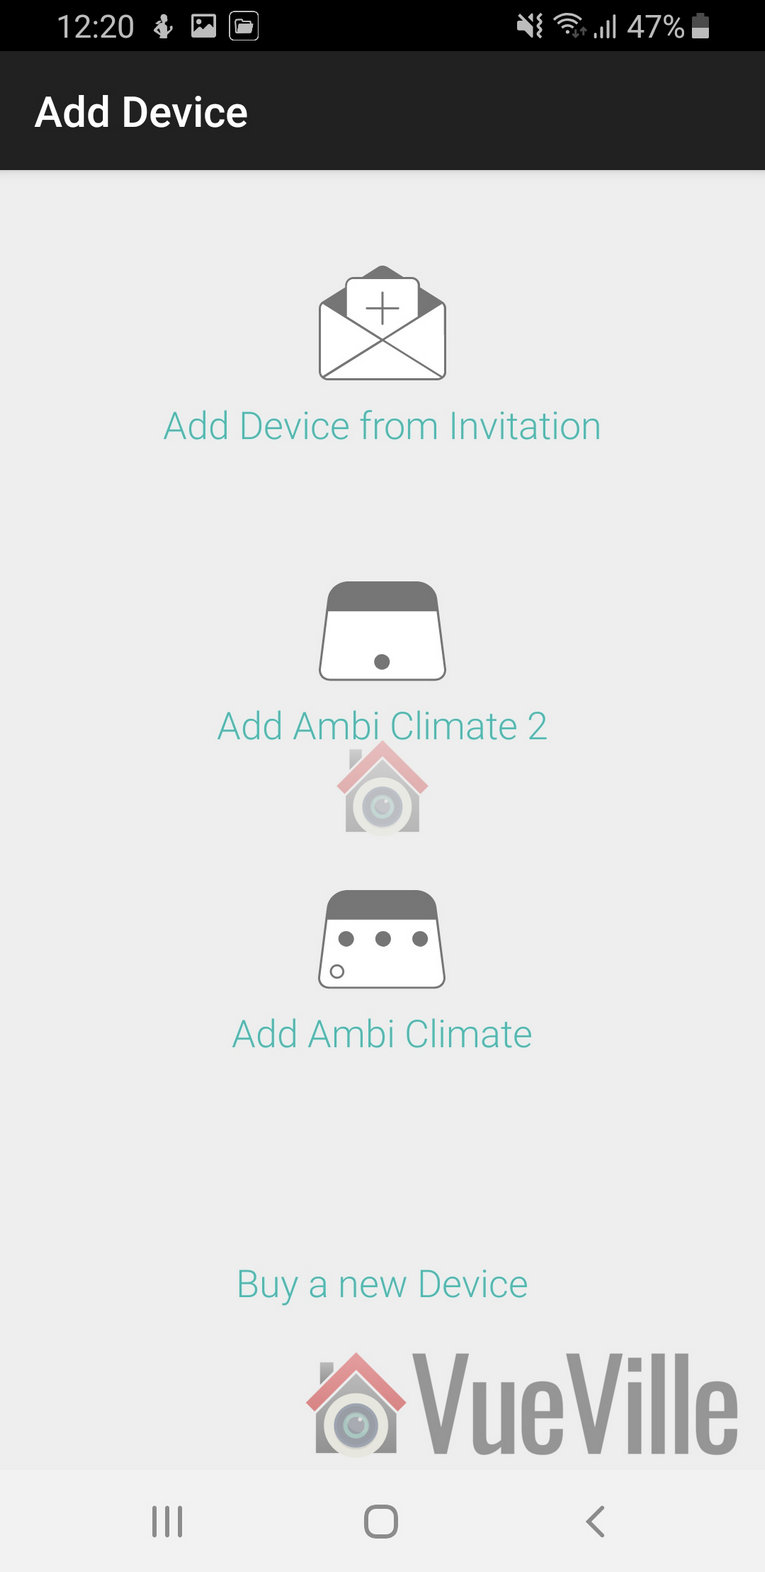
It then gave me 4 options to add a device: Add device from invitation, Add Ambi Climate 2, Add Ambi Climate, and Buy a new device.
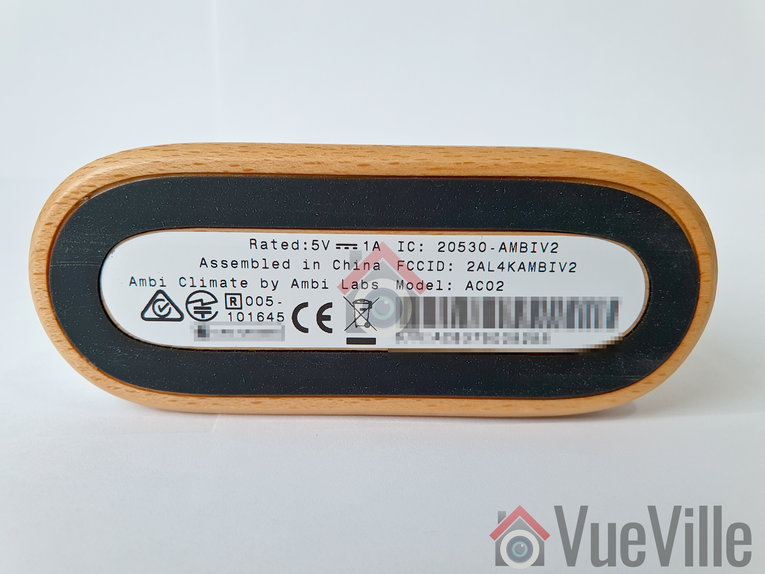
From the icons, I selected the Ambi Climate 2 option. It doesn’t actually mention this anywhere on the packaging or the unit itself. The only hint is the AC02 model number on the underside of the device.
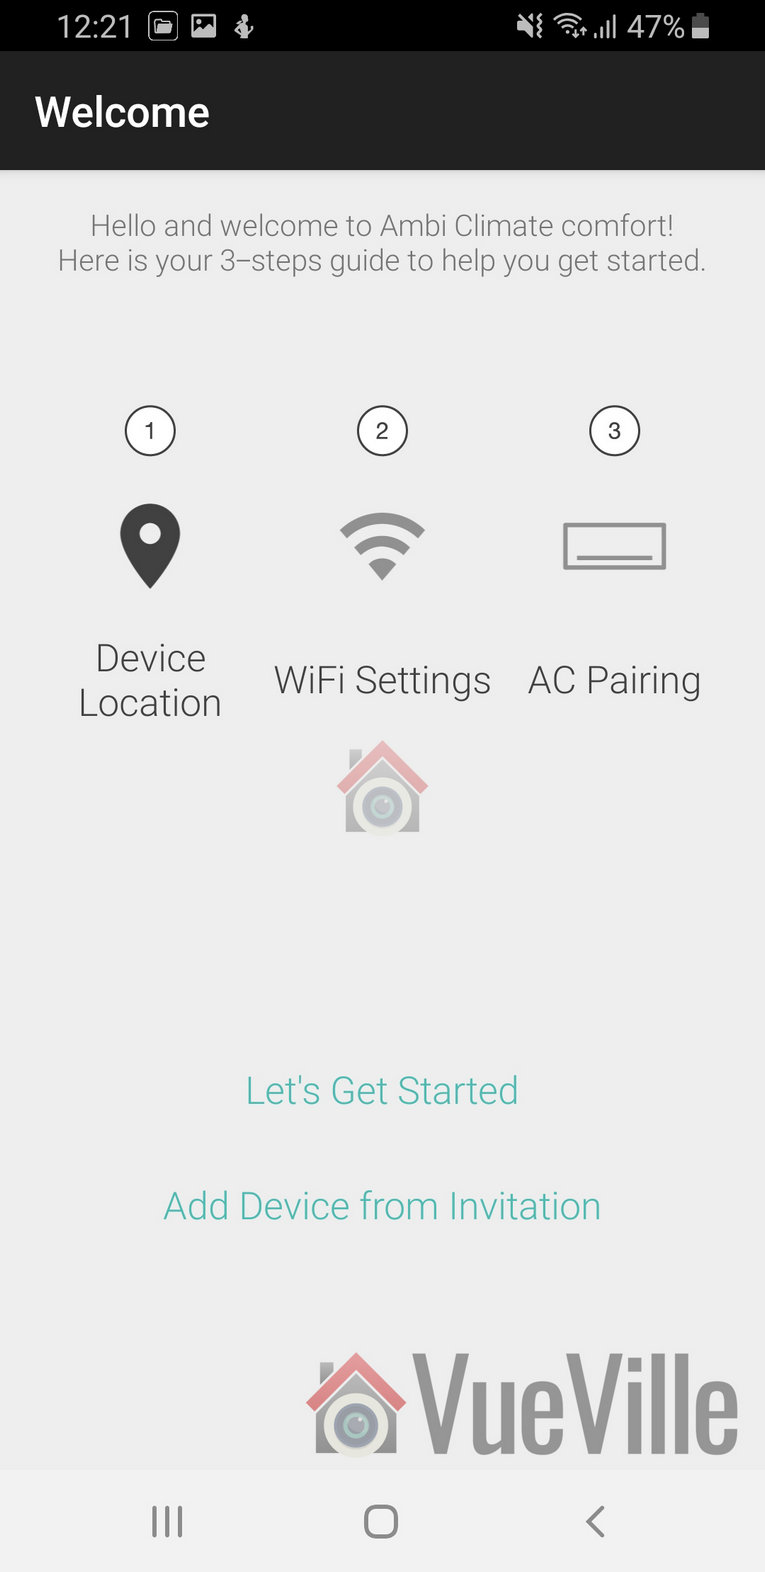
This then started a 3 step wizard:
And I pressed ‘Lets get started’.
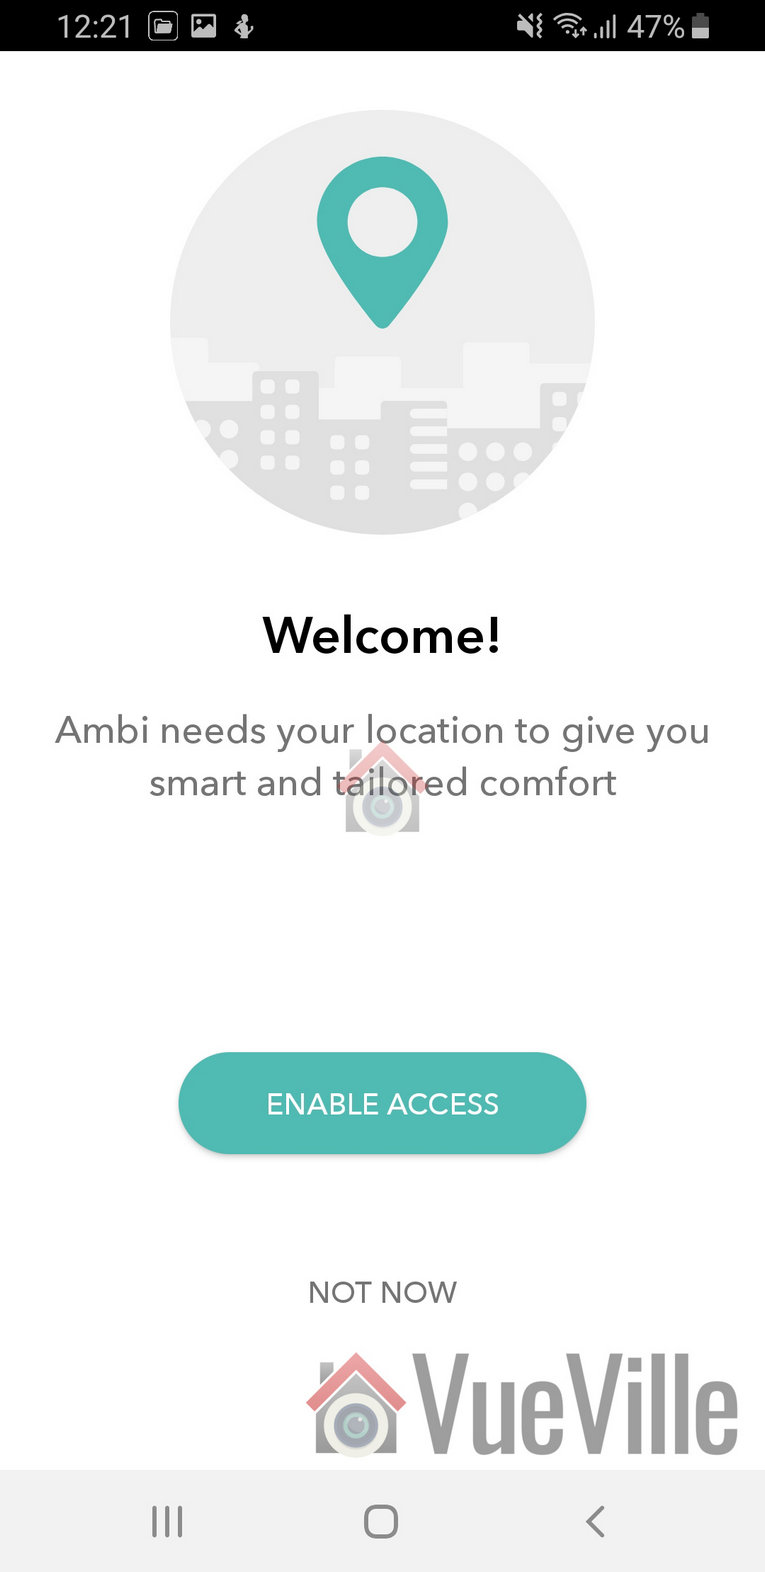
Step 1: Location
Ambi then said it needs my location to give me “smart and tailored comfort”. I wanted to review the standard workflow of the app, so I clicked enable access.
The app then asked me to confirm my location on a map, which I was not happy to but did anyway for the sake of the review.
I then named the room where the Ambi Climate 2 is kept.
Step 2: Wi-Fi
First it asked me to disconnect my phone from my home Wi-Fi and connect to the Ambi’s own Wi-Fi network
Then it asked me to enter my home Wi-Fi password
It then connected to the cloud and after 2 minutes confirmed the connection of the Ambi to my home Wi-Fi.
Step 3 – AC Pairing
I selected my remote model, confirmed the AC settings options and this step was complete.
Ambi Climate App Review
The app home screen lets you switch between rooms, see the temperature and humidity in each room and what the Ambi thinks the current climate is like (too warm / too cold / just right).
The app home screen is functional but was not exactly what I expected. As you can see above, the font size was a bit too small for my liking.
You can adjust the mode to change how the AI works:
Comfort mode
Temperature mode
Away mode
Manual mode
Off mode
The comfort mode is the smart AI mode that will learn your preferences and automatically control the AC settings.
The temperature mode allow you to manually set the desired temperature and it will control the AC to achieve the target temperature.
Going on holiday and want to prevent heat and humidity build-up and mold? The Away mode lets you do just that.
You can switch of the AC by selecting Off from the lower right hand corner of the main interface of the app.
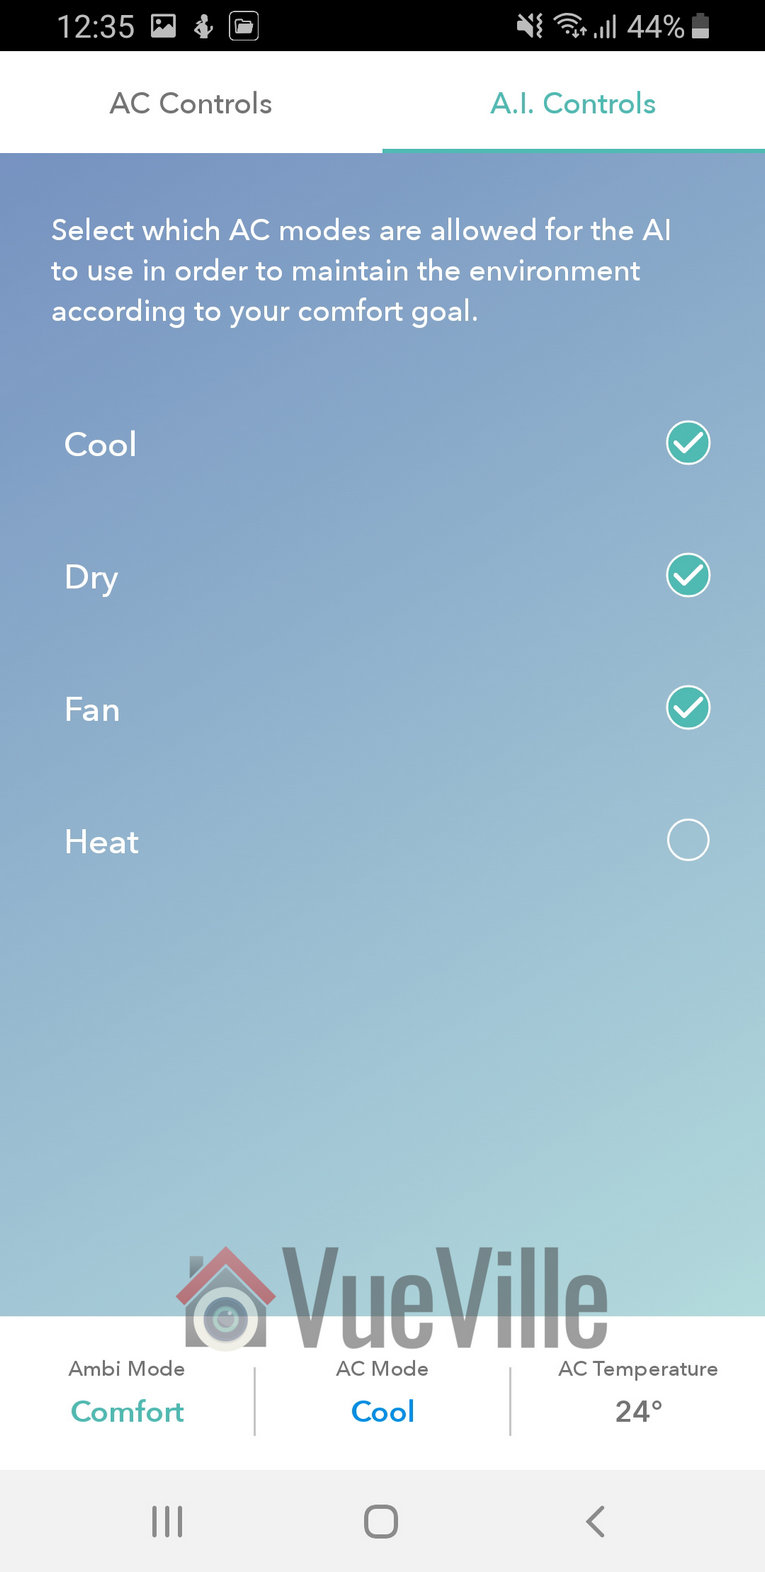
Looking at the settings screen, there are two tabs: AC controls and AI controls. The AC controls section allows you to set what the AI mode can adjust by itself.
The AI controls tab lets you define what AC modes the AI is allowed to use to maintain what it thinks is a climate you like in your home.
I had a strange issue where the Ambi Climate 2 would respond not just to my DaikinAC’re remote control but also to my Panasonic TV’s remote control. There are two solutions to this: move the unit to some place away from your TV or ask Ambi to disable the IR sensor on the device (through a support request).
I chose to move the unit to a place it couldn’t detect my TV remote control. I am just too used to being able to control the AC with its remote control. I can’t imaging pulling up the app on my phone every time I want to adjust something.
Verdict
[review]
I would have liked to see a few more features – air quality measurement (at least dust particles and CO2), an Ethernet port, and an option for full local control and data storage. I do not like putting my data on the cloud – I value my privacy too much for that.
While its too early to tell how much power savings the Ambi Climate 2 actually delivers, I can see some encouraging signs:
It seems to more proactively adjust the temperature settings in response to changing room conditions.
It also know what the humidity level is and takes that into account.
Whether it actually saves me money or not, there’s a super good reason to use the Ambi Climate 2. You can now control your AC split unit via your smartphone! So you can turn it on even when you are not at home, or switch it off if you left home and forgot to!
Where to Buy
[easyazon_link identifier=”B076BCPJP4″ locale=”US” tag=”vueville.com-eaz-20″]Check Price on your local Amazon site[/easyazon_link]
(* = affiliate link / image source: Amazon Associates Program)


 Here’s this week’s round-up of news articles and blog posts that I have been reading. Most have to do with home security, smart homes, technology in general, but may also relate to my other passions of blogging, investing and personal finance.