When I first started toying with the idea of getting a NAS for our home, I didn’t realise how much a part of our daily life it would eventually become. Let me take you back to where it all began…
The problem
My wife and I have separate laptops and we often need to access common files such as photos, videos, scanned bills, receipts. Storing copies on our separate laptops very quickly became a chore and using an external USB drive was the only real option. But this meant we couldn’t access information wirelessly – yes i tried plugging in the USB disk into the router’s USB port and found it very slow. I was also worried about the safety of the data in case the USB disk failed. All our precious photos and irreplaceable digital documents were in there!
What about Dropbox you ask? After all the cloud hacking that happened recently, I was clear that I didn’t want to trust my data to somebody else and neither did I want to pay a monthly fee!
The hunt for the solution
So I started researching storage options that I could access from across my home network. Before long I had learnt about Network Attached Storage (NAS) options from the likes of Synology, QNAP, Netgear and Asus. It sounded perfect and with redundant storage options such as RAID, I didn’t have to worry about the safety of my data either. One option I quickly eliminated was building my own PC-based NAS because I wanted an ultra low power device that I didn’t have to spend any time building or maintaining.
At about the same time, I had acquired a few security cameras and was thinking of which NVR to buy. So I was absolutely delighted when I learnt most modern NAS could perform the same job as an NVR!
Doing the research led me to settle on the QNAP TS-231+ which was an absolutely brilliant bit of kit and I enjoyed it immensely. It became the central hub of my network serving up photos, videos, to every screen, automatically backing up files from mobile phones and laptops, recording my surveillance cameras and a whole lot more!
Why a new NAS then?
I bought the TS-231+ from Amazon nearly 2 years ago and everything was going well until a month ago when the NAS started restarting on its own. Some basic troubleshooting didn’t go very far so a quick call to Amazon was placed. They referred me to QNAP as the product was still under the 2 year manufacturer warranty. Yes all the QNAP NAS models come with a 2 year warranty which can be extended even further on selected models.
QNAP offered two options – an RMA with me paying for the postage to their nearest depot or a full refund from the seller (Amazon). Naturally I went for the full refund. Now I had just finished my handy 2017 guide to the best DIY NAS NVR, so putting my money where the mouth is, I bought the QNAP TS-253A.
You know what the greatest realisation was for me through this whole episode? How incredibly inconvenient it was to not have a NAS and have to go back to sharing a USB drive between me and my wife!
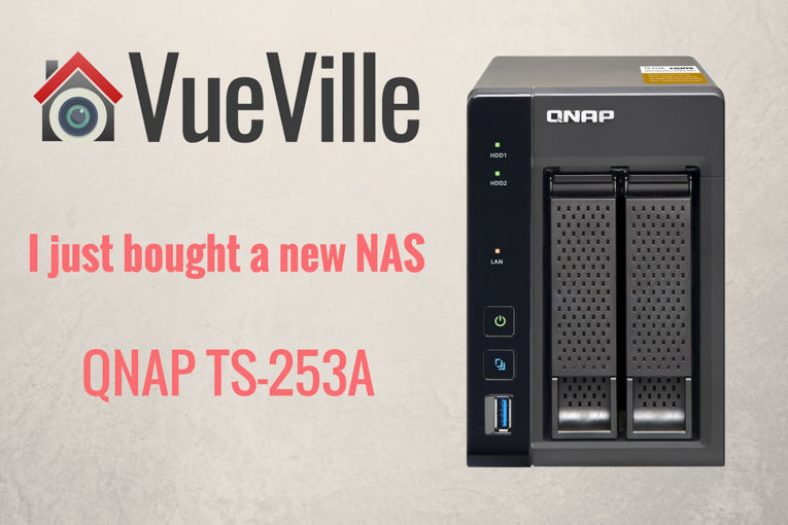
The QNAP TS-253A has arrived
Yesterday, the QNAP TS-253A arrived! I was surprised to see a package box much smaller than the TS-231+ but the actual NAS was pretty much the same size as the old NAS. Here are the main hardware features of the QNAP TS-253A NAS:
TS-253A-4G model RAM: 4GB (2 x 2GB SODIMM DDR3L-1600)
Hot-swappable 3.5″ or 2.5″ SATA 6Gb/s, SATA 3Gb/s hard drive or SSD
2 x Gigabit RJ-45 Ethernet port
4 x USB 3.0 port (Front:1, Rear:3)
Support USB printer, pen drive, and USB UPS etc.
2 x HDMI, up to 4K 2160P 30Hz Ultra HD support
2 x 6.3mm microphone jacks (dynamic microphones only)
Line Out Jack (for amplifier or headphone amplifier)
IR Receiver
Kensington security slot, console port (system maintenance)
150(H) x 102(W) x 216(D) mm
5.91(H) x 4.02(W) x 8.5(D) inch
System sleep mode power consumption: 1.18W
HDD standby power consumption: 8.38W
In operation power consumption: 14.43W
Whew, that’s a pretty impressive list of hardware features don’t you think? It is actually a fully capable computer that has 4k HDMI capability as well!
On the software front, the NAS runs QNAP’s linux-based OS called QTS. You also get a generous 4 IP camera licenses free with the NAS, which is one of the main reasons I recommended it in my 2017 NAS round-up.
I popped in my existing WD RED 3TB hard drives but the NAS didn’t like them so I went through the process of setting it up as if I had two brand new unused hard drives. Setup was smooth and I then plugged in my backup USB drive to restore my last backup. I was so glad that I had invested in the WD MyBook Studio to be my designated secondary backup drive! It is precisely for these type of situations that secondary backup is recommended! The NAS is currently mirroring my main hard drive to the second one. If you have ever done this, you know it can take quite a while.
I will write an exhaustive hands-on review soon but so far I am loving the QNAP TS-253A!
EDIT: Here’s the long overdue hands-on review! The upshot of my procrastination is that the review takes into account over 9 months of actual daily use.
[wpsm_box type=”warning” float=”none” text_align=”left” width=”100″ ]
This coupon code has now expired. Please refer to the Reolink Mega Discount Post for all the latest offers.
[/wpsm_box]
VueVille is launching its first ever giveaway which runs through the whole month of July and we want you to take part! Enter our sweepstakes below to win the amazing new Amazon Echo. One winner will be selected at random at the end of the sweepstakes.
You must be a USA or UK resident who is 18 or older.
Complete at least one of the given tasks.
You can use your email or login with your Facebook/Twitter/Youtube accounts.
Refer friends to get extra entries.
Come back daily to get more entries until the giveaway ends on 31 July 2017.
The more entries you have, the more chances you can gain to win. All the best!
Full Terms and conditions
GIVEAWAY (“GIVEAWAY”) SPONSORED BY VueVille.com (“SPONSOR”) AND ADMINISTERED BY Gleam.io. (“ADMINISTRATOR”). GIVEAWAY BEGINS ON 2017-07-01 AT 00:00:00 hours AND ENDS ON 2017-07-31 AT 23:59:59 hours. (“GIVEAWAY PERIOD”). NO PURCHASE NECESSARY TO ENTER OR WIN.
Only the actions specified in the giveaway as entry methods are required. By participating, entrants agree to be bound by these Official Rules and the decisions of the Sponsor and Administrator. Void where prohibited by law. Giveaway is open to legal residents of the United States and the United Kingdom who have reached the age of majority in their respective province or territory of residence at the time of entry. Employees or contractors of the Sponsor(s) and immediate family members of, and any persons domiciled with any such employees or contractors, are not eligible to enter.
1 winner will be chosen at random using the Gleam widget. The odds of winning will depend on the number of entries received. The winner will be sent an email and will have forty-eight hours to respond. If no response is received within forty-eight hours, another winner will be chosen. Administrators are not responsible for prize fulfillment nor for any technical failures. Winning entry will be verified. A list of winners will be displayed on the giveaway widget on the original giveaway post. Prizes will be dispatched within 30 days of the giveaway ending.
Facebook, Instagram, Pinterest, Twitter and/or Google+ are in no way associated with this giveaway. If applicable, social media posts (such as but not limited to tweets and Instagram posts) must be PUBLIC to be eligible. If you sign up for newsletters as entries, you must confirm your subscription for those entries to count.
Administrators and sponsors reserve the right to publish winner’s first name and last initial. Contact information for sponsor(s), if applicable, can be found in the giveaway website links. Retail value of prizes is listed in the giveaway text. Images included in the giveaway post may not depict the exact prize, and are for illustrative purposes only. We reserve the right to change the prize and/or replace it with a cash prize if we are unable to procure the advertised prize. Please contact the Sponsor for any questions using the contact page at VueVille.com
While I have owned and reviewed quite a few outdoor IP cameras and pan-tilt indoor cameras regular readers will note that my DIY CCTV system does not include a Pan-Tilt-Zoom (PTZ) camera. I have even got a few emails asking me why I don’t write much about PTZ cameras. This was not deliberate, I just didn’t feel the need for one in my current setup.
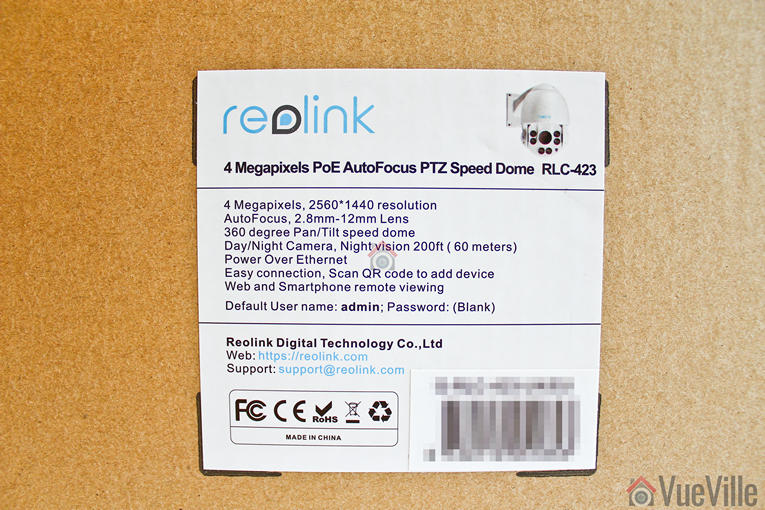
But you know me, I am always trying to write about what my readers want. So when Reolink asked me which one if their latest IP cameras I would like to review, I jumped on the chance to review their highly acclaimed PTZ model, the [easyazon_link identifier=”B016UCNP08″ locale=”US” tag=”vueville.com-eaz-20″]Reolink RLC-423[/easyazon_link].
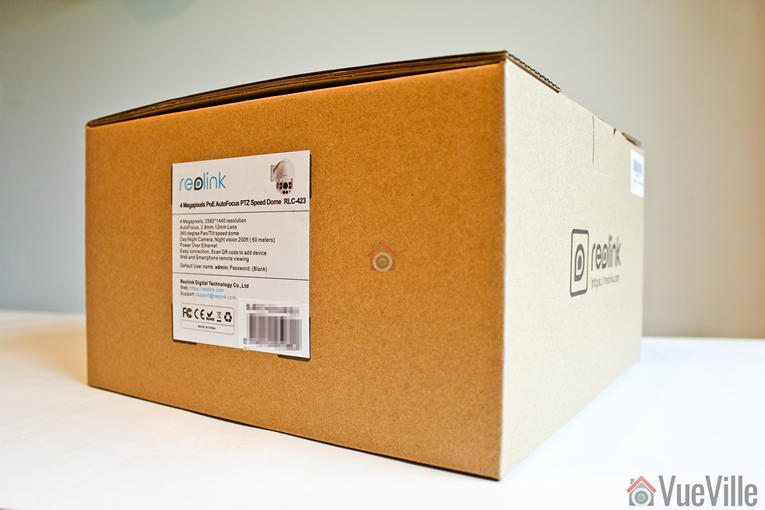
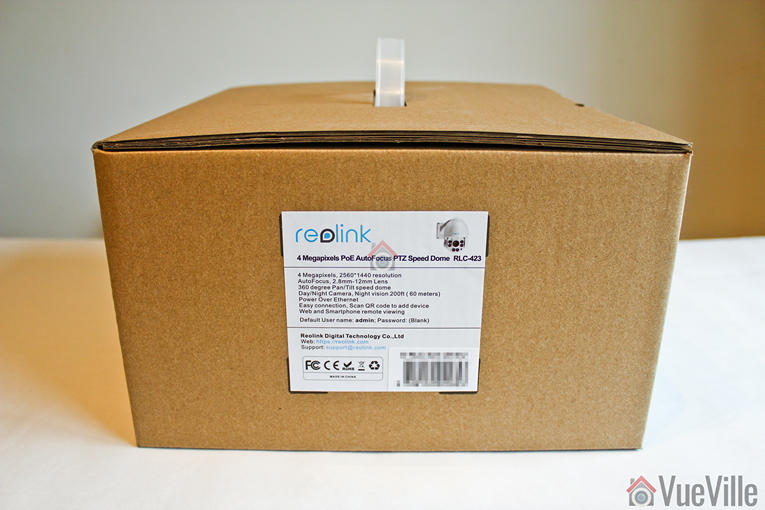
So not long afterwards, the postman showed up with this review unit kindly provided by Reolink:
Opening the box, I found a well-protected foam-padded RLC-423 PTZ camera and an assortment of accessories.
A list of the box contents:
RLC-423 IP camera
Waterproof sleeve for ethernet cable
1 metre network cable
Screws and rawl plugs
Software CD
Quick start guide
Surveillance sign
Mounting hole template
Power adaptor
Specifications
[table id=37 responsive=”scroll” /]
Design
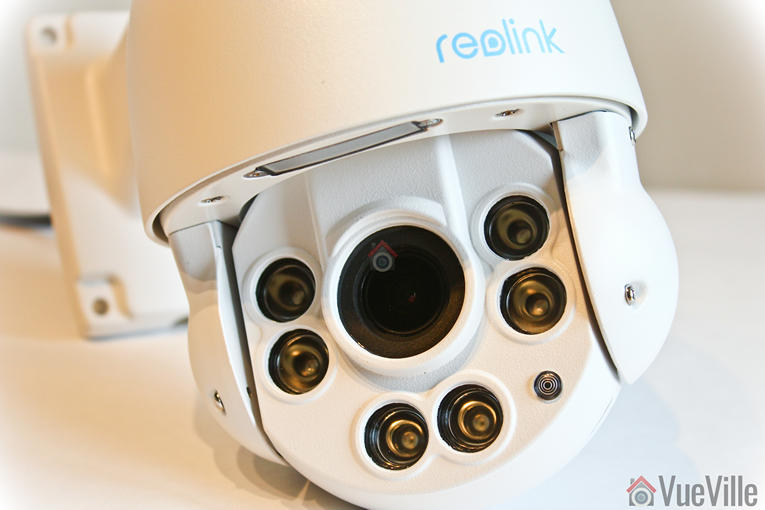
If you are used to modern IP cameras, the size of the RLC-423 will come as a surprise. Fixed lens cameras like the Hikvision DC-2CD2042WD-I or Reolink’s own RLC-410 are very compact as there are hardly any moving parts. But when you have a motorized lens and 6 high power LEDs, you need a larger housing for all the electronics.
The camera’s body is fully metallic and feels very solid, not to mention quite hefty. This is a well-built product and the matte finish screams quality. This is not your typical run-of-the-mill Chinese IP camera.
The front of the camera has a rather large lens, six InfraRed LEDs and the day/night sensor.
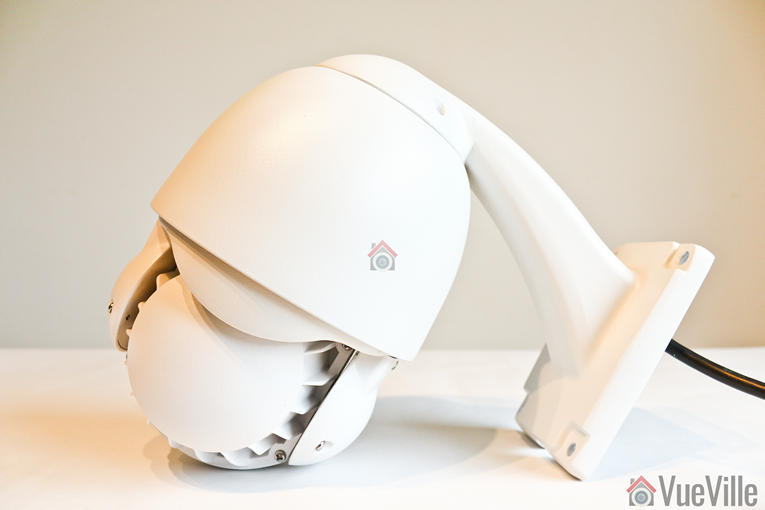
The rear of the camera body has fins to aid heat dissipation.
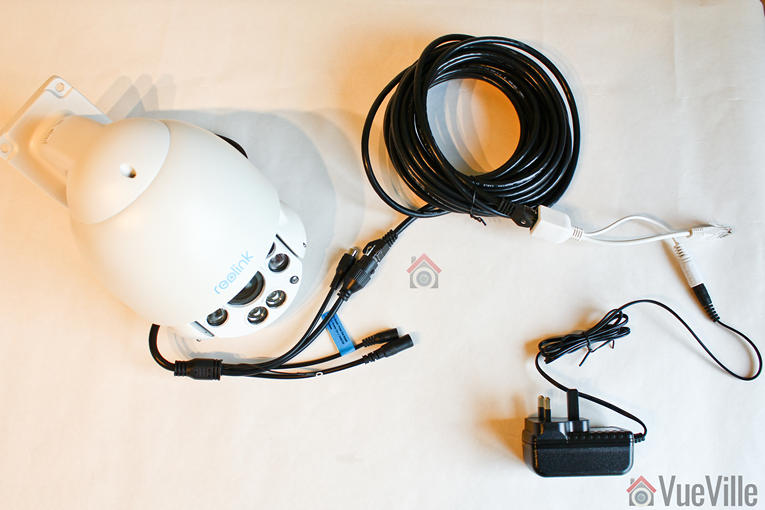
All the cabling comes out of the holder arm and can conveniently go into a junction box or down the wall through a cut-away provided for this purpose. The cabling consists of a pigtail with the following connectors:
12V power input jack
RJ-45 ethernet port
RCA audio in
A reset push button
I especially like the reset button not being on the main body of the camera. Apart from eliminating an ingress point, it means nobody can reset the camera unless they get to the hidden reset button! This is much better than many other cameras such as Hikvision’s which have the reset button externally on the camera body itself.
What’s missing though? An SD card is the most obvious omission and is quite a useful feature to see in an IP camera.
Installation
I was able to get the RLC-423 installed, up and running in 5 minutes. The camera comes with almost everything you would need to install the camera – rawl plugs and screws.
Hardware setup
The RLC-423 supports Power over Ethernet (PoE) which is my recommended way of powering IP cameras – you can use a single Ethernet cable to send both data and power to the camera using either a PoE switch or a PoE injector.
Since the camera uses high powered IR LEDs and has PTZ motors to power, it needs a lot more than the 7W or so a fixed lens camera needs – around 22W to be exact. So the PoE standard the camera supports is 802.3at. Reolink has thrown in a power adaptor that you can use to power up the camera and you may be thinking already ‘can I use that to inject power also’.
Yes, but hold your horses! My PoE switch is of the 802.3af variant so it didn’t have enough juice to power the camera. I had a PoE injector lying around and with the included power adaptor, PoE injection seemed to be the way to go. But what I quickly found out was that the 1.5 A power adaptor could power the camera only over cables of up to 30 feet length. When I tried using longer cables, the current drop over the cable run meant that the camera didn’t get the 22W it needed and couldn’t work properly when the IR LEDs also turned on. So either use a [easyazon_link identifier=”B07788WK5V” locale=”US” tag=”vueville.com-eaz-20″]802.3at PoE switch[/easyazon_link] or a [easyazon_link identifier=”B00BK4W8TQ” locale=”US” tag=”vueville.com-eaz-20″]higher power PoE injector[/easyazon_link] over a long Ethernet cable run.
If you want to use the included waterproofing connector, you will have to remove the RJ-45 plug on the ethernet cable and re-crimp it once it has been passed through the waterproofing connector.
Software setup
Most manufacturers prefer to use static IPs by default for their cameras. In most cases the camera will not have the same network settings (like sub-domain) as your network. This means that you cannot access the camera unless you change the camera network settings to that of your network. This is achieved by using the manufacturer’s camera finder tool. While this static IP method has security benefits, for most home users it would be easier if the camera manufacturer used DHCP as default. Then the camera would automatically be configured to use your network settings and be ready to use.
And this is exactly what Reolink has done. I was pleasantly surprised to see that the camera used DHCP by default.
When you are setting up a camera using DHCP, you normally wont know what its IP address is and so will have no way of directly accessing the camera. If you have IP reservation set up on your router, yes then you may know. But let’s assume you don’t know the IP address.
Remember this camera supports ONVIF. So to start using the camera you just need to find the IP address of the camera and there are quite a few ways you can do this:
Use the Reolink mobile app
Use the Reolink desktop client software
Use any camera monitoring software such as BlueIris
Use a mobile security camera app such as tinyCam Monitor Pro
Scan your network using a network scanner app
The included quick start booklet explains the first two methods. So to test the user friendliness of the instructions, I followed the instructions to use the Reolink client app to set up the RLC-423. These are the steps I followed:
Download and install the Reolink client software from the Reolink website
Click the ‘Add device’ button
Click on ‘Scan LAN’ and doubled click the RLC-423 that it finds
The default password is interestingly just ‘blank’.
This should then open the camera stream.
Once you have the IP address, you can simply pop that into Chrome or Firefox to directly access the camera settings. You could also use the desktop client app to change camera settings if you don’t want to use the web-based admin panel.
You should change the password of the camera as soon as you can, especially worth noting as the camera doesn’t require you nor remind you to do it.
Software features
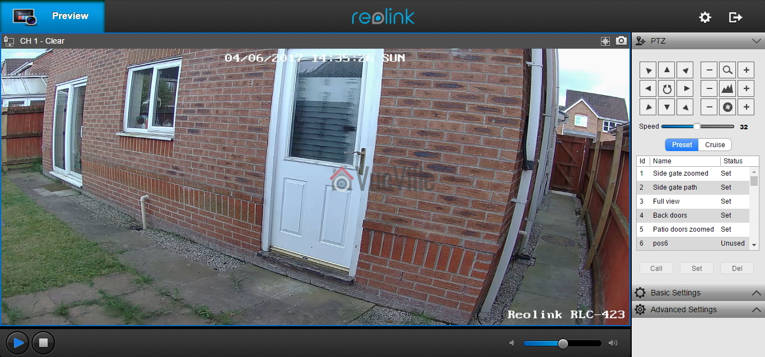
I prefer using the web admin page to watch the live view stream, to use the PTZ controls and to change camera settings. That’s because I can do this without installing anything on my devices, and I can do it from any device around my house.
So entering the camera’s IP address into any browser that supports the Adobe Flash player will let you login to the camera. Well an HTML5 interface would have been better for wider device compatibility but its far better than the NPAPI plugin that Hikvision insists on using. You can choose the stream you want to see at the login screen, Channel 1 is called Clear and is the 4 Megapixel stream. The other options are Balanced and Fluent. These can also be selected once you are logged in.
On the left hand side you have the live view stream, and at the bottom the play button lets you select between the video quality by switching between the Clear, Balanced and Fluent streams.
On the right hand side, an accordion type content holder has three sections – PTZ, Basic settings and Advanced settings. The basic and advanced settings sections are like a quick access area that duplicates the settings on the actual configuration page – accessed by clicking on the gear button at the top right.
The PTZ section lets you pan, tilt, and zoom, and adjust the focus manually. The camera has an auto-iris (aperture) control so the iris adjustment buttons are redundant and do nothing. You can choose the manual panning speed between 0 and 60 on a slider, with the default at 32. To make minor adjustments you have to lower the speed and then press the required directional button. The central spin button sends the camera into an endless spin mode, which is very nice feature if you set the pan speed to a low setting of 6 or 8.
There are two ways you can automate the PTZ function – presets or cruise mode. In preset mode, you can store up to 64 different positions in memory. Each preset will store the PTZ and autofocus settings. As you can see from the image above, I have stored quite a few positions. Preset positions are especially important if you plan to integrate the camera into your home automation system. For example, I could create a home automation scene in my Vera Plus to move the camera to a particular preset and take a video.
In cruise mode, you can define a path consisting of various preset positions and the camera will patrol the area according to those presets. Again this is a very useful feature and I am happy to see it on the Reolink RLC-423.
The Basic Settings section includes OSD settings, video stream encoding and image settings. The OSD page is pretty standard and lets you choose whether and where to show the OSD information such as day, date and time.
The Basic Settings is where you can set the video resolution, bitrate and frames per second of each of the Primary “Clear” stream (4MP default) and the Fluent stream (640×360 default). Interestingly, the ‘Balanced’ stream is missing in the stream selection dropdown.
The Image section lets you adjust the usual image settings such as brightness, contrast, saturation, sharpness and also mirroring and image rotation.
The advanced settings tab is where you will find the rest of the video settings and the ones I was most interested in – exposure, backlight and noise reduction. Setting the Exposure to ‘Low Noise’ lets you control just the range of gain, ‘Anti-smearing’ lets you control only the range of shutter speeds and manual lets you select both the gain and shutter speed ranges. The range selection method is novel – it means the camera will automatically choose the optimum settings from the range you specify. I didn’t see an option to change the i-frame interval. This is a bit strange as it is a setting that I would have expected to find. Why is it important? The i-frame setting specifies how often the entire frame is captured and not just what has changed from the previous i-frame. So being able to control it is important for getting the right balance between network bandwidth utilisation and a high quality non-blurry video.
As I said earlier, the real camera settings configuration page is accessed by clicking the gear icon at the top right. This lets you access network settings, motion detection settings, user control, and system maintenance settings.
There is no built-in NVR feature, so the camera cannot record to a network or NAS drive. This is a feature power users like but at this price point, its easy to understand why its missing.
Performance
I tested the camera at its default settings except for the frame rate, which I lowered from 30fps to a more realistic 10fps that most people recording 24/7 would use. I also added the RLC-423 to my favourite mobile CCTV app, tinyCAM monitor Pro to access the secondary stream.
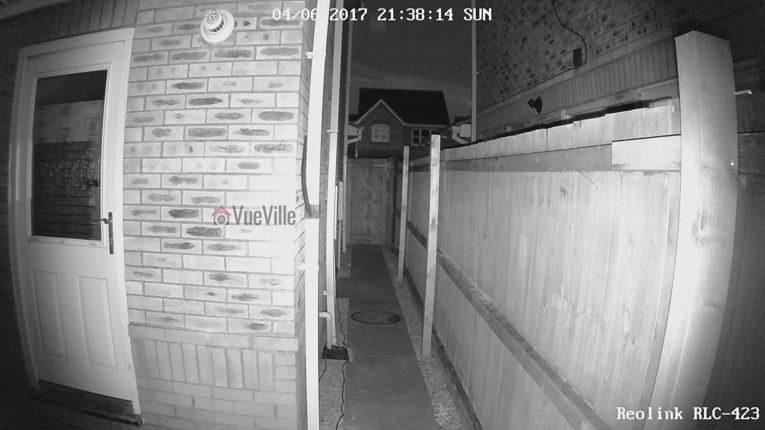
The RLC-423 is a 4 megapixel with a 1/3″ sensor. So I was expecting very high quality video and I was not disappointed, Daytime video is crisp and appeared to be sharper than my 4 Megapixel Hikvision DS-2CD2542FWS-IWS.
If the camera has one weakness, its the speed of the autofocus. While the accuracy of the autofocus is pretty good, it does take a few seconds to autofocus after zooming in or out.
Here’s a sample video of a recording during the daytime:
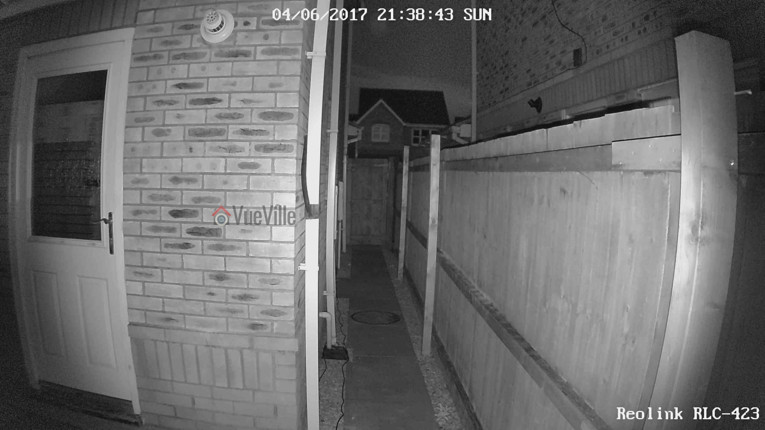
The real test of an IP camera is when the sun’s gone down and the lights are off. The Reolink has 6 high-power LEDs and a claimed InfraRed range of 60 metres.
Note that the RLC-423 doesn’t have true WDR, it employes digital WDR. So I was keen to look at the various backlight options:
backlight off
backlight on, and
Dynamic Range Control
So how did it perform? The video quality is excellent and I was very surprised to see the almost total lack of noise with the noise reduction setting on as default. Unlike most IP cameras, the noise reduction did not come at the expense of image quality. Check out the sample video below shot at default image settings (backlight off) and with Dynamic Range Control:
I am very excited that Reolink has launched such a high quality PTZ camera at such an affordable price point. This is the first affordable PTZ IP camera that I can recommend without any reservations. Yes the configuration options are a bit limited compared to the extensive configuration pages that Hikvision cameras boast, but you now what the Reolink RLC-423 does pretty well without it.
One weakness is the auto-focus which could be faster – but we need to put this in perspective. Its actually the impressive speed of the pan and tilt movements that highlights the relatively slower auto-focus. There are no alarm connections but that’s not a deal-breaker, especially given the price of the camera. What’s more important is the ONVIF and RTSP support that makes the camera very easy to integrate with the rest of your home security system.
Ultimately the PTZ functions superbly, video quality and resolution are stellar, and noise is very well contained with the help of the high power EXIR LEDs. The flexibility offered by the Pan-Tilt-Zoom features is immense and at this price level, the Reolink RLC-423 PTZ IP camera is a great buy.
[review]
Where to buy
[easyazon_link identifier=”B016UCNP08″ locale=”US” tag=”vueville.com-eaz-20″]Check your local Amazon site[/easyazon_link]
(* = affiliate link / image source: Amazon Associates Program)
Hikvision and Dahua are two of the most popular IP camera brands among DIY enthusiasts. Most of my cameras are from Hikvision, but that’s more due to my lack of experience when I first got into DIY CCTV.
Often when I saw recommendations being made online, it went like this: “Just go with Hikvision”. So you can understand when it came to pulling the trigger, I was leaning towards them.
Dahua was also mentioned but there were definitely fewer people using them compared to Hikvision. There didn’t seem to be any particular reason other than Hikvision being a bit cheaper.
But recently, both companies have been sanctioned by various governments due to their ownership by or links to the Chinese government. So after nearly 8 years of using these IP cameras, I am going to compare in this article the latest 2023 models and their retail availability in the US.
A quick note: This article may contain affiliate links. If you click on one of these links and then purchase something, we may receive a fee. This does not cost you anything extra. Also note that Hikvision and Dahua do not consider certain platforms including Amazon as an authorized seller platform. So if you need warranty support please purchase from authorized resellers of Hikvision and Dahua products in your country.
Hikvision vs. Dahua – the Stories behind the Brands
Hikvision
You’re probably no stranger to Hikvision if you have been dabbling with DIY security cameras for some time. Hikvision is a surveillance equipment manufacturer based in Hangzhou China. They primarily cater to professional installers and are not interested in retailing to the general public. But still they made a splash in the DIY space because of their affordable DIY IP cameras with powerful features. Like 3MP sensors which were unheard of in mainstream IP cameras in 2014 when I bought my first IP camera, the Hikvision DS-2CD2032-I.
A couple of years ago, they launched their retail brand EZVIZ. Confusingly, EZVIZ used to be the name of their cloud app as well. Anyway the EZVIZ models are dumbed down versions of the Hikvision cameras and are not worth spending any money on. That’s why I am focusing on the main Hikvision brand.
According to IHS, 53% of all security cameras shipped in 2015 were network (or IP) cameras. While Hikvision is the world leader in IP cameras with a global market share of 17% forecast in 2017, Dahua comes in second with a forecast of 5.5%.
The biggest concern I have with Hikvision is not so much about their cameras, but who owns Hikvision. The Chinese government owns at least a partial stake in Hikvision. This creates a few ethical and moral quandaries. The US government has also banned Hikvision and Dahua from all federal government bodies (along with Huawei and ZTE) through the National Defense Authorization Act (NDAA) passed into law in 2019. This also includes all the OEM/white label/private label brands – which makes up most of the security camera market. Recently, the US government went further and issued a ban on the FCC certification and authorization of these brands and their rebadged brands – which effectively kills the import of these cameras into the US.
From a technical standpoint, you should treat any security camera (Chinese or not, banned or not) the same way – with maximum suspicion that they may be ‘dialing home’ to their manufacturers servers. So lock them down using Virtual LANs (VLAN) and strict firewall rules like I have in my DIY home security camera system.
Dahua
Dahua is an OEM who are best known for their Starlight ultra low-light cameras. Of course, they have a full lineup of products just like Hikvision.
Dahua used to own Lorex until Novemeber 2022 when they sold it off. Dahua cameras are also re-branded by Amcrest, Honeywell, Panasonic, Bosch and many others. What these brands do is usually rebrand the Dahua camera by sticking on their logo and slightly changing the firmware to add/remove some features. For example see our recent Hikvision vs. Amcrest comparison where you will see that the Amcrest camera is a rebadge of a Dahua camera. Some brands even selfishly remove ONVIF support so that the camera works only with their own product range.
Just like Hikvision, Dahua are also partially owned by the Chinese government. So all the concerns I raised above with Hikvision apply to Dahua also. Their cameras and OEMs are also banned under the National Defense Authorization Act (NDAA) and recent FCC actions mentioned above.
Of course I don’t let that stop me from buying these or any other Chinese cameras – instead, I lock down all my security cameras tighter than Fort Knox using my DIY smart home network that uses the Ubiquiti Unifi line of networking products.
Dahua and Hikvision cameras have historically had very similar features, so this is going to be an interesting comparison.
8MP IP Camera Duel – Hikvision DS-2CD2085G1-I vs. Dahua N85DF62
I will look at the 8MP IP cameras as these are quickly becoming affordable for DIY fans like us. From Hikvision, I picked the DS-2CD2085G1-I model from the Darkfighter series. For the Dahua, I picked the popular N85DF62 model.
From the consumer’s point of view, price is an important factor in deciding which competing models are actually comparable. So I have tried to balance the features and price of the cameras that I have picked for this comparison.
Still, the Dahua cameras are richer in features and hence are priced quite a way above Hikvision.
Hardware
The most common sensor in DIY IP cameras is a 1/3″ progressive scan CMOS sensor. However the Darkfighter series Hikvision has a much larger sensor at 1/2″. But the Dahua Starlight cameras are even better with a slightly larger sensor (1/1.8″).
The size of the sensor has a huge bearing on the low light ability of a camera, whether it be a camcorder or a security camera. The larger the sensor, the greater its ability to gather light and so do well in low light conditions. But as you cram in more and more pixels into the same size sensor, they get smaller and smaller, which adds noise. Noise is the bane of low light video and reduces the detail that you can get out of your video.
So while security camera manufacturers have pushed pixel count from 4MP to 8MP, they have not increased the sensor size. However both the Hikvision and Dahua 8MP models have true 120dB Wide Dynamic Range (WDR) to help improve video quality.
How about low light performance? You would expect the Dahua to be better thanks to the larger sensor. But the Hikvision can go down to an astounding 0.014Lux, while the Dahua can go down to 0.08Lux. That’s at an f-stop of f1.6 and 1/30s exposure (shutter speed). Even though both manuacturers like to advertise even better low light levels at 1/2s exposure, I wouldn’t go any lower to avoid blurry videos.
Both Hikvision and Dahua top out at 30m IR range at night time.
The Hikvision is available with lens at different focal lengths – 2.8 mm, 4 mm and 6 mm, but the Dahua comes only with a 2.8 mm lens.
Moving on to the enclosures, both cameras have metal bodies and are weather-rated for IP67. But Dahua has IK10 vandal protection as well, which is very unusual for bullet form factor cameras.
So on the hardware front, I think the Dahua gets the edge here.
Interfaces
The cameras both have an RJ-45 Ethernet port, and Power over Ethernet (PoE). But Dahua supports Enhance PoE (ePoe) which improves power and signal integrity over long Ethernet runs.
The Dahua takes larger microSD cards (256 GB) vs. the Hikvision’s maximum 128 GB. Neither have Wi-Fi.
Something that has gone out of fashion is proper old-school audio and alarm in/out ports. So I was pleasantly surprised to see that Dahua has both of these features and even throws in an onboard microphone!
Clearly Dahua wins here.
Software
Let’s get the basics out of the way, both cameras support ONVIF and RTSP, the two most important features you should look for in an IP camera so that you can integrate it into your DIY Smart Home Automation System.
ONVIF ensures that your camera will work with standards-compliant equipment from 3rd party manufacturers (like dedicated NVRs, NAS NVR software or PC NVR software like BlueIris).
RTSP allows even non-ONVIF equipment (such as software) to access the security camera’s video stream. Examples are video players like the popular VLC player.
When it comes to features, one striking difference is that the Hikvision DS-2CD2085G1-I has a max bitrate of 16Mbps vs. the 8 Mbps of the Dahua N85DF62. This shouldn’t be an issue though, I’m quite happy with the 6Mbps stream from my Hikvision and Reolink cameras.
This bit rate provides sufficient quality while extending the number of days I can store on the QNAP NAS that I use as my DIY NVR.
In previous generations, only the Dahua had the ability to provide video streams at three different resolution. Now the tables have turned. Hikvision has caught up and can push 6 different streams simultaneously.
Motion Detection
Both cameras support basic motion detection as well as the expected advanced motion detection techniques (intrusion detection and line crossing).
I can’t emphasize enough the importance of these advanced motion detection methods in reducing false motion alerts.
Additionally, for the longest time Hikvision had face detection, abandoned object, and missing object detection. Dahua didn’t have these and lagged behind heavily.
But in 2023, we find that Dahua has clearly surpassed Hikvision by supporting all of the above, smart detection methods such as person and vehicle detection, and a host of other additional interesting features:
People counting
Fast-moving object detection
Parking detection
Crowd gathering
Loitering detection
Clearly Dahua wins here as they join Reolink & Amcrest in offering person & vehicle detection. One notable absence in both Hikvision and Dahua cameras is pet detection. But the Dahua has a very clever feature to avoid false alerts from leaves, lights, animals, and other inconsequential objects.
Mobile apps
Both the Hikvision and Dahua mobile apps are outdated and frankly terrible to use. But for enthusiasts like us who are the target retail audience, this doesn’t matter because we use these cameras in our own DIY CCTV system which uses a single mobile app for viewing IP cameras.
Warranty
Both Hikvision and Dahua offer a 3-year warranty but only through their authorized US retailer, B&H Photo. Online marketplaces such as Amazon are not included in their warranty coverage.
Detailed Comparison Table
Here’s a summary in a nice and easy table:
[table id=62 responsive=”scroll” /]
Verdict
So as you can see the Hikvision and Dahua are both capable IP cameras but have enough differences between them to warrant a closer look. Dahua has caught up on both hardware and software features vs. Hikvision. So I would pick the Dahua over the Hikvision.
Its also interesting that both Hikvision and Dahua are still available for retail buyers like us from their authorized US retailer, B&H Photo who offer a 3 year warranty as well!
There’s been an explosion of hidden cameras in recent years, with cameras now available in nearly every shape and form you can image. Everyday stuff such as clocks, desk alarms, computer speakers, power plugs, even kids toys have been discreetly turned into high-tech high resolution spy cameras.
Interestingly enough, there are not many hidden spy cameras in the form of a book. You would have thought that a book lying around is probably one of the easiest spy cameras to hide in plain sight and so manufacturers would be rushing to make tons of these. However, there are not many options around.
There are essentially two things a good hidden camera should be able to do – blend into the background and record video and audio/video reliably. So how does the [easyazon_link identifier=”B077D26PKL” locale=”US” tag=”vueville.com-eaz-20″]Conbrov DV9[/easyazon_link] spy camera book fare? Conbrov kindly provided a unit for us to test, and we put it through its paces. Note that the model we tested has an upgraded 1080p sensor vs. the 720p model currently available on Amazon.
I must warn you at this point that we do not endorse any illegal use of these cameras. All testing carried out using this camera features the authors of this blog. Make sure you follow all local and national laws in your jurisdiction while operating this camera.
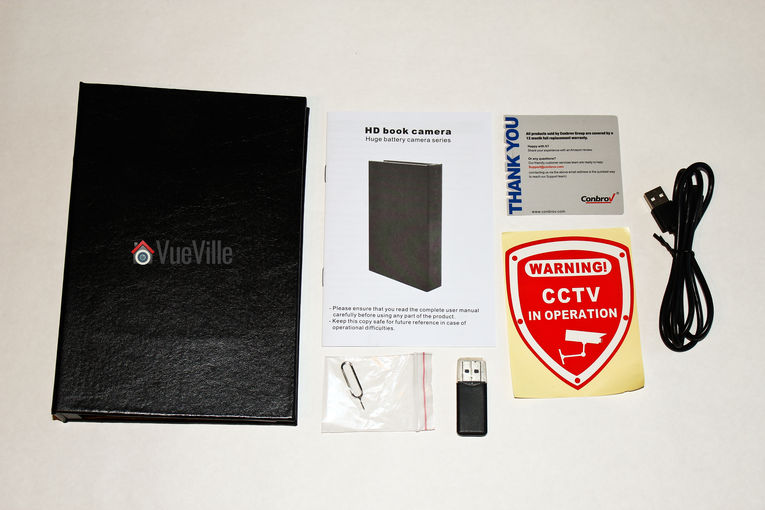
The DV9 comes in a high quality packaging that provides adequate protection to the contents. There is no branding on the box at all.
What’s in the box
1 x Book camera 1 x User manual 1 x Pin for resetting the camera 1 x Warning sticker 1 x USB cable 1 x USB Card reader
Main Specifications
[table id=36 responsive=scroll /]
Design and Features
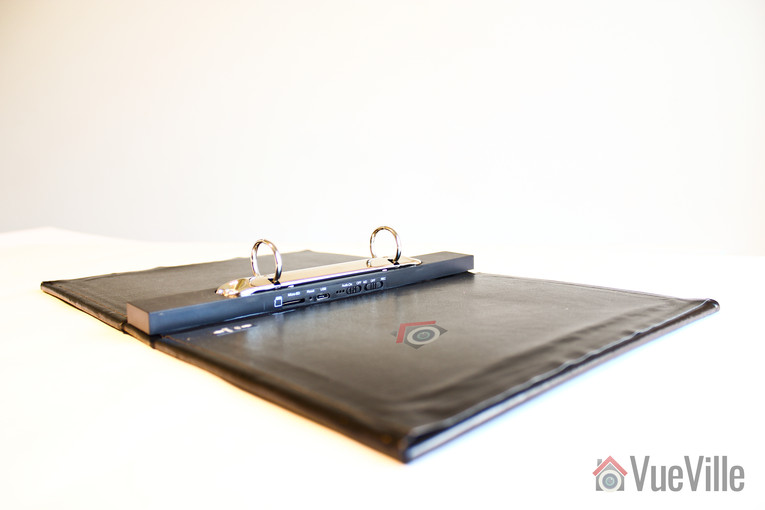
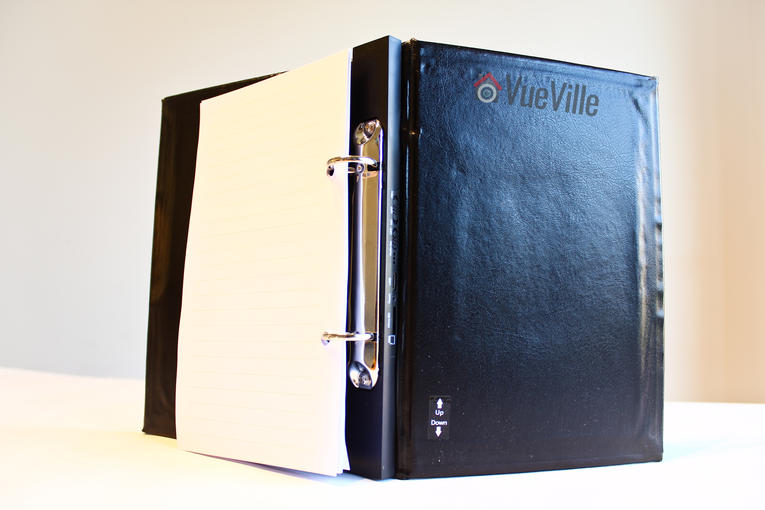
The Conbrov DV9 is described as a book by the seller, and it does look like a vintage book as you can see below.
But inside it looks more like a file folder or a binder. I can see why they went for a binder style inside of a book – you need a place to hide the massive 10,000 mAh battery and all the electronics. The spline of the binder is the perfect location for this. If someone were to casually flip through the DV9, they wouldn’t notice the settings buttons unless they went past the last page.
A few pages are included in the binder but you may want to add more pages to make it more realistic.
Hardware Features
There is a reflective glass cover at the top of the book concealing the InfraRed LED. Its noticeable only if someone is looking closely at the book. In operation, the IR LED glows a dim red. It is noticeable if you are looking for it, but is not so bright that it catches the eye.
Just below the IR LED is the camera lens. Even though the seller describes the camera as a 720p model, the video files I obtained from the camera were of 1080p resolution – a pleasant surprise! The camera has a claimed angle of view of 75 degrees and I verified this in my testing.
Further down you will find a very small PIR sensor with a detection angle of 65 degrees and a max range of 25 feet.
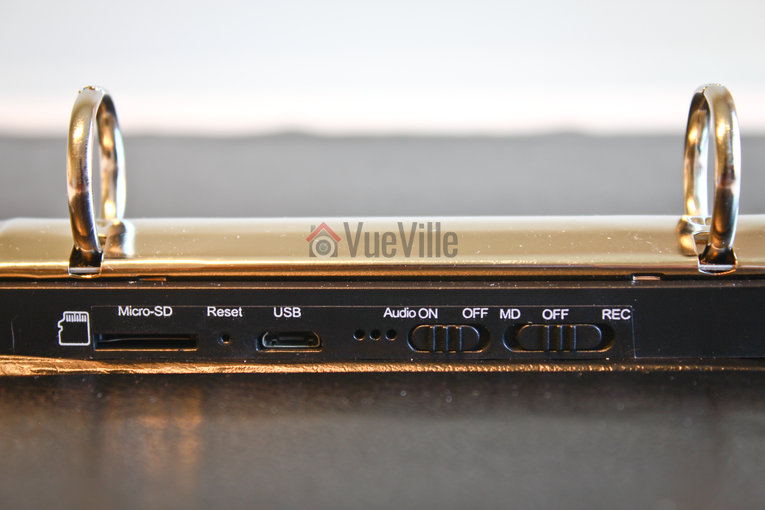
On the inside of the spline, you will find the MicroSD slot, a reset button, a microUSB port, activity LEDs, an audio On-Off toggle switch, and the mode selection switch. The camera supports up to 32GB microSD cards. The provision of a USB port allows you to connect the camera directly to a computer to download videos. This is much easier than removing the SD card and putting it in a computer using the included USB card reader device.
Even if you plug in a USB power cable, the battery does not seem to charge when the spy camera is in operation. This would be a good feature which would then let you use the battery as a power backup – potentially increasing the time you can keep the camera up and running if external power is available near the point of camera use.
Also missing are any wireless data transfer options. Why would you need Wi-Fi in a spy camera? So that you can retrieve recorded footage without having to physically access the spy camera. At the asking price, I would have expected to see a P2P Wi-Fi connection option. By the way this would also let you view a live stream from the camera.
Software Features
The camera has 2 operation modes – Motion Detection (MD) recording and Continuous recording (REC mode). In MD mode, recording is initiated whenever the PIR sensor detects motion. This is great because it prevents false recordings, helps conserve battery life and lets you record more on the microSD card. Audio recording is available in both MD and REC recording modes.
Date and time overlay is possible and you can turn on loop recording – but that’s it when it comes to configuring the camera. There is no way to adjust video quality settings such as the bitrate, or image quality adjustments such as brightness or contrast.
Camera Setup
The manual is written in very good English and is quite exhaustive in my opinion. There are clear illustrations showing the different parts of the spy camera and a clear summary of instructions. There are different sections that then detail each step of the summary.
A very helpful table of various LED indicator statuses is also provided.
So here are the steps I followed to set up the spy camera:
Insert a [easyazon_link identifier=”B007JTKLEK” locale=”US” tag=”vueville.com-eaz-20″]32GB Sandisk Class 10 microSD[/easyazon_link] card.
Charge the spy camera up using the provided USB cable and a 2 Amp charger.
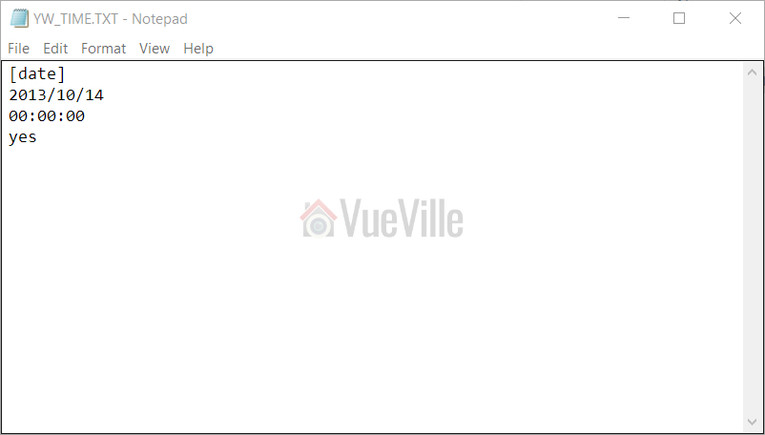
When its fully charged, put the spy camera in REC mode. The microSD card will show up as a removable disk on your laptop.
Open the YW_TIME.txt text file and enter the date and time, and whether you want the automatic video loop on or off.
That’s it – there are really no other software settings you can control. On the camera itself, you can turn the audio on/off, and choose the recording mode.
The next challenge is positioning the camera. As with most spy cameras, there is no Wi-Fi or live stream feature. So you can’t know whether you are getting everything you want in your scene until you record and then play back the video. But that’s just a one-time exercise.
Performance
Overall I was happy with the performance of the Conbrov book camera. Video quality is high at 1080p resolution and the audio quality is decent. The camera uses Variable Bit Rate (VBR) settings depending on the complexity of the scene – this helps optimise storage space. Sadly there is absolutely no way to control the camera video or audio settings.
There is some false colour during the daytime and that is because of the absence of an IR cut filter. But really that’s not an issue because the camera has a very low threshold for switching to night mode and then everything is black and white anyway.
Night time video quality
The following video was taken in absolute darkness, and you can see that the single IR LED is not powerful enough to light the whole scene and has a spotlight effect. The camera is around 10 feet from the wall.
Night time is grainy but I would take sharpness and detail over noise reduction any day (or night!).
[wpsm_toggle title=”Here’s some technical info of the clip itself:”]
[wpsm_codebox style=”1″] General
Format : AVI
Format/Info : Audio Video Interleave
File size : 182 MiB
Duration : 1mn 58s
Overall bit rate : 12.9 Mbps
Video
ID : 0
Format : JPEG
Codec ID : MJPG
Duration : 1mn 58s
Bit rate : 12.9 Mbps
Width : 1 920 pixels
Height : 1 088 pixels
Display aspect ratio : 16:9
Frame rate : 30.000 fps
Color space : YUV
Chroma subsampling : 4:2:0
Bit depth : 8 bits
Compression mode : Lossy
Bits/(Pixel*Frame) : 0.206
Stream size : 183 MiB
Audio
ID : 1
Format : PCM
Format settings, Endianness : Little
Format settings, Sign : Signed
Codec ID : 1
Duration : 1mn 58s
Bit rate mode : Constant
Bit rate : 128 Kbps
Channel(s) : 1 channel
Sampling rate : 8 000 Hz
Bit depth : 16 bits
Stream size : 1.81 MiB (1%)
Alignment : Aligned on interleaves
Interleave, duration : 512 ms (15.37 video frames)
[/wpsm_codebox]
[/wpsm_toggle]
Daytime video quality
While the room was not brightly lit in the next test video, there was ample daylight coming in from the window. You can see this in the first couple of seconds of the video, before the camera switches to night mode and turns on the IR LED.
What did I mean by the camera having false colour during the daytime? Check out this sample video shot outdoors – the leaves are not very green at all but actually they are very green, I promise:
[wpsm_toggle title=”Here’s some technical info of the clip itself:”]
[wpsm_codebox style=”1″] General
Format : AVI
Format/Info : Audio Video Interleave
File size : 253 MiB
Duration : 1mn 29s
Overall bit rate : 23.7 Mbps
Video
ID : 0
Format : JPEG
Codec ID : MJPG
Duration : 1mn 29s
Bit rate : 25.2 Mbps
Width : 1 920 pixels
Height : 1 088 pixels
Display aspect ratio : 16:9
Frame rate : 30.000 fps
Color space : YUV
Chroma subsampling : 4:2:0
Bit depth : 8 bits
Compression mode : Lossy
Bits/(Pixel*Frame) : 0.403
Stream size : 268 MiB
Audio
ID : 1
Format : PCM
Format settings, Endianness : Little
Format settings, Sign : Signed
Codec ID : 1
Duration : 1mn 29s
Bit rate mode : Constant
Bit rate : 128 Kbps
Channel(s) : 1 channel
Sampling rate : 8 000 Hz
Bit depth : 16 bits
Stream size : 1.37 MiB (1%)
Alignment : Aligned on interleaves
Interleave, duration : 509 ms (15.26 video frames)
[/wpsm_codebox]
[/wpsm_toggle]
Audio quality
What would you use audio in a spy camera for – to capture conversations. So it should be sensitive enough to pick up anything in the room. The DV9 is good enough – it easily recorded my baby crying downstairs and other bits of sounds outside the room through a closed door.
PIR Motion Detection
Software-based motion detection is the method employed by most spy cameras, so I was delighted to see that the Conbrov DV9 used a PIR sensor to detect motion. A PIR is far more accurate than software methods because it actually detects the presence of a heat radiating body in the scene. This means you have virtually no false recording triggers – which is the biggest issue with pure software based motion detection.
It detected motion in a range of 10 – 15 feet in our testing and never once missed a motion trigger. There is a slight delay before motion is detected but its very small, something like 1 second and is not a problem at all.
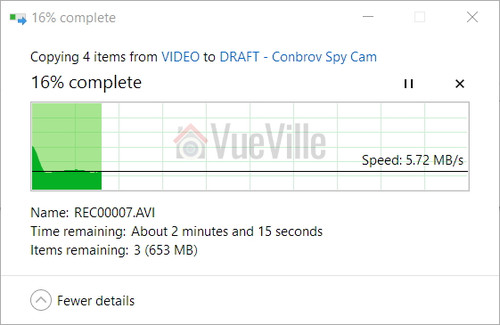
File Copy Speed
Plugged into a USB3 port with the included USB cable, it averaged around 5.7 MB/s which is fine. This was using a Class 10 Sandisk MicroSD card in the camera.
Battery life
The battery takes a few hours to recharge fully and the yellow charging indicator LED will go off when its done. Conbrov says the 10,000 mAh battery should provide a standby time of up to 24 months in motion detection mode, but of course we can’t test that. But the battery held up over 2 weeks of intense testing.
There is no battery gauge so you can’t know how much juice is left in the battery. Its very much a top it up and let it discharge till it is dry type of device.
Storage capacity
The high bitrate of the recorded clips limits the number of hours the camera can record. I found that it needs approximately 1.5 Megabytes per second of video and audio in night mode and around 3.0 Megabytes per second for daytime clips. So a microSD card with the maximum supported size of 32 GB can store up to 5.4 hours of night-time video or 2.7 hours of day-time video.
So to really take advantage of the massive battery capacity, you should use the motion detection recording mode, and this is what most people would probably use the spy camera for.
Verdict
So if you want a spy camera that does a nice job of melding into the background, but capture good quality full HD 1080p video and audio with a very long battery life, the DV9 is the spy camera for you.
[review]
Where can I buy one?
[easyazon_link identifier=”B0736SNG4B” locale=”US” tag=”vueville.com-eaz-20″]Check Price on your local Amazon Site[/easyazon_link]
It’s all well and good being able to monitor motion and temperatures changes around your house, but your home truly becomes a smart home only when it can then respond to those changes. This can be done by controlling lights, home appliances and other security gadgets in your home.
After I got my Fibaro and Aeotec motion sensors up and running, I started researching how I could get my existing dumb appliances to work with my smart home network. Let’s take the example of a humidifier. My son occasionally suffers from dry skin, so its very important that I am able to maintain a good humidity level in his nursery. I already have a [easyazon_link identifier=”B01C5UCWH6″ locale=”US” tag=”vueville.com-eaz-20″]non-smart humidifier[/easyazon_link] which is an ultrasonic cool mist humidifier. My Aeotec Multisensor 6 tells me what the humidity is but since the humidifier is not a smart device, I then need to manually switch it on or off. This is not very convenient in the middle of the night – I like my beauty sleep!
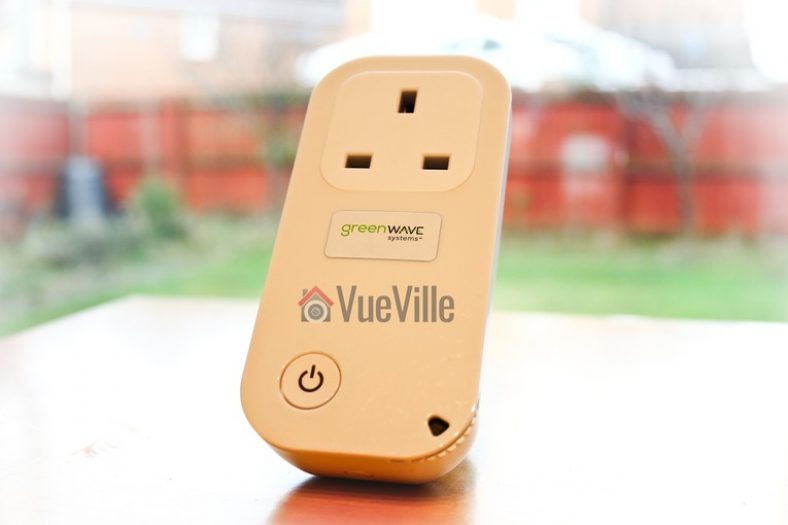
The expensive way of automating the humidification is by getting an expensive smart humidifier like the [easyazon_link identifier=”B01K3KTR9Q” locale=”US” tag=”vueville.com-eaz-20″]Motorola Smart Nursery Humidifier[/easyazon_link]. But there’s an easier and far more cost-effective way of making your existing dumb appliances smart – by using smart power plugs like the Greenwave Powernode 1.
For my first smart plug, I chose the Greenwave Powernode 1 because it is a very reasonably priced Z-Wave wall plug that has power usage monitoring and yet has great reviews.
Greenwave Systems was formerly known as Greenwave Reality Pte Ltd, a company started in 2008 in Singapore. Greenwave Reality became Greenwave Systems in May 2014. The company caters to both the consumer market through its smart home devices and industry through its disruptive Greenwave360 and AXON solutions.
Greenwave Powernode Series
The Greenwave Powernode Family
The Greenwave Powernode series consists of everything you need to control electrical appliances and monitor their power usage. Their most popular products are the 1-port wall plug and the power strip.
Greenwave 1-port Powernode Specifications
[table id=35 /]
Design
The Greenwave 1-port PowerNode is a well-built device with a premium feel to it. The rounded contours and matte plastic exude high-quality which you wouldn’t expect for such an affordable smart plug.
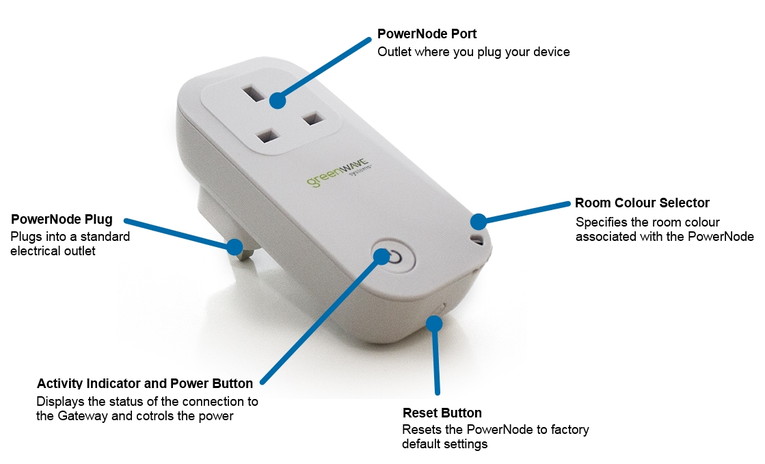
On the front, there is a manual over-ride switch which also doubles up as a slightly confusing indicator LED array. I say slightly confusing because, it is not a single LED but a ring of LEDs arranged in a circle around and behind the button. The LEDs are used in a dizzying number of patterns to convey different states and operation modes – keep the manual handy.
Features
Note that the reset button is also a SYNC button. Image courtesy – Vesternet
The PowerNode is a first generation Z-Wave device, which means it is not based on the latest 500 series chipset. However I don’t think it matters because for switching and power measurement purposes the increased bandwidth of Z-Wave 500 is not needed. I also found the range of the device very good, so don’t let the 1st gen nature of the device discourage you.
The PowerNode has both the basic relay function and a power usage monitoring feature. It supports a healthy switching capacity of 2,400W and up to 10A.
The other main feature if the smart plug is that it can monitor and report the power usage of plugged in devices. I tested it with an LED lamp, a humidifier, a traditional CFL lamp and every time it gave a reading that was in line with the device’s stated power consumption.
There is a room colour selection wheel at the bottom right, however this feature works only if you use Greenwave’s own Gateway controller. If this is the case, you can assign a colour using the wheel and it will reflect this assignment on the Gateway’s control panel. Frankly it sounds more like a gimmick than anything useful and anyway since I have a Vera Plus I can’t use this feature.
There is a Reset button on the bottom of the plug, but what the manual doesn’t state clearly is that it is primarily a Sync button. Even the physical symbol on the button is that of SYNC. So its just a multi-purpose button that does different things based on how many times you press it. You will need to know this, otherwise you will spend ages wondering where on earth the sync button is like I did. Greenwave, you need to really sort out your user manual!
Installation
I found installation mostly straight forward except for finding the sync button because the manual insists its a reset button.
The rather confusing user manual is written mainly with the assumption that you will be using the PowerNode with Greenwave’s own Gateway. But I suspect most people will want to use it with their own Z-Wave gateway, so here are the steps for adding it to your Z-Wave network (I used a Vera Plus, but the steps are the same):
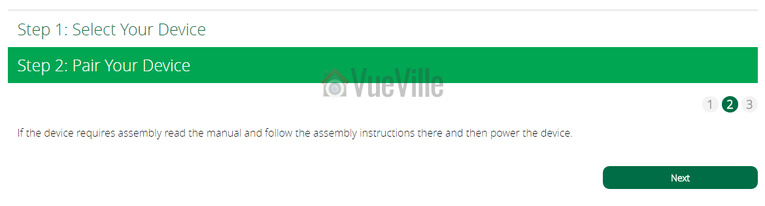
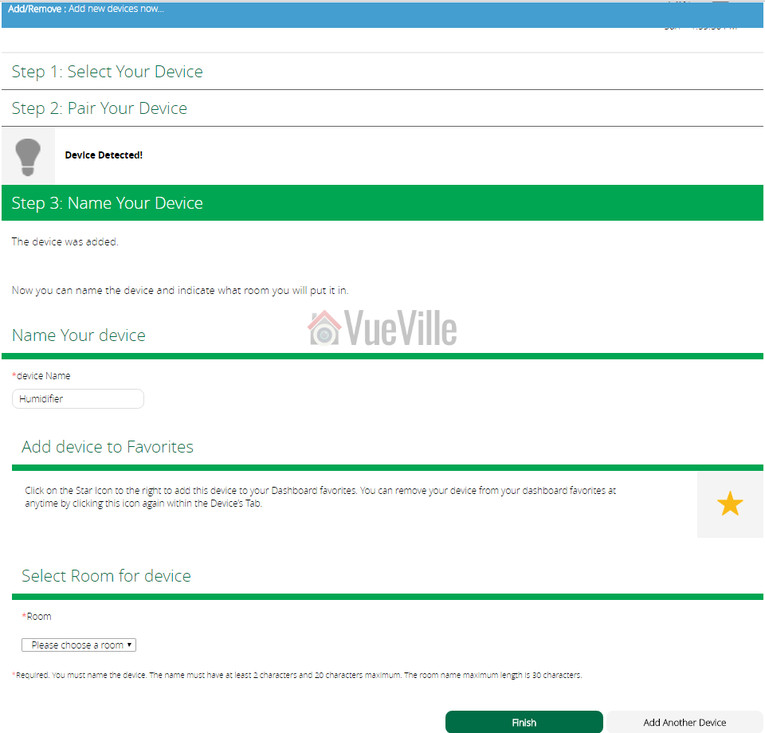
Click on the Add Device button
Now you need to select the type of device – choose ‘Generic Z-Wave Device’
Then you will see this screen, simply click ‘Next’
Now plug the PowerNode into an electrical outlet that is close to your Z-Wave controller.
Locate the sync button on the PowerNode. It is a small round button on the side of the device, marked with the sync symbol.
Press and hold the sync button for one second until the PowerNode activity indicator begins to display a clockwise-rotating pattern, which shows that the PowerNode is attempting ‘inclusion’ into your Z-Wave network.
Now press Next on your Vera Plus wizardYou will then see the following screen as the Vera Plus starts looking for any new Z-Wave device in range:
After a few seconds, the rotating pattern on the PowerNode LED indicator should stop and all bars turn green for five seconds to indicate successful inclusion. The PowerNode is now part of your Z-Wave network. If the rotating pattern has stopped but the bars rapidly flash green for five seconds, then the PowerNode inclusion process has failed, and you must start over.
Give the device a name and click Finish.
You will then see a “Please Wait” message at the top.
When it disappears, your new device will show up in the device list.
Performance
So when it comes to using it daily, how did it fare? Very well – I have 5 of these smart plugs in service for the last 6 months and they have been simply excellent. It has turned on and off every time as commanded by the Vera Plus. No issues at all with wireless range and they function as signal repeaters, so are great for extending the reach of the network too.
Power usage monitoring works well and while I am not doing anything with the info presently, its nice to know I can keep an eye on the connected appliance’s power usage.
There is no noticeable delay between me turning on my living room lamp from Imperihome and the LED lamp actually turning on.
If there is one quibble I have, its the PowerNode being quite needy when it comes to receiving a pulse from the Vera Plus. If it does not hear from the Z-Wave controller every couple of minutes, it starts angrily flashing its very bright LEDs. Yes they are enough to make you lose your sleep. The culprit is the default poll time which you can increase to sort out the problem, or you can instruct your controller to send the PowerNode a pulse every minute and keep it happy.
Looking at the most ubiquitous IoT device, there are 204 million smart phones in use in the United States. Apple is highly credited with releasing the first modern smart phone in 2007. Over the next 10 years dozens of companies invested significant R&D into the security of their customers mobile data. Despite the billions spent, there have been dozens of hacking cases involving these relatively secure devices. Along with the consumer data collection that the companies who produce these phones take part in, these devices with their audio, video, and GPS sensors allow for data to be collected on someone in real-time.
It is estimated that there will be fifty billion objects on the IoT in just three years. We must realize, that an IoT device doesn’t need all the functionality of a cell phone to be a serious privacy challenge. James Lyne the global head of security research at Sophos claims that:
IoT devices are coming in with security flaws which were out-of-date ten years ago you wouldn’t dream of seeing on a modern PC
While an IoT large-scale data breach has not yet occurred, we have already seen these devices be hijacked on a large scale. The DDoS attack which overwhelmed the DNS for most of the Eastern United States was done with a botnet consisting of IoT devices, primarily digital cameras, DVRs, and routers.
Unfortunately if history is any indicator, it seems to be a question of when and not if there will be a large IoT data breach. To date, reputable tech companies such as Yahoo, Tumblr, eBay and Daily Motion have lost the personal information of billions of users in hacks. These are companies, which deal solely in creating technology platforms. With such a high data loss to date, will the public be able to trust manufacturers of smart fridges, smoke detectors, cars, watches, etc., to protect their personal data from malicious actors?
Of course protecting peoples privacy not only relies on stopping the bad guys, it also requires informed consumers. There is a $125 billion market involving collecting and analyzing consumer’s personal data. If a consumer buys a smart fridge that tracks all of their purchasing and knows their most intimate dietary habits, the company which manufactures this fridge could have the option to sell this information to a third-party. A study by MeasuringU predicts at a maximum, 8% of users actually read a software EULA. There needs to be a more transparent option to identify company’s data policies, few people will have the initiative to read and comprehend hundred page documents for every IoT product bought.
As it stands, if you read every user agreement and only bought products that didn’t track data, and were able to guarantee you were never hacked – government agencies would still potentially have access to your personal information. Many countries such as the United States and Sweden, have laws which allow government agencies to monitor all internet traffic coming through their country. Today, anytime you use Skype, Facebook, or a service based in the US, the NSA has access to the data you’ve transmitted.
Let’s pretend a US company started selling millions of smart espresso makers all around the world. The espresso makers contain a camera, microphone, and remember all of your past coffee habits. Under PRISM, all your data use on that espresso maker could be recorded and viewed by the US government if it were transmitted through a US server. This means if you live in Norway and use your espresso maker to video chat your friend in Iran, because your call could be routed through a US based server, that call could be monitored. Later if the United States (or any other country) created or altered a secret law such as the Patriot Act, one can only imagine the potential to collect information about an individual just because they purchased a specific product.
While there are many potential privacy pitfalls with the coming IoT, there is evidence that regulatory agencies are looking at ways to tackle them. The United States Federal Trade Commission has made recommendations to protect consumer choice and ownership of data. A resolution passed by the US senate states the need to create a national policy on IoT data security and management, and the National Highway Traffic Safety Administration is preparing cyber security recommendations to make soon to arrive autonomous cars more secure.
In addition to governmental regulation, we can only hope companies are sufficiently motivated to adopt sufficient cyber security and ethical standards. Yahoo is estimated to have lost 1 billion dollars of its market cap after their massive data hack in 2016, and data breaches are costing consumer service companies on average $174 per record stolen as of 2016. Once again, the consumer has the potential to play a huge role. Currently data breaches have little effect on company stock prices. It will take consumers caring about their data, and fiscally punishing institutions who violate their trust to alter the current IoT landscape.


 [/wpsm_tab]
 [/wpsm_tab]
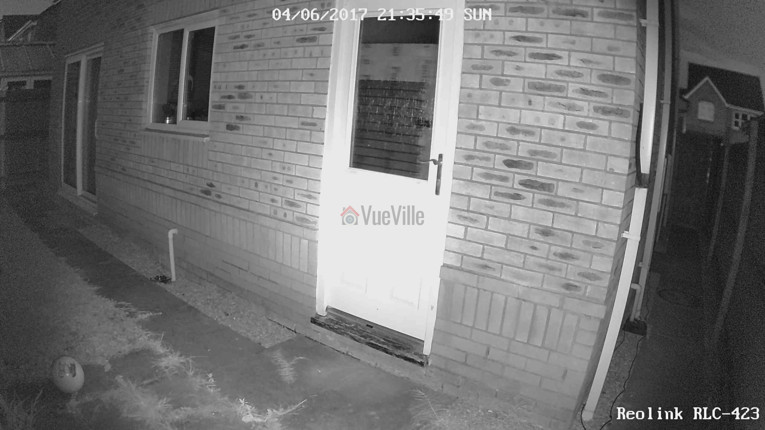 [/wpsm_tab]