Netgear has now released an updated version of the Arlo Pro, the Arlo Pro 2. Is it worth paying a bit more to get the new model, or will the older model suffice?
We strongly recommend the [easyazon_link identifier=”B077S1YBXS” locale=”US” tag=”vueville.com-eaz-20″]Arlo Pro 2[/easyazon_link] over the Arlo Pro because it has:
higher 1080p resolution,
more accurate PIR based motion detection and
pre-recording for zero-lag motion triggered recording.
Read on for an in-depth comparison of these two high-end Arlo models.
A quick note: As an Amazon Associate I earn from qualifying purchases. This post contains affiliate link(s). An affiliate link means I may earn advertising or referral fees if you make a purchase through my link, at no extra cost to you.
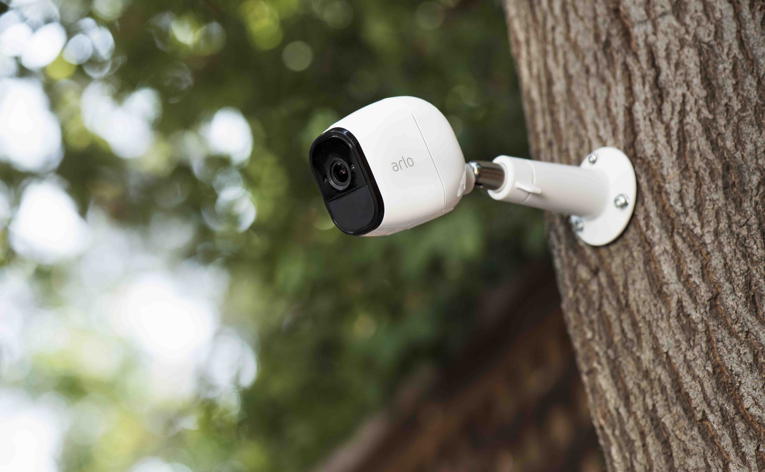
The Arlo Wire-free
Often the most visible elements of a smart home, security cameras are also one of the most difficult to choose and set up. For the longest time, security cameras were not considered mainstream enough by large consumer electronics companies. Very capable cameras were available but setting them up proved too daunting a task for many a DIY amateur.
The Netgear Arlo changed all that. Netgear shook up the home security world with the battery powered 720p Arlo wire-free or as Netgear now calls it, just Arlo. It was soon followed up with the Arlo Pro which had 2-way audio support and optional AC power. The Arlo range of cameras are not standalone devices, they require the base station to function. The Arlo Q family does not need the base station and will connect directly to your router.
We are not the biggest fans of using only battery powered cameras, but as part of a well-planned security camera strategy, battery powered cameras can be invaluable.
Arlo Pro 2 vs. Arlo Pro – Comparison Table
[table id=52 responsive=flip /]
Video quality
This is perhaps the biggest difference between the two. The new Pro 2 model has a Full HD 1080p sensor that is significantly better than the 720p sensor of the Arlo Pro. This alone is reason enough in my mind to go for the Arlo Pro 2 instead of the Pro.
The encoding format is the same for both, H.264 instead of the newer and more efficient H.265 that you tend to find in cameras such as the newer models from Dahua and Hikvision.
Both cameras also feature auto-adaptive white/black balance and exposure adjustment.
Audio Quality
Both models support 2-way audio with a built-in mic and speaker. But here’s the rub: they are half-duplex only, meaning they are like walkie-talkies. Only one person is allowed to speak at a time, so you cannot carry on a conversation using these cameras.
Netgear does advertise the 2-way audio as push-to-talk, so at least they are not trying to hide this fact.
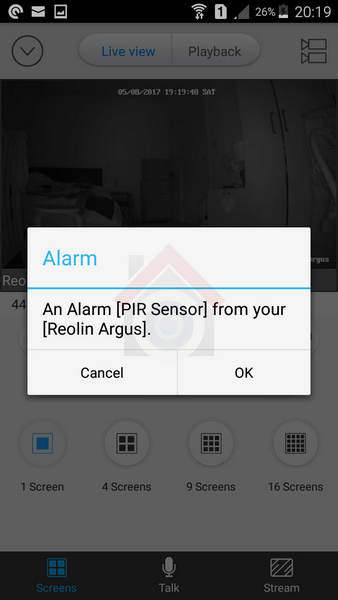
The lack of 2-way audio is disappointing because its such a great feature. The battery-powered Reolink Argus has it, albeit slightly laggy. So does the AC powered Reolink C1 Pro, again a bit laggy though.
Step up to the more expensive cameras such as the Vivotek IP8160 & Vivotek IP8160-W if you want to get true high-quality full-duplex audio.
Motion Detection
There are two kinds of motion detection: true motion detection using an Infrared sensor called a PIR (Passive InfraRed), and software based motion detection that analyses video frames to detect changes in the scene.
The first type, PIR-based, is highly accurate indoors, and the second one, software-based, is reasonably accurate indoors. But there is a measurable difference in accuracy between the two.
This is because the software running on the camera cannot distinguish between moving shadows and a moving person, they are both effectively the same to the camera. This is why you get more false alerts with software-based motion detection than the PIR method.
The Arlo Pro uses software-based motion detection whereas the Arlo Pro 2 has a new motion detection system that’s quite clever. In battery mode, it uses the PIR for detecting motion.
In AC power mode, it uses software based motion detection but you can mark up to 3 separate zones for it to monitor. This makes the motion detection capabilities of the Arlo Pro 2 more powerful.
But the main reason we prefer the Arlo Pro 2 is its 3-second lookback feature, which is a fancy marketing term for pre-recording.
Pre-recording is the feature whereby the camera is constantly recording what it sees and keeps the last few seconds in memory. This means there is virtually no lag between the camera detecting motion and the beginning of the recorded clip. This feature also overcomes the biggest complaint with Arlo cameras – the huge lag between motion and the camera starting to record.
The new Arlo Smart subscription adds the hottest feature right now, person detection. But the issue is that the actual person detection is performed not locally by the camera, but remotely in the cloud.
Notifications
Both Arlos are able to send email alerts with snapshots and push notifications based on motion or audio detection.
Weatherproofing
Both Arlo Pro 2 and the Arlo Pro have the same IP65 rating for water-proofing and dust ingress.
Battery-life
Both Arlos use the same VMA4400 rechargeable battery which has a healthy 2440 mAh rating.
Smart Home Compatibility
All Arlos support IFTTT and while this is not the best platform for smart home inter-connectivity, it is better than nothing.
The Arlo family of cameras are cloud-reliant, Internet-reliant security cameras that need a monthly subscription to work as proper security cameras with 24/7 recording on AC power. Even though they support IFTTT for smart home integration, the lack of local storage and cloud-reliance place them well outside of the VueVille Smart Home DIY Framework and are thus not recommended by us.
If you must have an Arlo, the Arlo Pro 2 is far better than the Arlo Pro. The improved image sensor is the primary difference between the two models and is worth paying the extra for.
Alternatives
We reviewed the Reolink Argus wirefree camera and were impressed with its slick setup, 1080p sensor, 2-way full duplex audio, lack of cloud reliance, and local microSD card storage.
Also consider the newer Argus 2 which adds color night vision (Starlight) and a rechargeable battery pack. Since these are purely battery powered cameras, they do not support any smart home integration such as Z-Wave smart hubs, IFTTT, Alexa, SmartThings etc. But at least they are not cloud-reliant.
If you are looking into getting an IP camera system for your home or office, you must have come across the term PoE. What does PoE mean? Is it worth paying for? What are the alternatives? Can you use PoE for your existing IP cameras? These are some of the questions I often get from our readers, so I thought I would write a post dedicated to all things PoE. [wpsm_toplist] [wpsm_stickypanel][contents h2][/wpsm_stickypanel]
What is Power over Ethernet (PoE)?
Power over Ethernet or PoE for short, is a technology that lets you transmit power and data over a single Ethernet cable, without any negative effect on data speeds.
What is the difference between Active and Passive PoE?
Active PoE is where both the PoE power source and the PoE powered device are standards-compliant and talk to each other to negotiate the exact amount of power needed. If a device claims that it is PoE standards compliant to, say IEEE 802.3af, it is claiming that it is an active PoE device.
In contrast, you can piggy-back power over an Ethernet cable using a PoE injector and this is called passive PoE. The injector simply takes the power you provide and transmits it to the other end of the Ethernet cable in a dumb or passive fashion.
How does Power over Ethernet work?
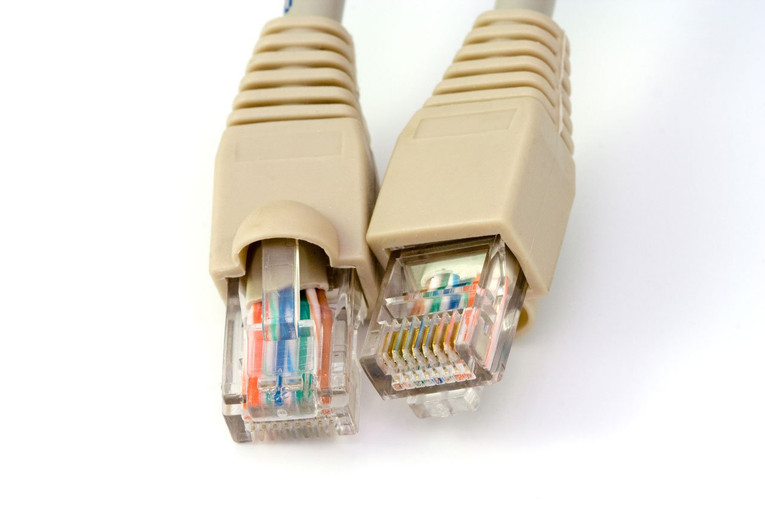
A typical Ethernet cable consists of 4 twisted pairs of 8 copper cables. Depending on the speed of data transmission (10/100 Mbps or Gigabit Ethernet), some or all of these pairs are used for sending and receiving data. These same copper pairs can also be used to send electricity. Which pairs exactly are used for sending power depends on the type of PoE (Active or Passive) and the specific PoE standard used.
PoE is not a one-way technology, it uses signalling between the PoE power source and the PoE powered device to:
Detect devices that need power
Determines the correct amount of power to be delivered to each device
When to start sending power
Detect device disconnections
When to stop sending power
When a PoE camera is connected to a PoE power source, the PoE power source will go through a multi-step process to discover and negotiate the required power level of a PoE powered device. Using a method called signature detection and classification, the PoE power source will start off with a low voltage and will raise the voltage until it meets the requirements of the powered device. It will then continue to monitor the power consumption of the device and accommodate any fluctuations.
The IEEE 802.3af standard is the most common type of PoE you will find. This standard provides for up to 15.4W of DC power per PoE port, that is a minimum of 44 V DC and 350 mA current on each port (Power = Voltage x Current). Due to voltage losses however only 12.95W is assured per port. Most PoE switches output up to 48V.
Most fixed lens cameras use around 7 W power only, so 802.3af compliance is plenty. However for motorised cameras the power requirements can easily go into the 20 W range, for example the Reolink RLC-423 PTZ requires 22 W power. This is why the 802.3at standard called PoE+ (or PoE Plus) was created which provides up to 25.5 W of power per port.
There are two newer standards that aim to increase the power available per PoE port, 802.3bt Type 3 (max. 51 W) and 802.3bt Type 4 (max. 71 W). I haven’t seen devices that support these standards yet.
What voltage is Power over Ethernet?
Typically the voltage used by PoE is 48 V. Copper wires are not just electricity conductors but have electrical resistance as well. This resistance causes some of the energy it conducts to be lost as heat and causes voltage drops. So the voltage at the PoE power source is higher (in the 44-57 V range) than the voltage at the powered device (37-57 V, depending on the PoE standard used).
A lower voltage device like a camera that needs only 12 V will then step down this voltage internally before it is used by the camera. The reason for the higher transmission voltage is that voltage losses are lower at higher voltages, which is also the reason that power companies transmit electricity across large distances at very high voltages of up to 765 kV even though domestic power supply may be only 110/230/440 V.
What are the advantages of using Power over Ethernet (PoE)?
The main advantage of PoE is that you don’t need to run separate power and data cables. But there are also several other reasons to use PoE:
Flexibility and lower installation costs – PoE removes the need of having an electrical power outlet at the camera installation location. Also you don’t need to run separate power cables to each camera installation location.
A standards-compliant PoE switch can discover and auto-negotiate power requirements for each device that is connected to it. This means you do not have to figure out how much voltage or power to provide to your devices, as long as the power requirements are lower than the rate output of each PoE port on the switch you are fine.
Voltage losses over long Ethernet runs are automatically adjusted for by the PoE auto-power negotiation process.
PoE provides overload protection as it constantly monitors the power requirement of a device and can adjust it as required.
Centralised power management and troubleshooting becomes possible because you can monitor the power usage of each device through a smart PoE network switch.
Centralised power backup – My PoE switch is hooked up to a UPS and that’s it, all my PoE cameras now have instant power backup!
Simpler, neater and faster installation possible, especially if you are thinking of running Ethernet through your attic or basement.
How to connect an IP camera using PoE?
There are a few different ways you can achieve this:
Use a PoE NVR and Ethernet cable: If you are following the EasyDIY approach of just getting an all-inlclusice packaged security camera kit, your cameras will plug straight into the included NVR using the included Ethernet cables. It’s that simple. Read more about these all-in-one packages here.
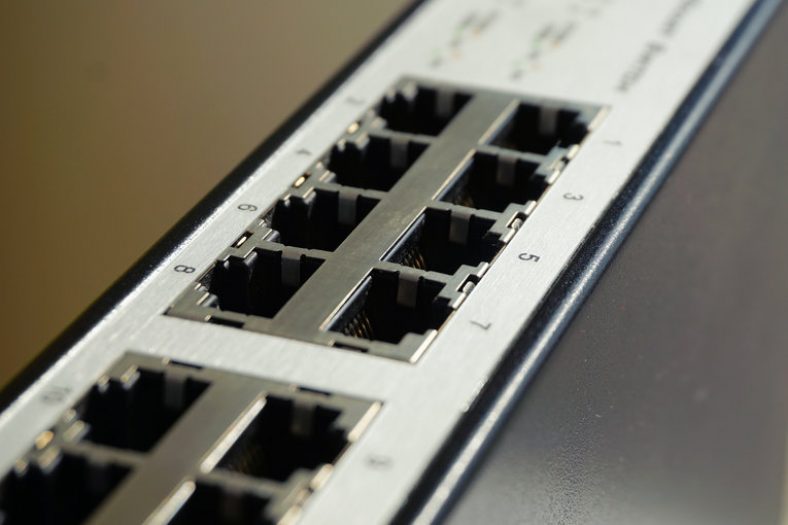
Using a PoE switch: Ethernet switches with Power over Ethernet support are the easiest way to power a PoE camera. I use a TP-LINK TL-SG1008P gigabit switch with 4 PoE ports to connect my PoE IP cameras. Installation is simple and straight forward – connect the camera to a PoE port on the network switch using a Cat 5/5e/6 Ethernet cable. If you are connecting outdoor cameras, use an outdoor and burial rated Ethernet cable. This should last longer and be resistant to critters that like to gnaw away at your cables.[easyazon_image align=”center” height=”177″ identifier=”B00M1C03U2″ locale=”US” src=”https://images-na.ssl-images-amazon.com/images/I/417nhw5tq4L.jpg” width=”500″ localize=”n”]
Using a PoE injector: These devices are great if you want to use PoE for just one camera and don’t want to buy a PoE network switch OR if you want to use PoE for a non-PoE IP camera. Yes you read that right! You can use PoE even for an older camera that doesn’t support PoE. You have two further options here: a smart PoE injector or a dumb/passive PoE injector/splitter combo.
A smart PoE injector includes its own power source and will function just like a PoE switch. It will take your Ethernet cable that carries only data into its input port, and you connect its output port straight to your IP camera. When the camera is powered on, the PoE injector will discover and auto-negotiate the required voltage and power levels for your camera. Smart, isn’t it? [easyazon_image align=”center” height=”500″ identifier=”B001PS9E5I” locale=”US” src=”https://images-na.ssl-images-amazon.com/images/I/41E4a%2B2wjeL.jpg” width=”500″ localize=”n”]
A passive PoE injector/splitter combo (or dumb as I call it) can be used for adding PoE capability to a non-PoE camera where you already have a power source. [easyazon_image align=”center” height=”398″ identifier=”B004UBUB7C” locale=”US” src=”https://images-na.ssl-images-amazon.com/images/I/31ajAs0Y-dL.jpg” width=”500″ localize=”n”] Another use case is where you have a PoE camera but don’t have a PoE network switch and want to keep costs low. Just use something like this: [easyazon_image align=”center” height=”500″ identifier=”B00NRHNPUA” locale=”US” src=”https://images-na.ssl-images-amazon.com/images/I/41BwdyA6PML.jpg” width=”500″ localize=”n”]
How far can you run a PoE camera?
Usually Ethernet cable runs of more than 100 metres or 328 feet are not recommended when you are using it for just data. I recommend the same for PoE Ethernet cable runs because any more than this and you are going to have significant voltage drops which can affect the reliability of your IP cameras.
Can I use PoE for my existing IP cameras?
Yes! Just use a passive PoE injector and splitter combo, this way you can use your existing camera power adapter to keep costs down.
Which camera manufacturers support PoE?
All major camera manufacturers including Hikvision, Dahua, Axis, Bosch, Vivotek, Sony, Amcrest and Reolink have models that support PoE. Moreover their PoE cameras are always standards-compliant. Ubiquiti is one notable exception – along with stadards-compliant PoE they also have a proprietary passive PoE injection solution that uses a lower voltage of 24V. Be aware of which PoE is supported by a Ubiquiti device before you buy!
If you would like to learn more about how I use PoE in my home security camera system, I have written a full guide to my DIY setup. Let me know what you think!
It feels like it was just a few months ago that I reviewed my first 4MP camera, a Hikvision mini-dome.
Today I am going to take a closer look at the 5 Megapixel Reolink RLC-422 dome camera with 4x optical zoom, kindly provided by Reolink for this review.
A quick note: As an Amazon Associate I earn from qualifying purchases. This post contains affiliate link(s). An affiliate link means I may earn advertising or referral fees if you make a purchase through my link, at no extra cost to you.
What’s in the box
The RLC-422 comes in an attractive package that showcases the Reolink mobile app on one side, and lists the camera features on another side.
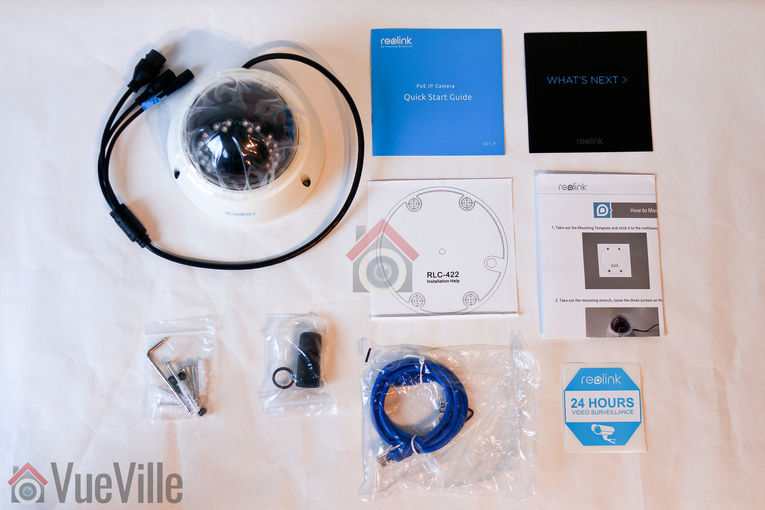
On opening the box I found the RLC-422 camera to be well-protected with foam padding along with some accessories. Not surprising as every Reolink camera I have unbowed has been well packed.
Box contents:
RLC-422 Zoom IP camera
Waterproof sleeve for Ethernet cable
1 metre blue network cable
Screws, rawl plugs and an Allen key
Software CD
Quick start guide
What’s next guide
Installation guide with photos
Surveillance sign
Mounting hole template
Specifications
[table id=44 responsive=”scroll” /]
Design
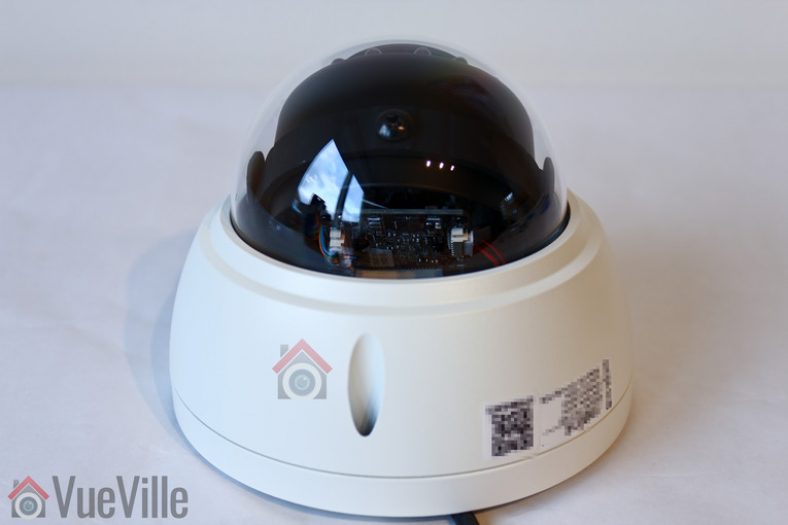
The RLC-422 has a traditional dome type design. This is a camera with a motorized lens though, so it is slightly larger than a fixed lens dome camera.
The base of the camera is made of steel and is painted white. The quality of the finish is very good and it feels like a camera that is far more expensive that it really is. The dome is made of clear plastic – I prefer it to be darkened because then its more difficult to figure out where exactly the lens is pointed.
On one side there is a sticker with the QR code for the mobile app setup and login details. I recommend removing this sticker before installing the camera outdoors.
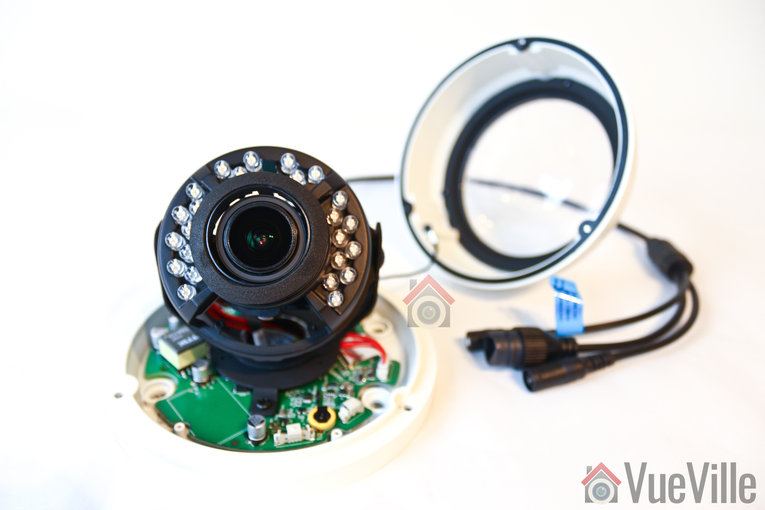
Unscrew three screws to open the camera and separate the dome from the base. The screws hold themselves in position in their holes when loose, and this is exactly what you want when you are trying to install the camera overhead. No screws falling out when you least want it.
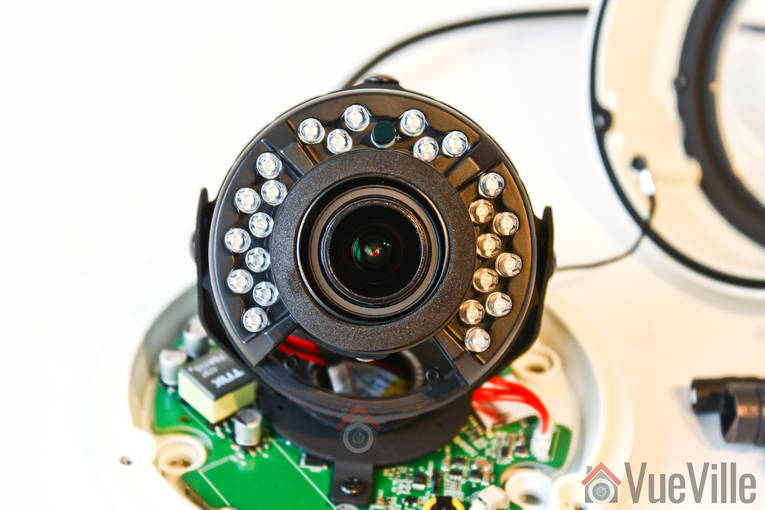
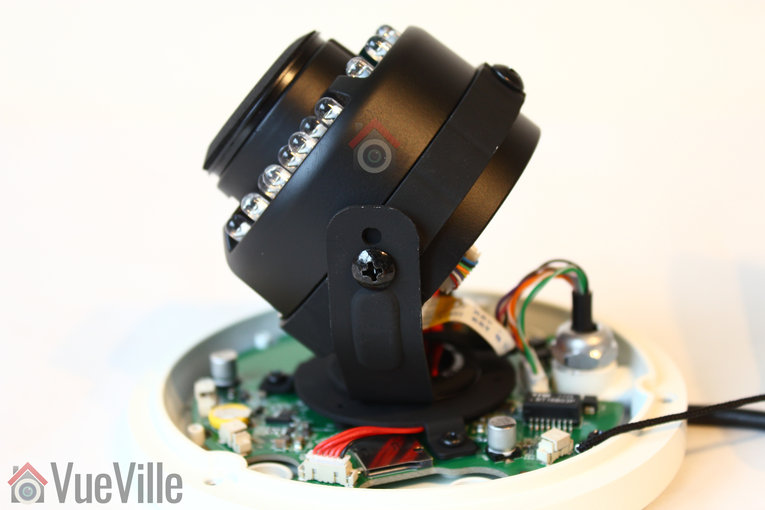
The lens assembly can be adjusted in two axes – the base of the lens rotates and the lens itself pivots around the arms. There are two screws that you need to loosen to allow this motion. One thing I always like to check is whether any of the 24 IR LEDs are blocked. As you can see in the photo below, we have no such issue with the RLC-422. You can also see the cord that connects the dome cover to the camera base, again terribly useful when you are trying to install the base to a ceiling.
The rear of the lens assembly can be seen below.
All the cabling comes out of the holder arm and can conveniently go into a junction box or down the wall through a cut-away provided for this purpose. The cabling consists of a pigtail with the following connectors:
12V power input jack
RJ-45 ethernet port
A reset push button
Just like the Reolink RLC-423 PTZ I reviewed, the reset button of the RLC-422 is not on the main body of the camera. Apart from eliminating an ingress point, it means nobody can reset the camera unless they get to the hidden reset button which is probably inside the wall or the soffit! This is much better than many other cameras such as Hikvision’s which have the reset button externally on the camera body itself.
Installation
I am not a huge fan of installing dome cameras, because they are generally a lot more work to install than a bullet camera. But as we saw earlier, Reolink has made it as painless as they can with the self-holding screws and the dome being linked to the camera base.
Hardware setup
The RLC-422 supports Power over Ethernet (PoE) which is my recommended way of powering IP cameras – using just a single Ethernet cable, you can send both data and power to the camera using either a PoE switch or a PoE injector.
You can adjust the lens around the perpendicular axis of the camera and you can rotate the lens around its own perpendicular axis by loosening the screws.
A typical fixed lens camera needs around 7W power, but the motorised lens of the RLC-422 means that it needs a little more power, a maximum of 10W to be exact. This is still within the 802.3af spec, so my TP-Link PoE switch had no trouble powering up the camera over PoE.
I added a Sandisk 64GB SD card so that I can record motion detection clips on-board the camera itself.
If you want to use the included waterproofing connector, you will have to remove the RJ-45 plug on the Ethernet cable and re-crimp it once it has been passed through the waterproofing connector.
Software setup
Most manufacturers ship their cameras with static IPs by default – for example Hikvision and Dahua. In most cases the camera will not have the same network settings (like sub-domain) as your network. This means that you cannot access the camera unless you change the camera network settings to that of your network. You are expected to do this using the manufacturer’s camera finder tool. While this static IP method has security benefits, most home users would find it much easier if the camera manufacturer used DHCP as default. Then the camera would automatically be configured to use your network settings and be ready to use.
As with all the Reolink cameras I have tested, this is exactly the case with the RLC-422: DHCP is enabled by default. When you are setting up the RLC-422 using DHCP, you won’t know what its IP address is and so will have no way of directly accessing the camera. If you have IP reservation set up on your router, yes then you may know. But let’s assume you don’t know the IP address. You just need to find the IP address of the camera and there are quite a few ways you can do this:
Use the Reolink mobile app
Use the Reolink desktop client software
Use any camera monitoring software such as BlueIris
Use a mobile security camera app such as tinyCam Monitor Pro
Scan your network using a network scanner app
The helpful setup guide suggests the first two methods – Access the camera by smartphone and access the camera by computer.
I have tried option 1 with another Reolink before so I went with option 2 this time – setup through a computer. These are the steps I followed:
Step 2: Installed Reolink Desktop Client v7.2.2.12 updated Oct 8, 2017, and ran it. Windows Defender identified it as a new app and asked me if I want to allow it Internet and LAN access. I allowed it to proceed.
Step 3: The app automatically identified the camera and logged in successfully, and presented me with the Live View screen.
Step 4: As I mentioned earlier, the camera has DHCP enabled by default but I like to assign my cameras static IP addresses. The main reason is that its easier to set up and access the camera form other devices wihtout having to check each time what the IP address is. Clicking on the setup gear icon and clicking through to Netowrk>General allowed me to change it. This caused the Reolik app to add another camera to the list, with my new static ip address. It also then started complaining that it could not find the original camera with DHCP IP address. This was a bit tiresome so I disabled the ‘Add Camera Automatically’ option under app settings. No reboot was needed which is great.
Step 5: I then tried to access the camera from the new static IP address through Chrome. I logged in with the default login details. However since the camera admin site uses Flash and Chrome disables it by default, I just had to click on the “Get Adobe Flash player” button in the live view section and enable it in Chrome.
Step 6: I then changed the password for the admin account. I also created a new user and tried to delete the admin account for safety but like most IP cameras, the RLC-422 doesn’t support this feature.
Once you have the IP address, you can simply pop that into Chrome or Firefox to directly access the camera settings. You could also use the desktop client app to change camera settings if you don’t want to use the web-based admin panel.
You should change the password of the camera as soon as you can, especially worth noting as the camera doesn’t require you to nor remind you to do it.
Software features
I have a number of ways of accessing my camera live feeds – typically I use the tinyCam Monitor Pro app on my Android phones, sometimes I flick my TV over to the QNAP Surveillance station channel (thanks to the TS-253A’s HDMI output). But when I want to tweak camera settings, I prefer using the web admin page – I can watch the live view stream, adjust the zoom and change camera settings.
So entering the camera’s IP address into any browser that supports the Adobe Flash player will let you login to the camera. As I always say, an HTML5 interface would have been better for wider device compatibility but its far better than the NPAPI plugin that Hikvision still insists on using. You can choose the stream you want to see at the login screen, Channel 1 is called Clear and is the 5 Megapixel stream (unless you have changed the camera settings). The other options are Balanced and Fluent. These can also be selected once you are logged in.
Reolink calls the landing page the Preview page, but I like to call it the Live View page, which is more logical. On the left hand side you have the live view stream, and at the bottom clicking the play button lets you select between the video quality by switching between the Clear, Balanced and Fluent streams.
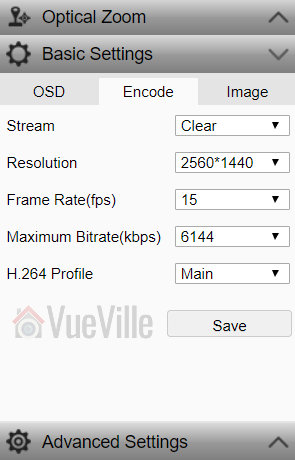
On the right hand side, an accordion type content holder has three sections – Optical Zoom, Basic settings and Advanced settings. The basic and advanced settings sections are like a quick access area that duplicates the settings on the actual configuration page – accessed by clicking on the gear button at the top right.
The Optical Zoom section adjusts to the abilities of the camera. In the RLC-423 it let you zoom, and adjust the focus manually. With the RLC-422, you have only the zoom function. You can also adjust the focus manually, but since it has auto-focus I recommend not changing it.
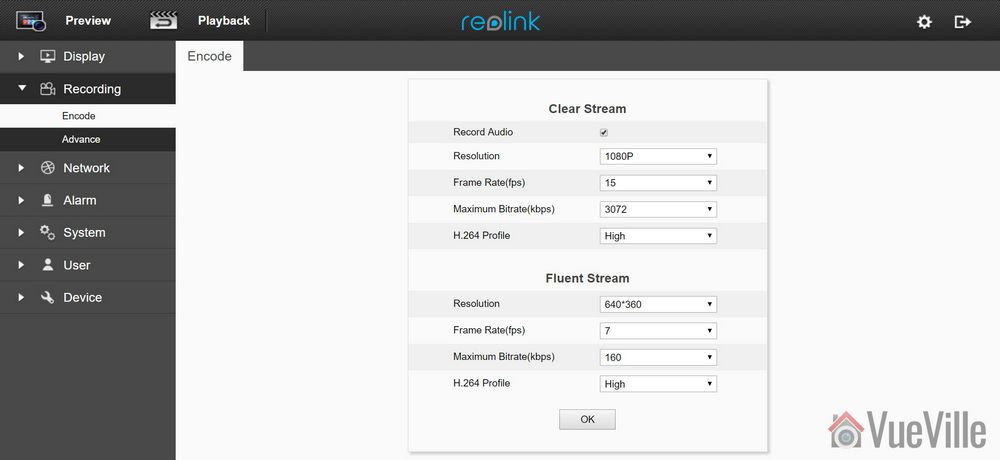
The Basic Settings section includes OSD settings, video stream encoding and image settings. The OSD page is pretty standard and lets you choose whether and where to show the OSD information such as day, date and time.
The Basic Settings is where you can set the video resolution, bitrate and frames per second of each of the Primary “Clear” stream (5MP default) and the Fluent stream (640×360 default). Interestingly, the ‘Balanced’ stream is missing in the stream selection dropdown.
The Image section lets you adjust the usual image settings such as brightness, contrast, saturation, sharpness and also mirroring and image rotation.
The advanced settings tab is where you will find the rest of the video settings and the ones I was most interested in – exposure, backlight and noise reduction. Setting the Exposure to ‘Low Noise’ lets you control just the range of gain, ‘Anti-smearing’ lets you control only the range of shutter speeds and manual lets you select both the gain and shutter speed ranges. The range selection method is novel – it means the camera will automatically choose the optimum settings from the range you specify. I didn’t see an option to change the i-frame interval. This is a bit strange as it is a setting that I would have expected to find. Why is it important? The i-frame setting specifies how often the entire frame is captured and not just what has changed from the previous i-frame. So being able to control it is important for getting the right balance between network bandwidth utilisation and a high quality non-blurry video.
Now the full camera settings configuration page is accessed by clicking the gear icon at the top right of the Live View page. This lets you access video resolution, network, motion detection, email and push notifications, user control, and system maintenance settings.
Click to enlarge
While the camera support motion detection alerts, these are of the basic variety. There is no advanced motion detection such as line crossing, or intrusion detection on offer here. One of the best ways to reduce false alerts is by using these advanced motion detection methods, so bear this in mind if you are planning to use this camera not for 24/7 recording but motion triggered recording. I would use it only for 24/7 recording or to capture images and videos based on commands from my DIY home automation system.
Click to enlarge
Click to enlarge
There is a built-in NVR feature, so the camera can record motion detection clips to the on-board SD card, and even 24/7 a network/NAS drive. The timeline feature is very handy and works well.
Click to enlarge
Performance
I tested the camera at its default settings of 5MP resolution and 20fps. Here are the properties of the video files it created:
[wpsm_codebox style=”1″]Daytime Video: MPEG4 Video (H264) 3072×1728 20fps 6253kbps [V: English [eng] (h264 high L5.1, yuv420p, 3072×1728, 6253 kb/s)][/wpsm_codebox]
[wpsm_codebox style=”1″]Night-time Video: MPEG4 Video (H264) 3072×1728 23.75fps 6105kbps [V: English [eng] (h264 high L5.1, yuv420p, 3072×1728, 6105 kb/s)][/wpsm_codebox]
I also added the RLC-422 to my favourite mobile CCTV app, tinyCAM monitor Pro and confirmed that I can view the camera streams there also.
However to optimise recording storage, I suggest recording at 4MP resolution and to lower the frame rate to 10fps:
The optical zoom function is the headline feature of the RLC-422. I found the zoom speed to be on par with that of the Reolink RLC-423 PTZ. The autofocus is a bit sluggish just like the RLC-423 but at such an affordable price, I shouldn’t complain.
Daytime video quality
The RLC-422 is a 5 megapixel with a 1/3″ sensor. In the daytime video is crisp and appeared to be sharper than my 4 Megapixel Hikvision DS-2CD2542FWS-IWS as well as the 4 Megapixel Reolink RLC-423 PTZ.
If the camera has one weakness, its the speed of the autofocus. While the accuracy of the autofocus is pretty good, it does take a few seconds to autofocus after zooming in or out.
Here’s a sample video of a recording during the daytime:
The real test of an IP camera is when the sun’s gone down and the lights are off. The RLC-422 uses 24 conventional IR LEDs arranged in a ring around the lens. I did not see any evidence of internal reflections or ghosting, common issues with lesser dome cameras.
Note that the RLC-422 doesn’t have true WDR, it employes digital WDR.
So how did it perform? The video quality is great with just a hint of noise. Check out the sample video below shot at default image settings (backlight off and 3D Noise Redcution on):
The Reolink mobile app is one of the best original manufacturer apps I have seen. Hands down beats Hikvision’s rather poor efforts and runs circles around other brands’ apps. I was able to quickly add the RLC-422 to the Reolink app on my phone, adjust the zoom level, and access the recorded clips stored on the on-board SD card.
Verdict
The RLC-422 is a very affordable 5MP dome camera capable of stand-alone operation due to the built-in NVR feature. However this is limited by the lack of advanced motion detection features. While the 5MP resolution is class-leading for affordable budget IP cameras, it is designed to a price – the lack of advanced motion detection methods, a microphone, audio and alarm connections and the slow auto-focus give away its budget nature. But for those who need a 24/7 recording dome camera with optical zoom, the ONVIF and RTSP support makes the camera very easy to integrate with an existing home CCTV or security system.
[review]
Where to buy
[easyazon_link identifier=”B01B4BKJHW” locale=”US” tag=”vueville.com-eaz-20″]Check Price on your local Amazon site[/easyazon_link]
(* = affiliate link / image source: Amazon Associates Program)
I believe a DIY home security camera system is not complete unless it has indoor cameras. Outdoor cameras are great for securing your home’s perimeter and alerting you to an intrusion, but what if the intruder has already entered your home?
That’s why you need smartly placed indoor IP cameras to hopefully capture identifying features of the intruder so that law enforcement can take them down!
Product prices and availability are accurate as of the date/time indicated and are subject to change. Any price and availability information displayed on https://www.amazon.com/ at the time of purchase will apply to the purchase of this product.
Product prices and availability are accurate as of the date/time indicated and are subject to change. Any price and availability information displayed on https://www.amazon.com/ at the time of purchase will apply to the purchase of this product.
Product prices and availability are accurate as of the date/time indicated and are subject to change. Any price and availability information displayed on https://www.amazon.com/ at the time of purchase will apply to the purchase of this product.
At the end of this article, you will also find my thoughts on some other popular IP cameras and why they didn’t make the cut.
A quick note: As an Amazon Associate I earn from qualifying purchases. This post contains affiliate link(s). An affiliate link means I may earn advertising or referral fees if you make a purchase through my link, at no extra cost to you.
The cameras I have selected fall into two categories:
Pan-Tilt (PT)
Pan-Tilt-Zoom (PTZ)
Every IP camera I recommend below meets the must-have feature of fully local operation that is essential for a self-hosted smart home. This means these cameras are not cloud-reliant, not Internet-reliant and have zero monthly fees or subscription plans for basic things such as recording and viewing footage.
Using a NAS NVR, CCTV software like Blue Iris or just Home Assistant integrations (like I do), you can use these cameras to intelligently detect motion and take action automatically.
Product prices and availability are accurate as of the date/time indicated and are subject to change. Any price and availability information displayed on https://www.amazon.com/ at the time of purchase will apply to the purchase of this product.
(* = affiliate link / image source: Amazon Associates Program)
Amcrest was one of the earliest brands I featured on my roundups. While Foscam made some very popular cameras, they had several shortcomings and I was never really satisfied with their cameras. Then Amcrest spun off from Foscam and totally disrupted the market with their reasonably priced and well-made cameras such as this Amcrest ProHD 1080p Pan-Tilt WiFi Camera. Amcrest has this unique blend of high-quality hardware, reliable software, and great after-sales support that makes it easy to recommend any of their products.
This extremely affordable camera has an Ethernet port, 2.4 GHz WiFi, built-in InfraRed LEDs for very good night vision, clear 2-way audio with mic and speaker, built-in SD card local storage, and on top of all this, AI person detection and even a dedicated baby monitor mode.
Amcrest has smartphone apps for both iOS and Android. The camera does not need an Internet connection to be set up or for functioning normally. So it can work in a fully standalone manner. But in case you need it, a cloud subscription plan for 1 year is included with the camera.
Even though there is an Ethernet port, this Wi-Fi model doesn’t support Power-over-Ethernet (PoE). There is no PoE model available, but you can use a PoE injector to carry both power and data over a single Ethernet cable. The downside is that you will have to split them again at the other end before plugging in the camera.
Product prices and availability are accurate as of the date/time indicated and are subject to change. Any price and availability information displayed on https://www.amazon.com/ at the time of purchase will apply to the purchase of this product.
(* = affiliate link / image source: Amazon Associates Program)
The Amcrest IP4M-1041W is a stylish 4MP indoor IP camera that works with Amazon Alexa also. It can pan and tilt, but not zoom. The fixed lens has a decent wide angle of 90°. Wi-Fi can be tricky in the furthest corners of your home, so this camera supports both 2.4 GHz and 5.0 GHz bands. For the bitrates that such cameras typically use, 2.4GHz is more than enough and gives you maximum range. But to make use of higher resolutions, the 5 GHz band is best.
Even though there is an Ethernet port, this camera doesn’t support Power-over-Ethernet (PoE). There is no PoE model available, but you can use a PoE injector to carry both power and data over a single Ethernet cable. The downside is that you will have to split them again at the other end before plugging in the camera.
This camera does not have person detection for smart notifications, but it can detect moving objects and has auto-tracking. This is a great feature which allows for motion detection recording that will keep the camera trained on the moving object at all times.
Product prices and availability are accurate as of the date/time indicated and are subject to change. Any price and availability information displayed on https://www.amazon.com/ at the time of purchase will apply to the purchase of this product.
(* = affiliate link / image source: Amazon Associates Program)
Reolink is a very DIY-friendly security camera company. In fact they are my favourite for affordable no-nonsense well-built cameras that respect our privacy.
All non-battery powered Reolink cameras support the ONVIF standard. This lets you use them with any 3rd party NVR, NAS NVR or software such as Blueiris which supports the ONVIF standard. The RTSP video streaming protocol is also supported, so I have integrated the camera with my DIY home automation system built around Home Assistant.
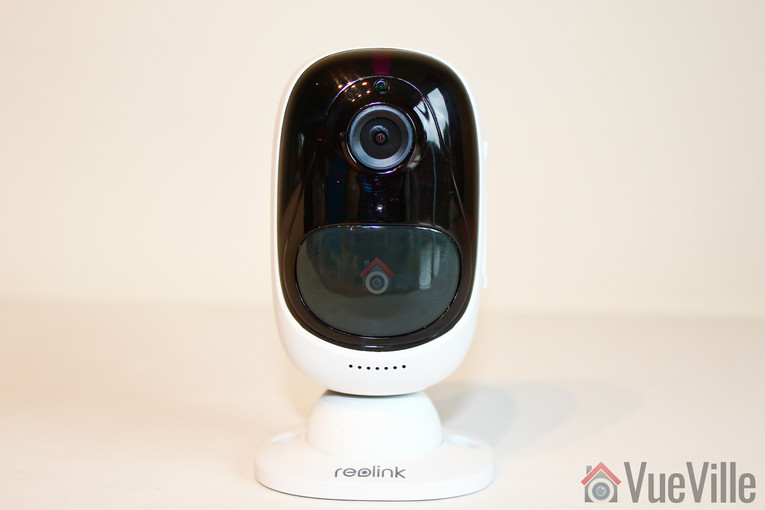
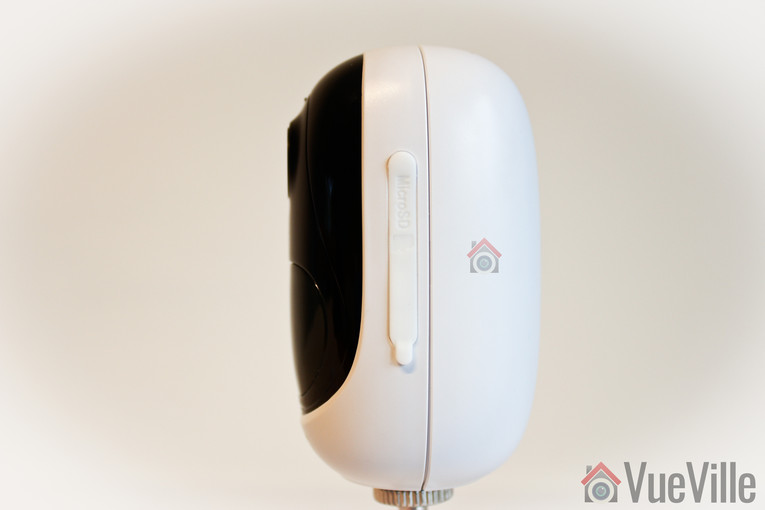
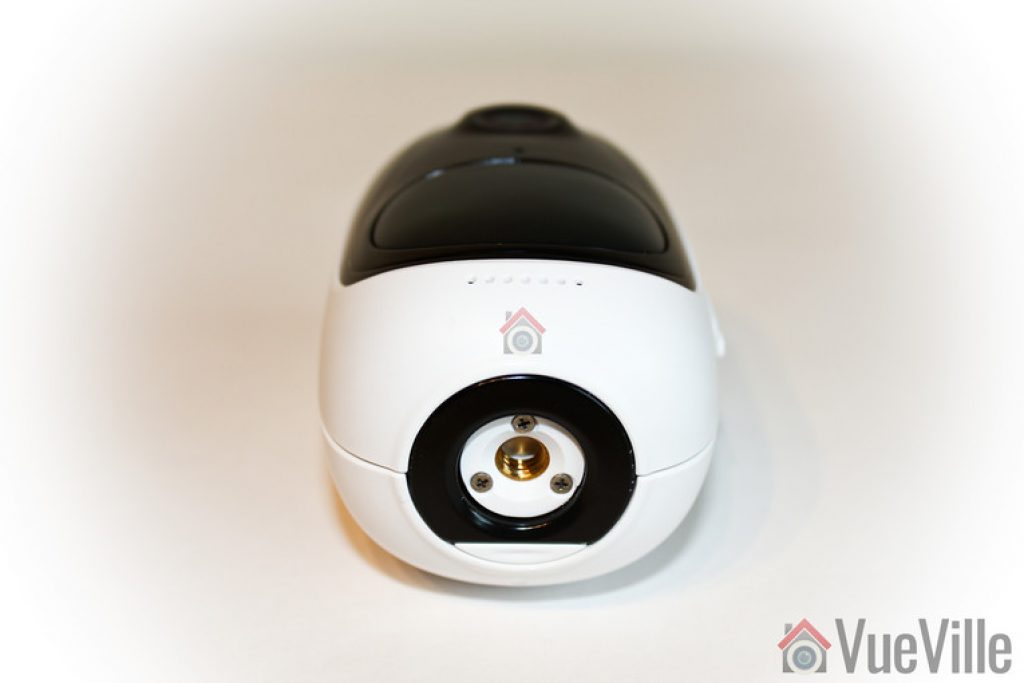
The Reolink E1 series of indoor IP cameras are noticeably smaller than previous models and come only in white colour. So it blends into the background much better and can easily go unnoticed on a bookshelf. The tennis-ball shaped body fully encases the eye-ball style lens. The E1 Zoom has pan-tilt as well as optical zooming capability.
With the 5 Megapixel resolution, you get great video quality and sharp detail. You can use motion detection to record clips to the microSD card, send push or email notifications and even trigger an audible siren to scare off intruders. Of course you can also immediately push the 2-way talk button in the app to talk to whoever is in front of the camera.
You can configure the camera through the Reolink mobile app, or more fully through the Web User Interface (UI). The Reolink Client desktop PC app is also available if you prefer to manage multiple Reolink cameras in one interface. What’s more, ONVIF and RTSP support make it a breeze to add this camera to smart home software such as Home Assistant or Blue Iris.
Smart motion detection methods such as person/animal or advanced method such as line-crossing/intrusion detection are missing. This also means that auto-tracking is not available.
If you don’t need the optical zoom, the E1 Pro is identical to the E1 Zoom but without the optical zoom feature and the Web UI. Check out my full review below: [wpsm_top postid=8537]
The ones that didn’t make the cut
A couple of years ago, most camera manufacturers figured out that a better way of making money is to sell you cameras that are crippled and become expensive paperweights unless you hook them up to the Internet and (in most cases) pay a hefty monthly subscription – all for the luxury of using your security camera that you already paid for. I am an engineer and one thing that I learnt pretty early on is that you always have to look at the Total Cost of Ownership (TCO) when comparing any two products. You would be just wasting your money if you bought an ultra cheap product which then needs a monthly investment to keep working for the rest of its life.
The same TCO concept applies when you buy a camera. The TCO of cloud cameras which requires a monthly subscription is very high compared to a self-sufficient camera which has a one-time cost.
Nest Cam: It was and probably still is the most over-rated security camera ever. Even with the new IQ model, this is a very poor security camera. First off, it cannot work without an Internet connection, it has no local storage so it can only record to the Google cloud, and what’s worse it stores only 3 hours of footage unless you pay up for the Nest Aware cloud subscription ($10/mo per camera at the moment, discount available for additional cameras).
Instead of pushing out gimmicks such as person detection and face identification, they should make the camera 100% reliable by giving it at least a local backup storage location like the Netgear Arlo Q does, making it less Internet-reliant.
Logitech Circle and Circle 2: Last year, Logitech launched the Circle which was an overpriced attempt at competing with the Netgear Arlo and Nest Cam. Now they have launched the Logitech Circle 2 which is an outdoor camera in both wired and wire-free flavours. Regardless of whether its the original Circle or the new Circle 2, both lack a local storage option and are reliant on an Internet connection to the Logitech cloud servers. If you don’t pay for the monthly subscription, you have access to the last 24 hours recorded footage but no motion zones and advanced alerts.
Canary All-in-One Home Security: I am not a big fan of all in one security devices, mainly because they are full of compromises made to still keep the device within a reasonable price point. The Canary is one of many such I-can-do-it-all devices in the market today. Not only does it do home security, it does home health as well with sensors to monitor air quality. Now if I could do something useful with this sort of information locally such as turn on my dehumidifier or air filter, I would have been mildly interested. It may be possible through IFTTT but again this is Internet-reliant. Sadly, this device is also 100% cloud-reliant. I do not want to be locked into any single manufacturer’s eco-system and then end up paying a cloud subscription fee, but that’s the case with Canary! So in short, the Canary is crippled if the cloud servers decide to take a hike – not great when it comes to protecting your family.
Piper NV All-in-One Home Security: Piper burst onto the all in one security device market with a bold promise – no monthly fees. Yet it is 100% reliant on the cloud because it has no local storage options. There is no SD card or USB drive option available with the Piper NV. But it strangely has some elements of a DIY home automation system, it’s a ZWave hub as well. So its less locked-in and proprietary than others of its ilk. But don’t be deceived, this device is designed to be reliant on the Piper cloud servers: it still can do only 100 recorded clips of up to 35 seconds each before you are asked to start paying a monthly subscription fee.
That’s not a whole lot especially if for some reason you get a lot of false alerts. Its very interesting that while the Piper NV has battery backup in case of power loss, it has absolutely nothing to protect it from an Internet outage or if their cloud servers go down. What would happen in such a situation? A burglar breaks in, the Piper motion detection is activated, but your Internet connection is disabled or the cloud servers are unavailable and the Piper cant record its video clips! Great for the burglar, not so great for you. Bummer.
Granted, companies like Piper are bringing innovation to the home security market, but if they expect us to trust them 100% for our home security, the products need to be as close to 100% reliable as possible. This blog is hosted on a VPS that has a Service Level Agreement that promise a 99.9% up-time for example. My point is no cloud server has a 100% up-time, so what happens when the inevitable service disruption happens? Well folks, don’t rely on anybody’s cloud. Build your own local DIY home security system like I have!
Zmodo Sight: Last year I commended the Zmodo Pivot for having local storage in the form of 16GB onboard memory and not being cloud-reliant. While this is still the case, Zmodo is going the way of all the other cloud-reliant camera makers and appears to not let you view continuous video recordings or alert clips more than 12 hours old, unless you pay the monthly cloud subscription fee. No thanks.
Yi Cam: The Yi camera is possibly the cheapest IP camera you can get these days. Being nearly half the price of the cheapest mainstream brands sets off alarm bells for me right away. Yes being a Chinese brand, designed and owned by a Chinese company (Xiaoyi) does help keep costs down but surely there must be some trade-offs?
Yep, there’s no such thing as a free lunch. The Yi family of cameras work only with their smartphone apps and are 100% reliant on the cloud servers, these cameras don’t even have a web interface for you to use locally! Moreover, the company has been severely criticized by its users for its draconian terms and conditions of use. My recommendation – steer well clear of this and other unheard of Chinese brands.
Amazon Cloudcam: Amazon’s effort to integrate even more into your life (not just shopping), the Cloudcam naturally requires an internet connection and a connection to the Amazon cloud to function. Not fit for home security then.
What to look for in an indoor IP camera
The most important must-have features to look for in an indoor security camera are:
Video Resolution – In 2022, 720p cameras are just not acceptable. They simply don’t have the resolution to meet the very high threshold that the police and courts require to achieve a conviction. Unless the intruder’s face is right up against the camera, 720p is just not going to capture enough detail to identify a person, especially in the dark. So, my minimum recommendation remains 1080p Full HD (or 2 Megapixels).
Field of view or horizontal viewing angle – This depends on the focal length of the camera lens. The wider the horizontal viewing angle, the more flexible the camera is going to be for placement in a tricky place such as a wide living room. Some manufacturers quote the diagonal angle which can be misleading as its always going to be higher than the horizontal one – like how TV screens are marketed! All viewing angles in this article are horizontal values.
Night vision – InfraRed night vision is crucial for getting good quality night shots. A true IR cut filter helps to produce true colour images during the day and high quality images at night. EXIR LEDs are brighter and have longer lifespans than the typical IR LEDs used in cheaper cameras.
Audio – Most indoor cameras have a built-in microphone, this is great for recording incriminating evidence. It should also have a built-in speaker.
Should not be Cloud-reliant – I feel very strongly about privacy and being in control of my data. The trend in recent years has been to create ‘cloud’ cameras that are reliant on the manufacturer’s cloud servers to do even basic things such as motion detection and event recording. Why? Because the cloud subscriptions that you are then forced to pay generates a steady stream of income for the manufacturer for years to come.The worst of the lot are camera that are absolutely crippled and cannot operate without an internet connection – these are the most dangerous because the whole point in having a security camera is that its going to be watching your home 24/7. Since many manufacturers still don’t have reliable cloud servers and an intruder can easily disable your internet connection, how can you be assured that your camera will notify you in time if a break-in is in progress? What you want is a camera that does not need any outside help to do its job – all it should need is electricity. I use a CyberPower UPS to provide backup power in case the burglars cut the power.
RTSP stream capable so that you can access the video stream from a 3rd part app such as tinyCam Monitor Pro or IP Cam Viewer. ONVIF support is ideal so that you can connect the camera to an NVR like Amcrest NVRs which can support any ONVIF compatible camera.
The nice-to-have features to consider are:
Wireless – While an Ethernet cable connection is more stable and hence more reliable, support for WiFi and/or Bluetooth is great if you have to install the camera in a spot you can’t run a data cable to. Please do not install only wireless cameras – make sure you have wired cameras also in case your wireless cameras fail for whatever reason.
Continuous Video Recording – Most indoor camera will have automatic event triggered recording, but not all support continuous video recording. Typically a Network Video Recorder (NVR) or NAS is needed for this function because recording 24/7 to as SD card will damage it easily. You can specify how many days worth of storage you want to keep, and the older videos will be automatically overwritten.
Audio – Most cameras that have a mic and speaker built-in are not full-duplex – they are half-duplex meaning you cannot carry on a conversation in a natural way, you will have to adopt a walkie-talkie style of talking over the camera. So look for full-duplex capability.
Software features – Email alerts on motion detection, audio detection, echo cancellation and push notifications to smartphone apps.
Local storage – I love using local storage such as an SD card as a secondary location for motion triggered clips. 100% cloud-reliant cameras will not have any local storage, but some cloud cameras like the Arlo Q Plus now feature local storage in case the Internet connection is unavailable. In my opinion, the best cameras are the ones whose cloud features are strictly optional and let you access their video stream using 3rd party apps like tinyCam Monitor Pro.
Motion detection method – While software based image change detection is the most common motion detection method, a PIR motion sensor is preferable to cut down on false alerts
Power source – A wired Ethernet port is preferable over wireless connections for the best reliability. PoE (Power over Ethernet) support is ideal since then you don’t need two cables to each camera. An internal battery for power backup purposes is great if a burglar cuts the power supply to disable your home defences.
Advanced features – Preferably a full API should be available for interfacing with home automation controllers such as the Vera Plus. IFTTT is not enough because it relies on an Internet connection and so is not a local solution.
Picking the right IP camera for your DIY Smart Home is tough, I know. Your time is valuable, and what you need is solid, well-researched, actionable advice that you can use right now.
Since 2015, VueVille has built up a reputation for providing exactly that sort of buying advice. And I don’t take that responsibility lightly.
So I have created this brand new up-to-date list of the best outdoor IP cameras for 2024 and here are my top picks:
I separated indoor IP cameras into its own guide. At the end of this article, you will find our recommendations for specific purposes like battery powered cameras.
A quick note: As an Amazon Associate I earn from qualifying purchases. This post contains affiliate link(s). An affiliate link means I may earn advertising or referral fees if you make a purchase through my link, at no extra cost to you.
Best Outdoor IP Camera – 2024 Recommendations Summary
Here’s a handy summary of all our outdoor IP camera recommendations for 2024, split by use case:
[table id=70 responsive=scroll /]
Recommendation Methodology
IP cameras come in all shapes and sizes. There are a few ways we can categorize them:
By location – outdoor or indoor.
By form-factor: Turret (aka eye-ball) cameras are my favourite type and are highly flexible in how you can point the lens, even after installation. Bullet style cameras are most visible and are great if you prioritize deterrence, whereas dome style cameras are excellent for vandal resistance.
So I will split this Best IP Camera round-up into two posts: outdoor/indoor camera. In each post, I will also cover the best cameras of each form factor.
[easyazon_link identifier=”B08135WDZW” locale=”US” tag=”vueville.com-eaz-boipc18-20″]Check Price on Amazon[/easyazon_link]
I started reviewing Reolink products in 2017 and have been impressed with the consistently high quality yet affordable products they have put out. Reolink continues to be our favourite for budget-friendly outdoor IP cameras in 2024.
Last year, the RLC-520A was replaced by the RLC-820A and it continues to be a great choice. Smart motion detection of people and vehicles is becoming more common across Reolink’s model range. I would place these person and vehicle detection features between basic and advanced motion detection of the old classics, Hikvision and Dahua. Yes other brands such as Nest and Arlo also have smart detection but those require rely on the cloud for this to work – no Internet connection means no smart motion detection.
Reolink not only does the smart motion detection locally but importantly does this without asking you to pay a monthly subscription fee. That’s huge and kudos to Reolink for bucking the trend here.
The RLC-820A is a turret style camera. There is a true IR cut removable filter (ICR) to ensure excellent night time videos and faithful colour reproduction during the day. Noise reduction and backlight compensation are also available.
One of the features I look for and often fail to find in budget cameras is our beloved built-in NVR feature. All Reolink standalone IP cameras including the RLC-820A have this feature. It’s great if you are just starting out and have a single camera or do not have a dedicated NVR. So you can set up the camera to do basic or smart motion detection, record to NVR/FTP or the onboard SD card, and it will overwrite older videos automatically.
The camera doesn’t support continuous recording to the on-board SD card, which is fine because its not something I recommend anyway. You will just end up wearing out the SD card sooner. SD cards are best suited to intermittent motion detection clips being written, rather than continuous data recording. The cameras can instead record to a Reolink NVR or any 3rd party NVR or software that supports the ONVIF standard and RTSP protocol.
Best Value 4K Turret Camera: Amcrest IP8M-T2669EW-AI
[easyazon_link identifier=”B08CWGJY37″ locale=”US” tag=”vueville.com-eaz-boipc18-20″]Check Price on Amazon[/easyazon_link]
Amcrest cameras are actually rebranded Dahua cameras. While Dahua doesn’t really support retail customers, Amcrest is purely targeted at retail customers like you and me. And the cost is about the same. So why not go for something that you can buy with 100% peace of mind with a full warranty and the ability to return to Amazon if you don’t like it.
While Amcrest cannot match the price points that Reolink hits, they differentiate their products by adding a few premium features without a huge price tag. Features like true 120dB Wide Dynamic Range (WDR) and advanced motion detection methods like tripwire (line crossing) and intrusion detection.
The Amcrest IP8M-T2669EW-AI is an extremely feature-loaded 4K IP camera. It has several highlights such as wide-angle lens, 120dB true Wide Dynamic Range for better shadow detail, extremely bright EXIR IR LEDs, and perhaps most importantly every type of motion detection you cant think of – simple zone-based method, advanced methods such as tripwire (line-crossing) and intrusion, and smart person/vehicle detection. Combining these methods means that you can virtually eliminate false alerts.
The AI in the model name refers to the smart motion detection that is performed locally and does not need an Internet or cloud connection to work. Nor do you need any sort of paid subscription. This is similar to Reolink’s strategy and great for local-only smart home enthusiasts like us.
Unfortunately the IP8M-T2669EW-AI does not have audio or alarm in/out connections. But that’s the only thing that is missing in an otherwise excellent package.
Best Budget 4K Dome Camera: Amcrest IP8M-2493EW-V2
[easyazon_link identifier=”B077Y52782″ locale=”US” tag=”vueville.com-eaz-boipc18-20″]Check Price on Amazon[/easyazon_link]
In past years, Dahua featured prominently in this guide. But once again you won’t find any Dahuas here in 2024. The reason is that Amcrest cameras are just rebranded Dahua cameras. While Dahua doesn’t really support retail customers, Amcrest is purely targeted at retail customers like you and me. And the cost is about the same. So why not go for something that you can buy with 100% peace of mind with a full warranty and the ability to return to Amazon if you don’t like it.
The Amcrest IP8M-2493EW-V2 is a great camera for the DIY enthusiast. You get a brilliant 4K camera with the latest Ambarella S3L33M chipset and true 120dB WDR capability, a wide-angle lens and on-board SD card storage.
Sadly the recent industry trend of removing audio and alarm connections continues with this camera, so check out the Vivotek models at the end of this article if that’s what you need. But on the flipside, advanced motion detection such as trip wire and intrusion detection have been added. But smart detection (people/vehicle) is missing. The camera supports the latest H.265 and H.265+ encoding standards with a very high 10Mbps bitrate.
[easyazon_link identifier=”B09DPSB9BL” locale=”US” tag=”vueville.com-eaz-boipc18-20″]Check Price on Amazon[/easyazon_link]
If you need the ability to zoom in/out remotely, you need an IP camera with a motorized optical zoom. The Reolink RLC-842A offers 5x optical zoom in the traditional dome-style shape that also offers IK10 vandal resistance.
So this IP camera is a great choice for exposed installation locations where vandals are expected. The camera does not suffer from IR glare or reflections, so you get that awesome 4K resolution and clarity without any compromise.
The RLC-842A also supports smart motion detection, it can distinguish between persons and vehicles and send push notifications or email alerts.
[easyazon_link identifier=”B07K74GWX5″ locale=”US” tag=”vueville.com-eaz-boipc18-20″]Check Price on Amazon[/easyazon_link]
This is the most recognizable type of security camera – the classic bullet shape. This also makes it a natural choice for a home CCTV system as a very visible deterrent. If a burglar sees one of these, he knows its not worth risking jail time to break into your house. But do make sure that you have got multiple cameras covering your entry/exit points and that your bullet cameras are high up and out of reach of vandals, because a well-aimed missile can potentially knock it off target.
The 8mp RLC-810A is the upgraded version of last year’s 5MP RLC-510A. Just like the other Reolink cameras in this article, you get a high-quality camera with smart person and vehicle detection. But unlike the turret cameras, you don’t get EXIR LEDs for night vision, just the standard ring-style IR LEDs. Still, these are plenty fine for most users.
Best Value 4K Bullet Camera: Amcrest IP8M-2696EW-AI
[easyazon_link identifier=”B0837485XG” locale=”US” tag=”vueville.com-eaz-boipc18-20″]Check Price on Amazon[/easyazon_link]
The Amcrest IP8M-2696EW-AI is powered by a Sony Starvis image sensor and Ambarella S3LM chipset that can put out UltraHD 4K video at 15 fps. At the same time, true 120dB WDR helps to avoid washed-out scenes in bright daylight. Bumping the resolution down to 3MP will result in a max frame-rate of 30 fps. Personally, I am happy with 15 fps as it reduces the disk space required and so extends the hours of video recorded.
Just like every other camera in this article, this Amcrest also sports onboard storage. So pop in an SD card (up to 128GB) and the camera can work in a fully standalone manner. It can record motion detection triggered clips and snapshots straight to the SD card without requiring a PC, NVR or anything. This built-in NVR of the Amcrest can be accessed through a web browser or the Amcrest mobile app. The same app also delivers push notifications to your smartphone.
Uniquely this camera also has audio or alarm connections, that help you to extend the capabilities of this camera. If you dabble with Home Assistant and ESPHome, you can set up some nifty automations using these inputs.
[easyazon_link identifier=”B08QV8T3D9″ locale=”US” tag=”vueville.com-eaz-boipc18-20″]Check Price on Amazon[/easyazon_link]
Now I have to say this upfront: the only time I recommend Wi-Fi cameras is when you cannot conveniently wire the camera up at your installation location & you have another wired camera covering the same viewing area. Why because Wi-Fi cameras are simply never going to be as reliable as a wired camera. That said, they do have their place.
For a Wi-Fi camera, you are constrained by available bandwidth. So the maximum 5MP resolution is plenty fine and in fact I would suggest a lower resolution to avoid dropped frames if you are placing the camera well away from the nearest Wi-Fi access point.
A major highlight is the motorized optical zoom that you can control from the excellent Reolink mobile app. I also like that even though the camera is wireless, it has an Ethernet port that allows it to be used as a wired camera as well! That’s a great touch, even though its not PoE capable.
2.8-13.5mm motorized varifocal lens, with pan-tilt
27°-96° Viewing Angle
60m/200ft EXIR LED Range
Spotlight for colour night vision
Built-in siren
Power over Ethernet (PoE 802.3at)
IP66 weatherproof
Smart (Person/Vehicle) with Auto-tracking
Built-in mic and speaker
[easyazon_link identifier=”B095H2BBWZ” locale=”US” tag=”vueville.com-eaz-boipc18-20″]Check Price on Amazon[/easyazon_link]
I first reviewed the 4MP version of the Reolink RLC-423 in 2017 and were very impressed with the quality and features that Reolink managed to cram into this PTZ at a very affordable price. In 2020 Reolink launched the 5MP version of the same camera and last year Reolink upgraded it to the 4K 8MP RLC-823A.
The most important upgrades are smart person detection with auto-tracking, on-board SD card storage, spotlight LEDs for colour night vision and a siren. With these features, the RLC-823A becomes the best value PTZ on the market.
Reolink Argus 3 Pro: Wire-free or battery operated Wi-Fi cameras became mainstream a couple of years ago and I started reviewing them on VueVille. I wouldn’t recommend using only battery powered cameras in your DIY security camera system because they are not a 100% reliable. Batteries will run out, or fail at the most inopportune moment. But as a secondary camera covering areas already covered by mains powered or PoE cameras, wire-free cameras are an excellent choice.
The Argus 3 Pro has a 4MP sensor and coupled with with PIR motion sensing and SD card storage, its a perfect DIY IP camera. Being battery powered, you can’t really expect it to support RTSP or ONVIF. But it does have colour night vision, 2-way audio, pre-motion recording, person/vehicle detection, large built=in battery, solar panel support, IP65 weather-proofing and Google Assistant support.
The other new models include the Argus Lumus and the Argus Eco which is the only bullet-style battery powered camera I have seen.
Check out our detailed review of the Argus below:
[wpsm_top postid=4415]
[easyazon_link identifier=”B08S7Q3BSH” locale=”US” tag=”vueville.com-eaz-boipc18-20″]Check Price on Amazon[/easyazon_link]
Best Outdoor Spotlight Camera with Colour night vision
Reolink RLC-824A: If you are looking for a spotlight camera with excellent colour night vision, check out our hands-on review of the RLC-824A.
[wpsm_top postid=11942]
[easyazon_link identifier=”B099ZPF3B2″ locale=”US” tag=”vueville.com-eaz-boipc18-20″]Check Price on Amazon[/easyazon_link]
What to look for in an outdoor security camera
Every year IP camera technology advances and you get more features for your money. But what exactly should you be looking for? The most important must-have features to look for in an outdoor security camera are:
Video Resolution – at least 4MP resolution. This is to ensure an increased chance of positive identification of faces, especially at night. 4MP is recommended as it costs no more than 3MP models these days and you can also fall back on the 2MP(1080p) or 3MP setting if you want to reduce bandwidth usage and disk space usage.
Field of view – at least 80 degrees horizontally. This depends on the focal length of the camera lens. The shorter the focal length, the wider the field of view. Ignore diagonal measurements, what matters is horizontal field of view.
Night vision – Should at least have InfraRed LEDs for night vision with an auto IR cut filter to avoid false colour in the daytime. Every camera I recommend in this article has an auto IR cut filter.
Weather proofing – Expressed in IP ratings, the first digit is the solid ingress rating and the second digit is the water ingress rating (higher is better always). An X instead of a number indicates a product is unrated for that component. An IP weather-proof rating is preferable, IP66 is the standard for good security cameras. Vandal resistance is expressed in the IKXX rating and is good to have in high traffic areas.
Should not be Internet or Cloud reliant – Can the security camera function without an internet connection? Do you have to pay a monthly subscription for core features such as recording video clips, storing them, accessing them later on, for motion detection? I only recommend cameras that do not need an Internet connection to function, are not cloud reliant and have the ability to write video clips and images to a local device such as an NVR, a NAS, or SD card. This is because for something as critical as home security, your camera should be able to record and store clips without requiring anything more than just a power source. Get a UPS and you can keep your cameras running even if an intruder cuts your home’s power supply.
RTSP stream capable so that third party apps such as camera viewers and Home Automation controllers can access the camera video stream.
ONVIF compatibility so that you can connect it to an NVR like the Amcrest which can support any ONVIF compatible camera.
Software features – Motion detection, Email alerts on motion detection
The nice-to-have features to consider are:
Wireless – Support for WiFi and/or Bluetooth if you have to install the camera in a spot you can’t run an ethernet cable to. But really I do not recommend going with only wireless cameras for your whole network – Wi-Fi is not that reliable.
Continuous Video Recording instead of just automatic event triggered or manual recording. Requires a storage medium though, like an NVR which adds to the cost.
Software features – Built-in NVR feature, advanced motion detection methods to reduce false alerts, push notifications to smartphone apps
Local storage – in the form of a microSD card slot, or internal flash storage. A built-in NVR function is a plus.
Motion detection method – PIR motion sensor is preferable to cut down on false alerts
Power source – Ethernet port preferable with PoE (Power over Ethernet) support, internal battery good for power backup purposes
Audio – Microphone built-in would be a nice to have, full-duplex capability is superb but very rare
Advanced features:
API available for interfacing with home automation controllers such as the Vera Plus or Fibaro Home Centre
Full duplex 2-way audio support, built-in mic or audio and alarm connections
PIR sensor to reduce false alerts
How to use this IP camera buying guide
Choosing your own DIY IP cameras can be overwhelming. So if you are brand new to this, it’s a good idea to first read up on IP camera basics. It contains all the frequently asked questions about IP cameras.
All the cameras I recommend in this article are DIY cameras that are not cloud-reliant or even Internet-reliant. None of them are crippled by their manufacturers to make you pay a monthly fee.
While I do recommend sticking to one single brand for convenience and maximum compatibility, thanks to the ONVIF and RTSP standards you can mix and match as I have done with our DIY home security camera setup.
Also if you want to just start with any one of these cameras, you can always continue using them in your future setup that also supports open industry standards such as ONVIF and RTSP.
Want to start with a single IP camera that can do everything, and maybe expand later with an NVR or NAS NVR? Awesome, that’s how I started! Pick a camera with on-board storage (SD card slot) from the recommendations below.
Want to start with a NAS as an NVR, with the freedom to add IP cameras later? Awesome, any camera recommended below will work for you! Skip down to the recommendations below.
How to choose an IP camera for an existing NVR
If your existing NVR doesn’t support ONVIF, choose the same brand IP Camera as your NVR.
If your existing NVR supports ONVIF, any camera recommended below will work for you.
Conclusion
The wide range of outdoor IP cameras above should give you a good overview of the freedom and flexibility going Pro-DIY brings you. Have I missed a camera that really ought to be on this list? Please leave a comment below – I love hearing from you!
Reolink recently launched their latest indoor pan-tilt wireless camera, the 4 Megapixel [easyazon_link identifier=”B01LS71HNM” locale=”US” tag=”vueville.com-eaz-20″]Reolink C1 Pro[/easyazon_link]. I got the chance to do a thorough hands-on review and I found it to be a great multi-purpose DIY security camera. With its easy setup, built-in NVR features, full duplex 2-way audio, and dual-band WiFi, its a solid choice for your DIY home security system, especially if you don’t want to be reliant on any cloud service.
I currently use the Amcrest ProHD 1080p as my son’s baby monitor. Since the Reolink C1 Pro is likely to be pitched as an upgrade to a ‘mere’ 2MP camera and I have been using the Amcrest for over a year, I will be drawing comparisons between these two throughout this review.
A quick note: As an Amazon Associate I earn from qualifying purchases. This post contains affiliate link(s). An affiliate link means I may earn advertising or referral fees if you make a purchase through my link, at no extra cost to you.
Specifications
[table id=39 responsive=scroll /]
Unboxing
The Reolink C1 Pro comes in a nicely packed box with a sufficient level of padding inside to protect the camera. The model name of the camera, and its main specs are clearly listed on a sticker on the outside of the box along with the default login details.
What’s in the box
Reolink C1 Pro Mini PT Camera
DC 5V wall adaptor
Mini USB cable
Ethernet cable (1 metre long)
Wall mounting bracket
Quick Start guide
What’s next booklet
Drilling templates
CD-ROM with software and manuals
Reolink surveillance notification sticker
Screws and rawl plugs
Design & Features
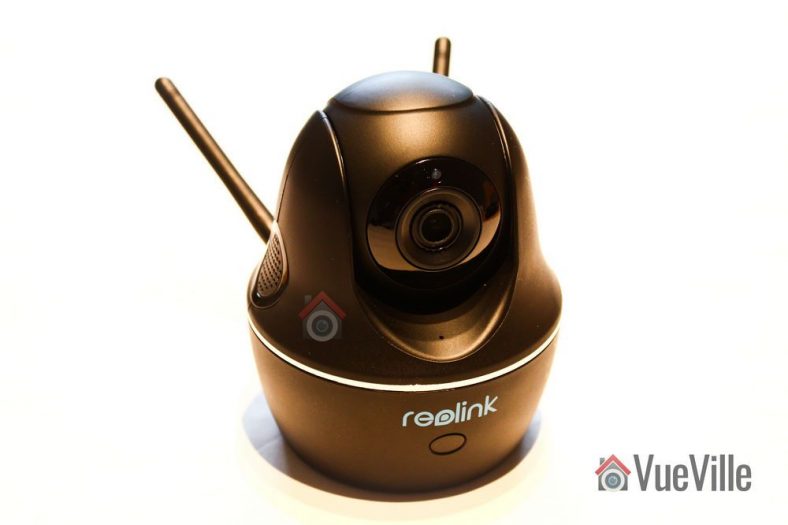
The C1 Pro is available in only one colour – black. The camera can be divided into three parts – the base, the body and the lens mounting which contains the lens itself. A chrome trim runs around the base, lending it a high-end look and feel.
The base has the indicator LEDs on the front (see above) and the connectivity ports on the back. You will find the 10/100 Mbps ethernet port, a microSD card slot and a micro-USB port which serves as the power input. Yes the camera runs on 5V DC which means that you can easily plug it into a USB port to power it. How much amperage would you need? Power = Voltage x Current. Since the camera is rated for a maximum of 6W power usage and runs at 5V, the current requirement is 1.2A. If your USB port is rated for charging devices, its 1.5A rating is more than sufficient to power the camera.
The dual Wi-Fi antennae are also fixed to the back of the base. Now this is a great feature to have as most of the C1 Pro’s competitors are still sporting just 2.4 GHz Wi-Fi. The antennae are adjustable and so you can orient it to get the strongest Wi-Fi signal.
You will also find a handy reset pin hole on the side of the base.
The body is the part that rotates around the vertical axis, and has a 355 degree freedom of motion. The body also contains the dual speakers, one on each side as you can see below. The built-in microphone can be found on the front of the body just under the lens mount.
The lens mounting piece is free to rotate about the horizontal plane with 42 degrees of movement. The daylight sensor is integrated into the Ring-type Infrared LEDs concealed smartly around the lens. If you look carefully you can see the red tinge of the Infrared LEDs under the darkened glass surrounding the lens.
All in all, the camera feels solid in construction and the matte finish of the dark plastic makes it look more expensive than it really is.
Installation & Setup
The Reolink C1 Pro comes with a very good quick start guide which is a double-sided glossy booklet, just like the Reolink Argus I reviewed recently. The general introduction section illustrates and labels the different parts of the camera such as the daylight sensor, the built-in mic, the speaker, the indicator LEDs and the various connections.
There is also a helpful camera connection guide for those who are new to security cameras. Initial setup needs the C1 Pro to be connected to your router via an ethernet cable unlike the Argus which had a niftier setup method. Nope, there’s no voice guiding you through the setup process like the Argus either.
Since the C1 Pro doesn’t support PoE, you have to use the included power adaptor. The camera uses a standard USB power plug so you may be able to power it using alternative power sources too. The blue power LED will lit up when I turned on the power. There was no ‘startup dance’ or calibration as my Amcrest ProHD 1080p PT does when I power it up, although after the initial setup I noticed it does this whenever I power it on.
So you have two options for setting up the camera:
Setup using a phone or tablet – the smart device method as Reolink calls it, or
Setup using a laptop
I suspect most people would opt for the smart device setup, so that’s what I did.
Install the Reolink mobile app. I had it already installed since I use the Reolink Argus.
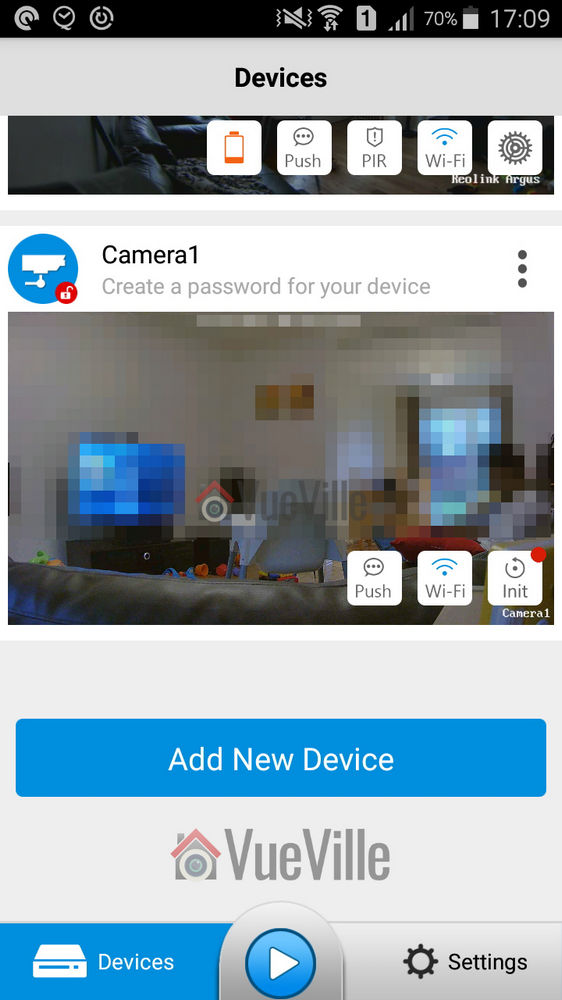
To my surprise, when I opened the app I found that it detected and added the Reolink C1 Pro automatically! There was a red indicator next to the ‘Init’ button for the C1 Pro. So I turned to the quick start booklet and sure enough it said the camera would be automatically detected.
Now its time to set up the Wi-Fi. I touched the Wi-Fi symbol for the C1, entered my Wi-Fi network details and then proceeded to perform the Wi-Fi test. The test was successful, so I backed out to the main devices page.
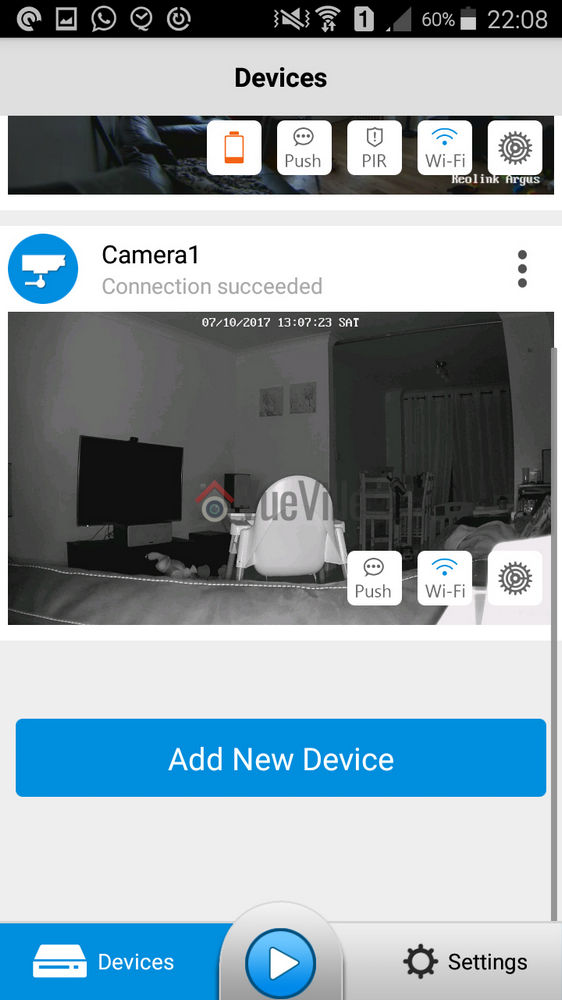
Next I clicked on the warning message saying ‘Create a password for your device’, and saved a password. The app then opened the camera’s dedicated page with all the control options including the PTZ button and Live View. Backing out to the main devices page showed that the warning message now changed to ‘Connection succeeded’.
Interestingly the quick start guide didn’t say anything about the Init button which still had a red indicator next to it (as you can see above). So I touched it and completed the initial setup. I touched ‘Synchronize phone time’ and then hit Next to complete the setup. Good, now the setup was really complete and the Init button changed into a settings gear button.
Configuring the C1 Pro
As we saw earlier, the easiest way of setting up the camera is using the app. This is in part because you don’t need to know the camera’s IP address to access it, the app does that part for you. But don’t forget this is not a dumbed down security camera. It has its own web admin page where you can access the advanced settings. But to do this you need to know the IP address of the camera. Since the initial setup requires the camera to be connected physically to your router via the Ethernet cable and DHCP is enabled by default to help newbies, the camera is accessible via that interface’s IP address. You can scan the network using any number of apps to find out the ethernet interface’s IP address.
If you have set up the Wi-Fi as well, that interface will have a separate IP address. Just like the Amcrest ProHD IP camera, both interfaces are live at the same time and you can choose to access the camera through either one. This is a very nice feature.
The Web Admin page
When you first log in to the web admin page, it takes you straight to the Live View page, which Reolink calls the ‘Preview’ tab. Here you can control the PTZ function of the camera, switch between different resolution (clear/fluent/balanced), and access some of the OSD settings. You can also mute the camera audio if required. The web admin page uses Adobe Flash though, I would have preferred an HTML5 interface.
The playback tab is for accessing the built-in NVR feature of the C1 Pro. What is the built-in NVR feature? Basically, pop in a microSD card and the camera can record continuous or motion detection triggered video clips or snapshots to the SD card. You can login any time from anywhere to review the footage through a timeline view. This means that if you need only a single camera or two in your home , you don’t need to buy a separate NVR just to record video footage. The camera can also push notifications to the Reolink app on your mobile phone, send email alerts with attached snapshots or video clips and even upload them to an FTP server.
Moving on to the settings page, the various configuration options are neatly laid out in logical sections. You can set the video resolution and frame rates separately for the main stream (called clear stream) or the secondary stream (called the fluent stream). The secondary stream is used for the mobile app live view feature.
The network section lets you switch between static and dynamic IP allocation (DHCP), and also adjust many other settings such as the various ports used, set up a dynamic DNS ping, email notification setup, FTP settings, and push notifications. I was happy to see that uPNP is disabled by default – this is a great security feature. When ONVIF is available you really do not need uPNP.
Okay but how does the Reolink app manage to access the C1 Pro and receive push notifications even when you are outside your local network? Well its got to be that favourite protocol of every security camera manufacturer, P2P! Except, Reolink doesn’t call it that – you are looking for the UID setting. It is on by default which is fine for making the camera super easy to set up but for power users like me, I don’t need the C1 Pro to poke a hole through my network and connect to Reolink’s P2P servers. I have my super secure way of accessing my local network remotely through OpenVPN, so I immediately turned off the UID P2P feature.
Adding a microSD card for motion detection recording
I inserted a microSD card into the SD card slot. I had to push the card all the way into the slot before it click-locked. I then formatted the card through the web admin page. The camera then automatically rebooted and the microSD card was ready for use.
A word of warning here, by default the camera automatically will then start recording 24/7 to the SD card. I would have been happier to see the default set at ‘None’ or ‘Motion’ instead of ‘Normal’.
Mobile Push Notifications
Push notifications can be set up based on the time of the day. Remember that push notifications will not work outside your local network if you switch off P2P though.
Adding the Reolink to QNAP Surveillance Station
The C1 Pro supports ONVIF, so I was easily able to add it to my QNAP TS-253A’s Surveillance Station app. I first created an additional user for the NAS using the web admin page of the C1 Pro.
Performance
Okay so the C1 Pro is a 4 Megapixel camera that can do 30 frames per second, so its no surprise I found things ticking along nicely throughout the review with no slowdowns, frame stutters or any performance issue really.
Let’s look at the default settings the Reolink C1 Pro comes with from the factory:
Main stream: 4MP @ 15fps and 3Mbps
Now I think the default bitrate of 3Mbps is too low but since these are the defaults, I ran my day and night tests at these settings.
In the System>Performance section of the web admin page, I could see that while idling the processor usage ranged between 10% and 15%. When motion was detected this went up to around 40%, so there was always sufficient headroom for the camera’s processor.
Video quality
Video captured was crisp and clear both during the day time and in total darkness, in line with my expectations for a 4 Megapixel IP camera.
Here are the motion detection triggered videos recorded at the default 4Megapixel resolution, at 30 fps and 3 Mbps bitrate:
There was no blurring of the video and there were no dropped frames.
Motion detection
The C1 Pro is able to both pre-record and post-record. This means the camera is able to record not just what happens after motion was triggered but a few seconds before the trigger as well. This is a great feature and something that I always look for in a security camera. The post-record feature lets you decide how many seconds the camera should record after the last motion trigger. The default is 15 seconds.
Night vision
The Infrared LEDs are reasonably powerful and can light up a decent sized room. There are no settings to control the brightness of the LEDs and there are no advanced features to dynamically control the infrared light output.
Audio quality
Just like most indoor security camera, the C1 Pro supports 2-way audio. Usually the implementation in most manufacturers’ native apps mutes the audio when you activate the microphone. In other words they have half-duplex audio, not full-duplex. Ideally to use the camera as an intercom, you need 2-way full duplex audio.
Interestingly Reolink has not claimed full duplex audio, however the Reolink app doesn’t mute the incoming audio when you press the microphone button. You can continue to hear what the person at the other end is saying when you are speaking. So the C1 Pro actually supports full duplex audio.
So how well does it work in practice? The audio quality is great and the dual speakers do a great job in reproducing audio. But there is a noticeable lag, however slight, in audio playback and this makes the full duplex capability less useful. We found ourselves using the Reolink C1 Pro more like a walkie-talkie just like the Amcrest ProHD.
PTZ performance
If you are planning to use the C1 Pro as a baby monitor with 2-way audio, you are going to love how quiet it is. One complaint I do have with the Amcrest ProHD camera is how noisy the PT motion is, truly its loud enough to wake up my baby if he is sleeping lightly.
The C1 Pro hardly makes a sound and so is better suited as a baby monitor. There are no speed control settings though whereas the Amcrest ProHD does. One other drawback I found is that the motion detection stays active even when you use the Pan-Tilt controls which means the camera records a motion detection clip each time you use the PTZ controls.
Wireless performance
So I tested the camera over both Ethernet and Wi-Fi. But you know Ethernet is easy for any camera in 2017. What really matters is how good the Wi-Fi connection and performance is. The C1 Pro boasts of 2T2R MIMO antennae for improved wireless performance. So I moved the camera to the farthest point in my house to see how the Wi-Fi did. Over both 2.4GHz and 5 GHz, the C1 Pro was stable and performed just as if it was connected over Ethernet.
Mobile app live view
I first installed the Reolink Android app on my phone when I reviewed the RLC-423 PTZ. I then added the Reolink Argus and now the Reolink C1 Pro. I have been quite impressed with the fluid intelligent design of the mobile app, its definitely something that Hikvision for example can learn from. Where the iVMS app is clunky and often doesn’t work, the Reolink app simply delivers.
Live view on the app can be by camera or you can simultaneously view multiple Reolink cameras. There is a handy PTZ joystick button and the camera is quite responsive when you move the joystick around. Over a remote connection, there was a 0.5 second delay between moving the PTZ controls and the video changing.
Mobile app push notifications
So what should you be looking for when it comes to push notifications? The speed and reliability of the push notifications reaching you. You want the camera to send you push notifications immediately after it detects motion. Especially if you have configured email alerts, SD card recording at 4 Megapixel recording and push notifications, inferior cameras may struggle but not the C1 Pro.
Inside my local network I got push notifications on my phone instantaneously and on remote networks there was a delay of just 1 second which is very impressive. The success rate of receiving the push notifications over multiple motion triggers was a solid 100%.
Reviewing recorded footage
So this is how you access the built-in NVR feature of the C1 Pro. Clips recorded on the microSD card can be accessed either via the web admin interface or the Reolink mobile app.
Using the web browser interface
You can choose a date to review and if motion triggered recording is enabled, all these clips will be shown on the timeline. You can roll the mouse wheel to zoom in and out of the timeline to select specific clips. Click anywhere on the timeline and it will jump to the next recorded clip and then keep playing one clip after the other sequentially.
There is a handy download button which lets you download multiple clips to your computer. Overall great implementation and a very useful feature.
Using the mobile app
The Android mobile app also can access the built-in NVR feature of the C1 Pro. It works just like the web interface – you can choose the date to review and either let it play one motion triggered clip after the other or pick a specific point on the timeline.
Verdict
There are lots of indoor security cameras available these days – hundreds and hundreds of obscure brands that all promise to meet your indoor security needs. But there are a few brands that stand out – Reolink & Amcrest.
The super quiet Pan-Tilt motion of the camera calls for special mention, its ideal for discreet use cases or where you don’t want to wake up a baby in light sleep!
The Amcrest ProHD is available with PoE whereas the Reolink doesn’t have PoE. It would be nice to have the option of choosing between PoE and Wi-Fi.
[review]
Where to buy
[easyazon_link identifier=”B07CPNNT56″ locale=”US” tag=”vueville.com-eaz-20″]Check Price on your local Amazon site[/easyazon_link]
(* = affiliate link / image source: Amazon Associates Program)
The Netgear Arlo is that once in a century product, that totally revolutionizes the industry by making taking something niche into the mainstream. As I noted in my recent Reolink Argus wire-free camera review, I was initially against battery-powered cameras. But my experience with the Argus blew me away. It forced me to take a fresh look at how a good wire-free camera can help fill out and complete a good DIY security camera system.
So in the spirit of discovery, I am looking at the Arlo family today. Starting with the [easyazon_link identifier=”B00QH0Q8J4″ locale=”US” tag=”vueville.com-eaz-20″]Arlo[/easyazon_link] and the [easyazon_link identifier=”B075P84FH9″ locale=”US” tag=”vueville.com-eaz-20″]Arlo Pro[/easyazon_link], I will take you through the different features, and talk about which camera is best for which situations.
The basic idea of the Arlo is this: small 100% wire-free battery-powered cameras that connect to a hub. The hub is then connected to your Wi-Fi network. The Netgear Arlo is lovingly called the Arlo HD by customers, even though Netgear prefers just Arlo. The Arlo Pro is a beefed up version of the Arlo HD and is sort of the big brother of the Arlo HD. Calling the Arlo, the lowest member of the Arlo family ‘HD’ makes sense because it has 720p resolution which is popularly known as HD resolution.
A quick note: As an Amazon Associate I earn from qualifying purchases. This post contains affiliate link(s). An affiliate link means I may earn advertising or referral fees if you make a purchase through my link, at no extra cost to you.
Arlo HD vs. Arlo Pro – Comparison Table
Here’s a quick comparison table between the Arlo Pro and the Arlo HD: [wpsm_comparison_table id=”14″ class=”hover-col1 “]
Now let’s look at the main features of these battery-powered cameras head-to-head.
Video Quality
Both the Arlo HD and the Arlo Pro have the same 720p sensor and therefore have similar image quality. 720p is on the lower side and if you need 1080p, you need to go up to the Arlo Q or the Arlo Q Plus which also sports Power over Ethernet.
Both cameras also feature auto-adaptive white/black balance and exposure adjustment.
Audio Quality
Well the Arlo HD doesn’t have a microphone, and so cannot compete with the Arlo Pro which does have one. Having a microphone is a major advantage because it lets you listen in on the camera from your mobile phone, and also can record incriminating conversations if needed!
The Arlo Pro is capable of 2-way audio because it has both a speaker and a microphone built-in. It can also send you audio alerts so it can alert you to unwanted visitors who may manage to avoid the camera but still get caught on audio.
Motion Detection
The Arlo, Arlo Pro and Arlo Go all have a real PIR sensor which is far better than software-based motion detection that most cameras use. This is because a PIR sensor detects motion using Infrared rays which reduces the number of false alerts that you will invariably get with non-PIR cameras. There is a weakness though, PIR sensors are weak at detecting motion that’s perpendicular to it, side-to-side motion is where it excels.
The image above illustrates this problem very well. The solution is to have more than one camera covering the same scene.
Weatherproofing
The Arlo and Arlo Pro now both have a very good IP65 rating and so should be absolutely fine braving the elements. This is a recent development though, as only the Pro had IP65 rating when I checked last year.
Battery-life
This is where the cameras start drifting apart. The Arlo HD uses four off-the-shelf CR123A batteries. This means the camera operation time depends on the mAh rating of the batteries you choose. You could use rechargeable batteries also, the batteries recommended by Netgear are the Tenergy rechargeable batteries.
The Arlo Pro makes use of a built-in rechargeable battery that you cannot replace yourself. It has a capacity of 2440 mAh and it needs this extra juice for the extra features such as the built-in speaker and microphone.
Which Arlo is better for the outdoors?
Since both the Arlo Pro and the Arlo are now rated IP65 for water and dust resistance, you can put either one outdoors. Although as always its preferable to put them under the eaves or in a sheltered area to minimise the risk of damage.
I’ll admit it – I have never been a fan of battery powered security cameras and have stayed away from them in the past. I am a set-it-and-forget-it type of person and that is probably why batteries have never appealed to me. Well all that changed when I started writing this Reolink Argus review.
To make things simple, lets talk about what wire-free cameras are not for:
they are not for 24/7 live-streaming or recording. Why? Because of batteries.
they are not for locations that are remote or cannot be accessed every 3 months or so. Why? Again because of batteries.
For any application that do not need the above, wire-free cameras can be considered.
For outdoor security cameras, generally power is not an issue because you can just run Ethernet cables anywhere and power up the cameras using Power-over-Ethernet (PoE). But where battery powered cameras come into their own are locations outside your home where you cant get cables to or for applications inside the home where there’s no power source nearby.
Lets take an example of a common application most people would consider the Argus for. When I heard of the Argus, the first thought that I had was ‘can it be a portable baby monitor’? You see, I have been using the Amcrest IP2M-841B as my baby monitor for over a year now. While its a great camera for this purpose, there is one little issue – when my baby moves around the house during the course of the day, I have to keep moving the baby monitor along with him. This is not great because I have to keep hopping the camera from one power socket to the next.
With a wire-free camera, I am no longer constrained by the location of power sockets! In fact this was the source of inspiration that led Reolink’s CEO Colin Liu to create this camera in the first place through their highly successful IndieGoGo campaign that raised over a million dollars. So is the Argus a good baby camera? Not a primary one as you will see soon, but good as a secondary one.
Wire-free cameras are also great for renters who are not allowed to make permanent changes to their properties. There are a few other possible applications too – ever wanted to put a camera inside your pets cage? Or inside the bird house at the bottom of the garden?
Well if only there was a wire-free weather resistant camera that could also solve the problem of false motion detection alerts – enter the Reolink Argus! Reolink have kindly provided a test unit and I put it through its paces.
What’s in the box
Reolink’s packaging is usually great and the Argus is no exception. The Argus box itself was encased in another shipping box providing an extra layer of safety.
The box has the main features of the camera printed on it.
So what’s inside the box?
Reolink Argus camera
4x CR123a batteries
Magnetic base
Magnetic base hole template
2x Pack of screws
Reset needle
Outdoor security mount
Outdoor security mount template
What’s next card
Quick start guide
Surveillance sticker
Everything that you need to get started with wire-free surveillance is included. 4 GP-branded CR123A batteries are included and this is a great choice. I personally use GP batteries in all my home automation sensors and so very pleased to see Reolink opted for the same brand.
Specification
[table id=38 responsive=scroll /]
Design & Hardware Features
Right off the bat, let me say that the Argus looks and feels a lot more expensive than its price suggests. The glossy glass-like finish, the quality of the materials used and the general fit and finish are very Nest-like.
In the photo above, the camera is attached to the magnetic base and in the photo below, it is attached to the outside security mount.
Starting from the top, there is a daylight sensor which automatically turns on or off the Infrared LEDs. Next is the lens itself, surrounded by the Infrared LEDs. There is a status LED that shines bright blue below the lens. Below the status LED sits the built-in microphone.
You can’t miss one of the best features of the Argus, the built-in PIR motion sensor. This enables accurate motion detection instead of the more inaccurate software based motion detection.
The speaker is placed at the very bottom of the camera and is identifiable by the grill holes.
The rear of the camera sports just the Reolink logo and the quick setup QR code (more on that later).
On the left of the camera, we find a removable soft rubber cover. Open it and the microSD card slot is revealed along with the reset button.
I should point out something here to save you potential frustration especially as the manual doesn’t mention it. Typically microSD slots have a spring loaded mechanism which clicks when you push the card in and locks it in place. But in the Argus, there is just a spring mechanism. Meaning the microSD card never stays locked inside the slot by itself. You have to push the card in and then replace the rubber cover. That’s it. It would have been helpful if Reolink just used the standard microSD card slot every other manufacturer uses.
The bottom of the Argus contains a magnet for the magnetic base and a standard tripod mount. The magnet in the base of the camera attaches very strongly and securely to the magnetic base. Its a great idea and fits in nicely with the wire-free theme. It lets you quickly detach the Argus from the magnetic base and move it around the home.
The provided wedge is needed to open the Argus. The camera needs four CR123A batteries and these are included in the box.
Installation
The included quick start manual is if very high quality and illustrates the setup process well. The Reolink Argus is designed to be as easy to set up as possible and I have to say a 5 year old can set up this camera – its that simple.
How does the camera do this? By guiding you through the setup process using voice instructions. Yes the camera actually speaks to you. Very cool and it’s not just a gimmick, I found it held my hand right through the setup process.
These are the steps I followed from the user manual to set up the Argus:
Insert the batteries into the cameraAs soon as I added the batteries, a red light came on and the camera started talking with a female voice every 60 seconds: “Please run Reolink app. Click the ‘Add new device’ button and follow instructions to set up the camera.”
The next step is to install the Reolink app. Now there are 2 ways to proceed – go to the App Store (iOS) or the Android Play Store and install it yourself or scan the QR code in the manual.
Click the ‘Add new device’ button as prompted earlier by the camera
Scan the QR code on the cameraClick on the ‘Set up camera’ option when prompted by the Reolink app.
Now the camera will ask you whether you heard the voice prompt heard in step 1. So click the button named “I heard the voice prompt”.
Next enter your WiFi network information and tap the “I have entered the correct information” button.
The next step is a novel one. You have to point the camera at your mobile screen where a QR code is displayed. Basically the app is telling the camera what the WiFi network login details are. If the camera reads the QR code successfully, you will hear the camera say “Scan succeeds. Camera is connecting to the router.” Now click the ‘I heard scan succeeds’ button’.
When the camera successfully connects to the your WiFi router, you should hear the camera say “WiFi connection succeeds (sic), welcome to Reolink!”. Go ahead and tap the ‘I heard WiFi connection succeeds’ button.
Now the camera is connected to your WiFi network and you can login for the first time
As soon as you login, the camera will prompt you to change the default password which is just a blank. This is a good security feature and I am happy to see the Argus has it.
Don’t forget to tap the ‘Init’ button on the live view page to set the camera’s time and Daylight Savings Time (DST) settings.
You don’t have to do any extra setup such as port forwarding for accessing the camera remotely. It utilises Reolink’s P2P servers to accomplish this automatically. If you are worried about security you can block the P2P service and do your own port forwarding, or better yet give the Argus local access only and just VPN into your home network.
Software features & Mobile app
The Reolink Argus is controlled exclusively by the Reolink mobile app. You cannot access the camera from any other source. That said, the app is quite good and lets you do everything that you could through a dedicated web interface.
The app has two main sections – Devices and Settings. When you open the app, it takes you to the Devices screen by default. This is a list of all the devices and buttons that let you view each device’s battery status, turn on/off PIR and push notifications and access the full configuration page.
The Settings section is actually app-related settings such as a password, and enabling access over mobile data networks.
Device View
When you select a device, its own live view screen will open. Here you can turn on audio, record a video, or take a photo.
If you switch to the Playback tab, you can view both motion detection clips and video clips recorded through the app. These clips are stored on the microSD card.
You can select a specific date or select the marker on the timeline to choose a particular recording. At any point, you have the option of viewing more than one device by clicking on the multiple camera icon in the top right.
Device Setting page
Performance
The camera was able to maintain a steady WiFi signal from all corners of my home. It was able to keep serving a live video stream from some parts of my garden also.
Mobile App Live view
I tested the camera from inside my home network and remotely over 4G. My home broadband is 50 mbps up/10 mbps down and 4G network is around 15 mbps up/down. These are very high speeds and are ideal for bandwidth intensive applications such as video. You may not get the same results as I did if you are on slower networks.
On the whole, the Reolink Argus camera performed well considering the fact that it is a battery powered WiFi device. Even remotely, the app was zippy in logging into the camera and displaying the live stream.
Video
The FullHD 1080p video resolution is very good and provides the Argus with sharp and clear video, both during live streaming and in clips recorded to the microSD card. The IR LEDs are not the brightest you will find in a security camera but are adequate for the job.
In my humble opinion, what makes or breaks a security camera is its ability to capture motion triggered video clips. After all, lets not forget that the main purpose you are getting the Argus in the first place is to capture an intruder in action and get a clear shot that the police can use.
The PIR sensor gives the Argus an edge over cameras that rely on purely software based motion detection- you will get far fewer false alerts. You can also adjust the sensitivity of the PIR sensor to suit the installation location.
So how does it perform? In my many tests, it never once failed to trigger within the claimed detection area. I got immediate push notifications and email alerts on my mobile phone.
However there was one area of weakness which has more to do with the camera’s programming than the PIR sensor itself. The camera does not seem to have a pre-record feature and a very short recording duration for each motion detection event. These two are perhaps the most important software features a camera should have.
Watch the following videos to see what I mean:
Daytime Indoors video https://www.youtube.com/watch?v=RL3PDPDXLgE
Night-time Indoors video https://www.youtube.com/watch?v=FgcgfWhcvUo
Daytime Outdoor video https://www.youtube.com/watch?v=c6v-2YP5ydU
Night-time Outdoor video https://www.youtube.com/watch?v=mD5uee3fw4w
There is no pre-recording – the recording begins only around a second after the PIR sensor fires. So it missed me entering the room with my face exposed. With pre-recording, the camera would be recording the stream 24/7 automatically and so would be able to capture the few seconds before the PIR sensor fires.
Short recording duration – In the test videos below, I first trigger the PIR then walk towards the camera with my face exposed. But because the PIR cannot detect motion in a direction perpendicular to the sensor, it stops firing and recording stops soon after. If it had continued recording for 10 seconds, it would have caught my face. Of course I then reached the camera and the PIR sensor fires again as I move sideways.
I put the 2 points above to Reolink who informed me that there was no pre-record feature and that the recording duration was a fixed 6 seconds. While I can live without pre-recording on a battery powered camera, the fixed recording duration of 6 seconds is not great at all. Fortunately Reolink also added that the ability to adjust the recording duration will be added to the camera in future.
Audio
While most indoor security camera boast half-duplex 2-way audio, the Reolink actually has full-duplex 2-way audio. This means you can speak and hear at the same time as you would on a normal phone call, not take turns to speak like on a walkie-talkie.
Interestingly Reolink doesn’t claim to have full-duplex audio and maybe that’s because its not perfect yet. I found two slight issues. When I pressed the talk button when the audio from the camera was also on, it resulted in the volume of the camera audio stream reducing by quite a bit. This made it difficult to hear what was being said. Secondly, there was an occasional echo.
Advanced features
Being a consumer focused model, the camera doesn’t currently have Motion JPEG, RTSP or API support which would help it interface with your existing home automation or NVR. I asked Reolink whethere there were plans to add RTSP and they said its on the cards! With that I would be able to just ask my Vera Plus smart home hub to get an alert whenever the camera PIR senses motion and take a snapshot or record the RTSP stream. Now that would be cool!
Battery
Each of the 4 batteries provided by Reolink can hold 1500mAh. This means that with standard usage, the camera should last around 4-6 months. Over the week I intensively tested the camera, the battery level hardly fell. I would have liked for Reolink to provide a % level meter instead of the detailed statistics screen showing me how many minutes I have used the camera each day. There is a visual meter but it has no scale, so can be difficult to read accurately.
Reolink Argus vs. Netgear Arlo
The Netgear Arlo comes in different varieties starting with the Arlo Wirefree, the Arlo Pro and the Arlo Go. The Arlo model that is closest to the Argus is the Arlo Pro, and this is the choice you will most probably come up against.
Both the Argus and the Arlo Pro are wirefree thanks to their batteries. However the Arlo Pro has a proprietary rechargeable battery which can result in higher operation time depending on which batteries you use in the Argus.
When it comes to video, the Argus has a clear advantage due to its 1080p sensor. Things are more equal when it comes to audio with both cameras having full duplex 2-way audio with a built-in microphone and speaker.
Connectivity is an area where there are major differences between the Argus and the Arlo Pro. Both cameras use Wi-Fi for communication, but the Argus is a standalone camera. The Arlo Pro on the other hand needs its base.
Both cameras support motion alerts and are weatherproof with IP65 ratings.
Verdict
Overall, my experience with the Reolink was very positive and this is a camera with great potential. It’s very easy to set up with the voice guide, it has good video and audio quality, it has a PIR sensor for true motion detection, a stable app and last but not the least, the ability to work without the cloud thanks to its microSD local storage.
Some improvements are necessary to make this a killer camera though – the ability to adjust the motion detection recording duration, RTSP support and an API to access the camera from apps other than the official Reolink app. All of these are slated to be added in the future and I look forward to that.
[review]
Where to buy
[easyazon_link identifier=”B07GBRV8W5″ locale=”US” tag=”vueville.com-eaz-20″]Check your local Amazon site[/easyazon_link]