
Ever since I started setting up the VueVille DIY Smart Home, I have been focused on Z-Wave. Back in 2017 when I was starting out, Z-Wave was the only reliable DIY option for smart home enthusiasts who didn’t want to rely solely on Wi-Fi.
Zigbee was beginning to make a mark but lax compliance with the standard meant that you couldn’t count on Zigbee devices to work well together. But things are very different now and that’s what made me revisit my decision now. Zigbee has come a long way and after just 1 month of exploring the Zigbee ecosystem, I can confidently say that its worth considering for us Z-Wave holdouts. Not as a Z-Wave replacement, but rather to complement it. More on that later.
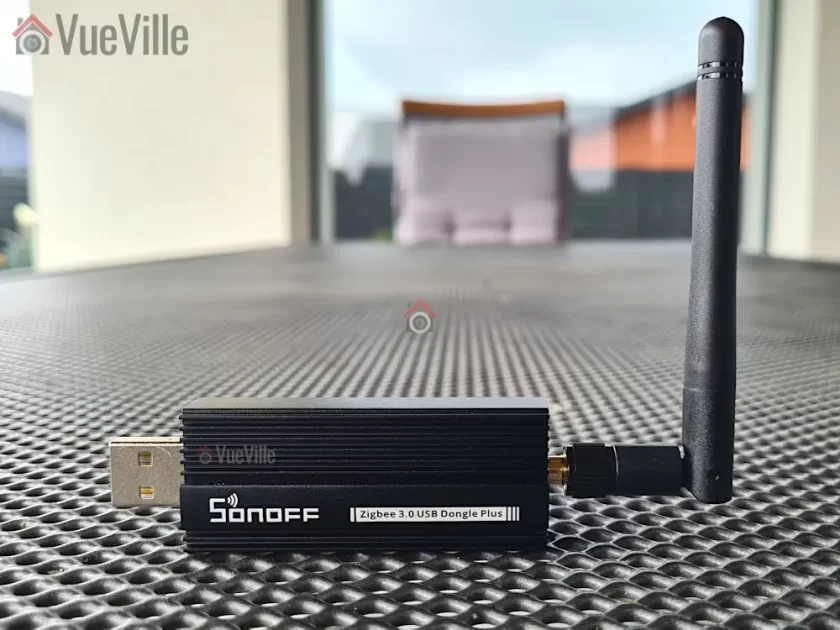
The first bit of kit that I purchased is the product I am reviewing today: a Zigbee USB stick called the SONOFF ZigBee 3.0 USB Dongle Plus (model ZBDongle-P). Its essentially similar to a controller in the Z-Wave world, but in the Zigbee world a controller is called a coordinator. This particular model comes pre-flashed with the Zigbee coordinator software so is plug and play with Home Assistant ZHA and Z2MQTT.
Please note that there is another model called the ZBDongle-E, but this uses a newer less supported chip and currently is not recommended for use with my preferred Zigbee integration in Home Assistant: Zigbee2MQTT.
So let’s get into it!
A quick note: As an Amazon Associate I earn from qualifying purchases. This post contains affiliate link(s). An affiliate link means I may earn advertising or referral fees if you make a purchase through my link, at no extra cost to you.
Zigbee Basics
If you’re new to the world of Zigbee like I am, here’s a primer on what you need to know.
Just like Z-Wave, Zigbee is also a mesh wireless protocol. This is one of the best things about Z-Wave that allowed me to create a strong reliable mesh network among all my Z-Wave devices. This is not possible with Wi-Fi or Ethernet where each device requires a direct connection to the router (although multiple WAPs can somewhat alleviate this).
So what does this mean in practice? Suppose your Zigbee coordinator sits in the garage with the rest of your tech gear, like mine is. And at the other end of your home, you want to place a temperature and humidity sensor like the Sonoff SNZB-02.
With Wi-Fi, you would need to be within range of your Wi-Fi router or have a WAP nearby. With Zigbee again the ideal scenario is if the sensor can connect directly to the Zigbee coordinator. But if its not, the mesh network comes into play. Most mains powered Zigbee devices such as smart bulbs or smart relays are able to act as ‘routers’ by relaying signals between the coordinator and other Zigbee devices. Do note that being mains powered does not automatically make a Zigbee device a router!
So our battery powered sensor can connect to the nearest Zigbee router and thus communicate with the coordinator. Thus our sensor here is an ‘end device’. Such battery powered Zigbee devices are usually not able to act as routers.
Now the biggest downside of Zigbee is that it uses the same frequency as 2.4 GHz Wi-Fi. This creates the potential for interference between your 2.4GHz band Wi-Fi network and your Zigbee network. I have learnt after much research (Metageek is an awesome resource) and quite a bit of fiddling that the best way to ensure your Zigbee and WiFi networks can coexist is by ensuring the specific frequencies (i.e. channels) they use do not overlap.
One thing to watch out is that the ‘channel’ numbering that WiFi and Zigbee use are similar and so you may think the frequencies won’t overlap. But they do! For example it may seem that Zigbee channel 11 uses the same frequency as Wi-Fi channel 11, but they don’t! In fact, Zigbee channel 11 overlaps Wi-Fi channel 1. The Metageek resource linked above explains it very well.
So my suggestion is:
- Put your WiFi access points on channel 1 (if you have more than one WAP, use 6 for the one that’s furthest from the Zigbee coordinator and 1 for the WAP that’s closest to the Zigbee coordinator).
- Put your Zigbee coordinator on channel 25 (or 20 if you are in the US).
This configuration ensures minimal overlap between your Wi-Fi network and the Zigbee network.
What’s in the box
The Sonoff Zigbee USB stick’s retail package is very compact and has an unusual blue color. Unusual for Sonoff with their trademark orange branding you’d find for Zigbee gear.

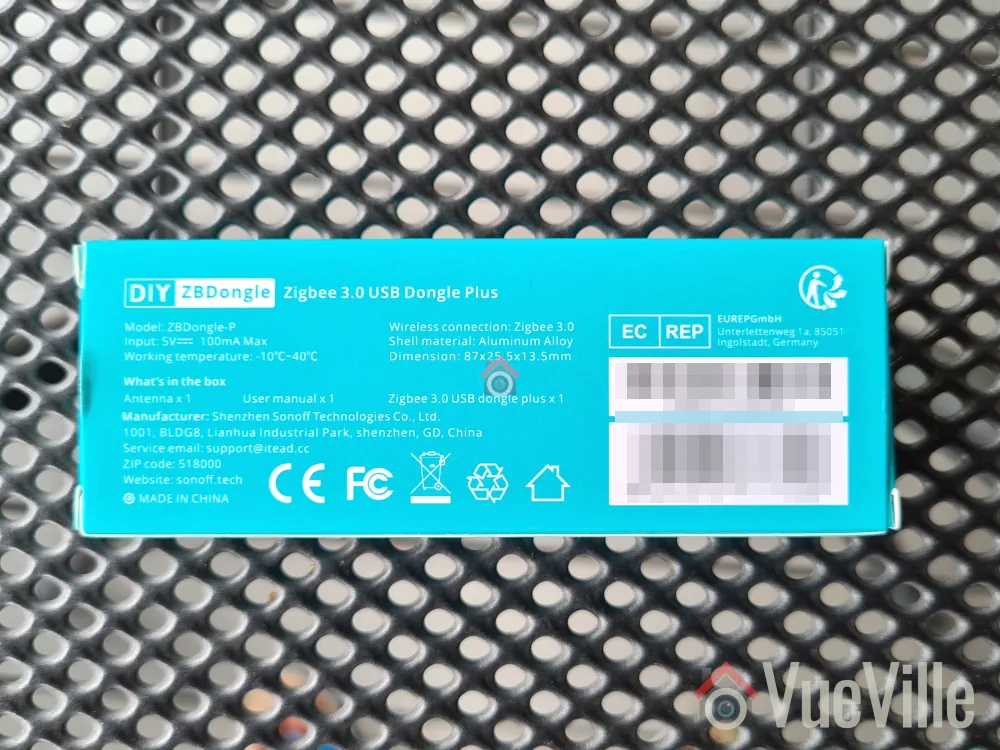

Inside the box we find the following:
- ZBDongle-P USB coordinator
- Antenna that you can screw on
- User manual
Specifications
[table id=87 responsive=scroll /]
Taking a closer look at the Sonoff Zigbee Dongle

The Sonoff ZBDongle-P has a metallic body and feels reassuringly solid in the hand. The front design looks a bit like a heat sink, which is a smart thing to do with a metal enclosure. You just need to screw on the included antenna and the dongle is ready for use.
The ZBDongle-P uses a CC2652P based System on a Chip (SoC) design. The P in the CC2652P model number refers to the power amplifier this chip has onboard. It allows up to a 20dB signal output power but the outdated default firmware Sonoff has pre-flashed this dongle with seems to support only 5dBm. This can be rectified by flashing a newer firmware (which I detail below) and can be easily adjusted in Zigbee2MQTT.
The USB-serial interface is handled by the CP2102(N) chip.

The backside sports the model name, safety and regulatory information.
The USB-A port should be plugged only into a shielded extension cable on a USB 2.0 port. USB 3.0 ports can cause interference with Zigbee networks, and is probably the root cause of many complaints about poor reliability when using Zigbee USB dongles.
Setting up the Sonoff Zigbee Dongle
With Home Assistant, there are 2 integrations you can choose to build your Zigbee network around: the official ZHA integration and the community effort called Zigbee2MQTT. I recommend Zigbee2MQTT because it has slightly wider device support and is generally quicker to add support for new devices as well.
I run Home Assistant on a Raspberry Pi4 (running DietPi Linux distro) with an SSD connected via USB 3.0. I also have the Aeotec Z-Stick 7 plugged into a USB 2.0 port. Everything works well without the need of a USB powered hub. That left me with 2 free ports on the Pi – 1 USB 2.0 and 1 USB 3.0.
So I happily proceeded to plug the Sonoff dongle into an extension cable off the free USB 2.0 port. My troubles began here because I foolishly assumed that just because Linux could see the device plugged into a USB port would mean that Home Assistant would also be fine with it. Big mistake. I spent a couple of hours checking everything until I realised the Sonoff dongle is probably not getting enough power from the Pi’s USB bus. So I moved the Sonoff to an externally powered USB hub and BOOM, Home Assistant immediately recognised the Sonoff!
So here is a summary of the steps I followed to set up the Sonoff dongle:
- Plug in the device into your Home Assistant. Make sure you use a USB 2.0 port and a good quality extension cable. USB 3.0 ports cause interference and an extension cable minimises interference as well.
- Home Assistant’s built-in Zigbee integration called ZHA will recognise the Sonoff and offer to set up the integration – click Ignore to cancel the ZHA setup.
- Install the ‘MQTT Broker’ addon
- Install the ‘Zigbee2MQTT’ addon
- Create a Home Assistant user for Z2M to use to connect to the MQTT broker
- Configure Z2M with:
5.1 the user and password details you created above
5.2 Find the USB port ID using this command in a terminal window dmesg | grey tty - Go to Addons -> click Enable watchdog for MQTTbroker and start it
- Go to Devices & Services -> Click configure on MQTT, click Submit and again click Submit & finally click Finish.
- Go to Addons – > click Enable watchdog for MQTTbroker and start it
- Click Zigbee2MQTT on the sidebar, and change the Zigbee channel to 25 in settings (20 if you are in the US as channel 25 has a lower maximum power limit by law).
- IMPORTANT: Do this before pairing devices! If you try to change the Zigbee channel later, you will have to repair all your devices!
- Add your first device: In Zigbee2MQTT, click permit join at the top and follow the device instructions to join a Zigbee network
I found that my Sonoff dongle came flashed with the ZStack firmware version 20210708. I first tested the dongle with this default firmware and then tried the latest 20230507 version as well. More on that later.
Zigbee Pairing with Zigbee2MQTT & Wireless Range
I purchased a variety of Zigbee devices and was able to pair all of them without any issues whatsoever:
- Sonoff Power Plug
- IKEA Vindstyrka
- Sonoff Motion Sensor,
- Sonoff Temperature and Humidity Sensor, and
- Sonoff Door/Window Contact Sensor
The best practice when starting a new Zigbee network is to pair the wired mains-powered devices first. This will create a strong mesh network that the battery powered devices can then be added to.
So I first paired the Sonoff power plug and then the IKEA Vindstyrka. Both devices were paired easily and without any fuss. They were both detected as router devices, thus creating and extending the Zigbee mesh network. All the sensors were detected automatically and Home Assistant created the device entities correctly.
On to the battery powered devices now. Here, there were two things I wanted to test.
- Adding battery-powered Sonoff devices directly to the coordinator – I did this for sensors that were at most 10 metres away with 1 or 2 concrete walls in between.
- Adding battery-powered Sonoff devices through the router devices – I chose this option for those devices that were at the other end of the home and had 3-4 concrete walls in between.
I added over 6 Sonoff sensors in all, in their final installation locations and every time it was smooth sailing. No pairing errors, and I;ve not experienced any sensor dropping off the Zigbee network.
Here’s a network map produced by Zigbee2MQTT that shows the link quality and the routes between each device:

A few things struck me as very odd when I first saw this network map and the link quality information. The Sonoff Smart Plug (powering the garage door opener) is located in the garage along with the Sonoff Zigbee co-ordinator, whereas the Ikea Vindstryka is at the other end of the house with 3 concrete walls in between. But the Ikea link quality is way better at 96 compared to the 72 of the Sonoff Smart Plug.
The other thing worth noting is that the Garage-Laundry door sensor is a Sonoff Door/Window sensor also placed in the same garage right next to the Zigbee dongle. But with the ‘permit join all’ option in Zigbee2MQTT, it chose to connect through the Sonoff Smart Plug instead of directly to the Zigbee co-ordinator. I wonder why that is. Also, the link quality is only 29 from the Sonoff Smart Plug to the Sonoff Door sensor even though they are in the same room! Interestingly, a similar door sensor from Sonoff placed in the same room as the Ikea Vindstryka has a far better link quality of 159. My conclusion here is that the Ikea Vindstryka is a superior router device. So I won’t be buying any more Sonoff smart plugs with the intention of using them as a router – they are clearly not very good at this.
Updating the firmware
I was wondering whether the 2+ year old Z-Stack 20210708 firmware version on the device was the culprit. This fimrware had a +5dB limit on the antenna gain instead of the +20dB the hardware is capable of.

So I flashed the latest 20230507 firmware using the excellent instructions on post #2 of this HA community forum thread. This firmware has a default antenna gain of +9dB and further allows it to be raised all the way to +20dB if needed. I didn’t have to repair my devices which was great, and here’s the new network map:

The most striking difference is that the co-ordinator now had much higher link quality to both the router devices. For example the linkquality for the co-ordinator and Ikea pair went from 96/29 to 132/46. If you are not familiar with this figure, linkqualiy for a router is always expressed two figures separated by a slash. The first figure is the strength of the link as seen by the co-ordinator and the other is that as seen by the router device.
Some other devices saw improvements as well, whereas a Sonoff door sensor got worse. The link quality reporting overall still seems a bit off to me.
Overall I was quite happy with the firmware upgrade. I have a feeling as the Zigbee mesh adjusts to the new firmware, the link quality may improve further.
What I didn’t like about the ZBDongle-P
While all my devices worked as expected and I didn’t experience any devices dropping off the Zigbee network, I couldn’t help but wonder about the link quality reporting of the dongle. The dongle seems to be reporting much lower values than even the Ikea which is just a router device.
Now it could all simply be down to the way the dongle calculates link quality is not a 100% correct. Indeed, this Home Assistant community forum thread seems to be suggesting so.
Still, this does make me wary of relying on the reported link quality numbers to design my Zigbee network.
Verdict
[review]
The ZBDongle-P is a tried and tested Zigbee co-ordinator and is on the list of recommended USB dongles for Zigbee2MQTT. It also works well with Home Assistant’s built-in Zigbee integration called ZHA.
If you are keen on Zigbee2MQTT, the ZBDongle-P is the better choice as the ZBDongle-E is not yet fully supported in that integration. However if you prefer ZHA, both are good options.
I found the ZBDongle-P to be an easy to setup and easy to use USB adaptor with good wireless range. The only major hiccup I had was my Pi4 not supplying enough power to the dongle but this was resolved by using a powered USB 2.0 hub. After that, I was able to pair all the devices I tried without any fuss and I have a solid Zigbee network in my home as a result. Upgrading the firmware brought a welcome improvement in mesh quality and I highly recommend this step if your device comes with an outdated version as mine did.
Where to Buy

(* = affiliate link / image source: Amazon Associates Program)
Leave a Reply