How do you access your security cameras remotely when you are away from home? In all likelihood, you are accessing each device using the manufacturer’s mobile app because they simply work without having to mess with port forwarding or VPNs. In other words you are relying on the manufacturer’s P2P servers, whether you realise it or not.
I think there are two main issues with this approach:
Inconvenience If you have a Hikvision camera, an Amcrest camera and a Reolink camera, you may be using the Hikvision iVMS app to access the Hikvision camera, the Amcrest app to access the Amcrest camera and finally the Reolink app to access the Reolink camera, one by one. Not the most convenient way to access all your cameras is it?
Security Although its straightforward and simple to use your camera manufacturer’s native app, you should understand what exactly is happening here. You are allowing the camera to make an outgoing connection from your network to the manufacturer’s servers. So essentially you are trusting the manufacturer’s security practices. If you are using their cloud service for data storage instead of using local storage, you are trusting your private data to a 3rd party.If you think this is without risks, just google the iCloud hack. If it can happen to Apple, it can happen to you.
So, what’s the alternative?
If you are a power user like me, why not do what I do and use a single app like tinyCAM Monitor Pro to view the live streams of all your cameras?
tinyCAM Monitor Pro
And why not access your DIY NAS NVR and review all your camera’s recorded clips in one place, with simultaneous synchronised playback?
QNAP NAS – QVRClient
And why not do all of this securely without relying on any 3rd party to protect your data?
As I alluded to earlier, there are 3 ways to access your home network remotely, but not all are secure:
the manufacturer’s own app which uses the manufacturer’s servers, uPnP and P2P protocols to reach your camera,
port forwarding each of your devices to your router,
set up a VPN server on your home network – I recommend this method!
The first and second methods are not secure as you are either relying on the security of your device manufacturers or opening up multiple ports on your network to the Internet (port forwarding). The recommended way of remotely accessing your home network and security cameras is by creating a VPN connection from your remote device straight to your home network.
If you are wondering how your VPN server can be reached from the Internet, you have been paying attention! You cannot eliminate port forwarding totally. Your VPN server needs to listen for incoming connections and so you have to port forward your VPN server’s port to the router. But this is far safer than port forwarding every single camera and exposing these devices which often have poor security to the dangerous digital expanse we call the Internet.
Unless you have a static IP for your home broadband, you also have to deal with the fact that your home IP address will change occasionally and so you may not be able to reach your VPN server when you need to! Fear not, there is a way around it – Dynamic DNS services.
Here’s a 4-step summary of how to set up the VPN method of remotely accessing your home network and your security cameras:
Set up a device in your home network to act as a VPN server, eg. WiFi router, NAS, a PC or a Raspberry Pi
Forward the OpenVPN port from your NAS to your broadband router
Set up the same VPN server or any other device in your home network to periodically report your home IP address to a Dynamic DNS service, so that you can always reach your VPN server using an address like yournetworkname.noip.com
Set up a VPN client on the device you will use to remotely access your home network, eg. your mobile phone, tablet or laptop
Now simply use the VPN client to connect to your VPN server and voila, you are in your home network, as if you never left home. You can then access your security camera or any device on your home network, without relying on third-party P2P services, without port forwarding each IP camera, without a static ip address, and with maximum security.
Let’s take these steps one by one and break them down. I will be using my QNAP TS-253A NAS for this how-to.
Some house-keeping
Make sure you disable all existing port forwarding rules and uPnP in your router settings. Then systematically disable P2P in each of your cameras (and NVR if you use one). This locks down the cameras and other devices so that they are isolated from the Internet and cannot ‘dial home’ without your knowledge.
If you still want to use the camera manufacturer’s app, you should not disable uPnP and P2P. But then don’t be surprised if your cameras and network get hacked!
Step 1 – Set up the QNAP NAS as a VPN server
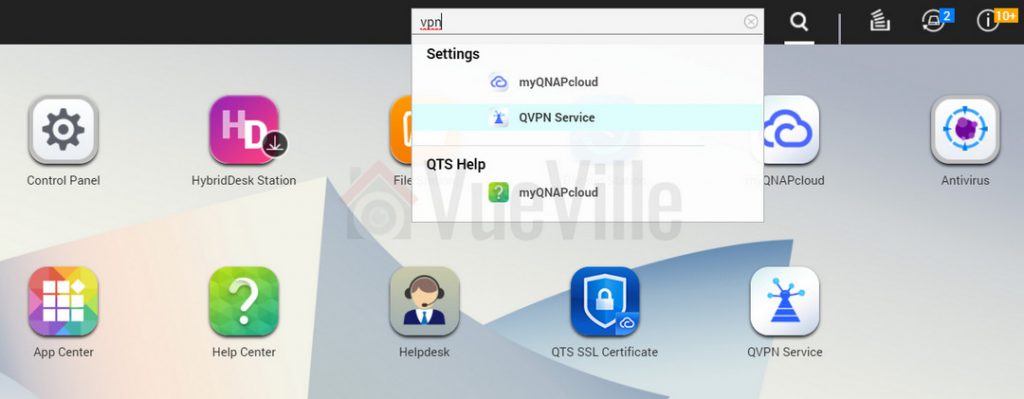
Login to your QNAP NAS using an admin account and search for vpn. Click on QVPN.
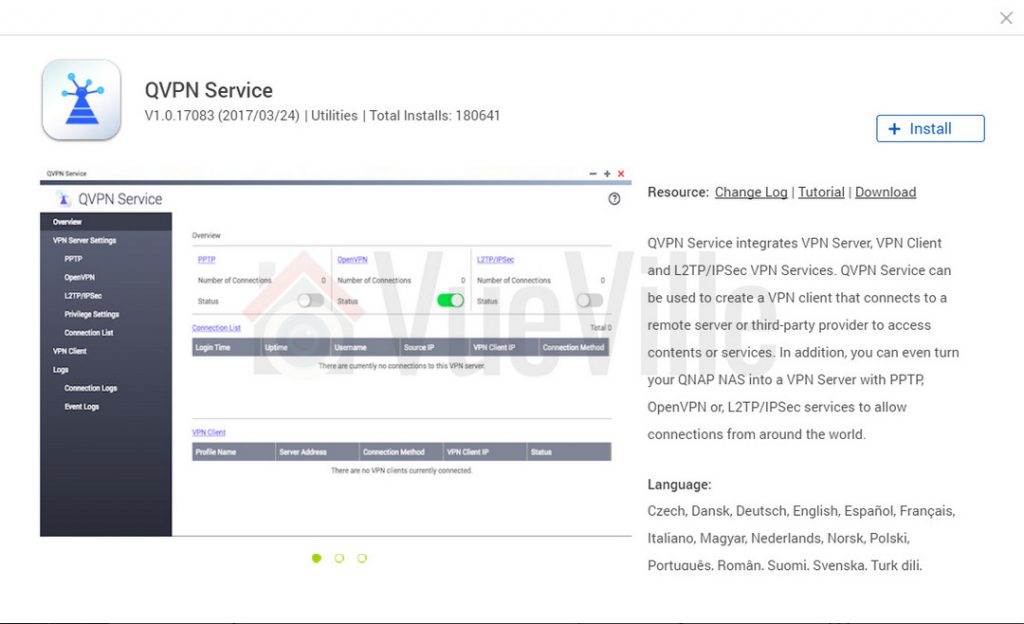
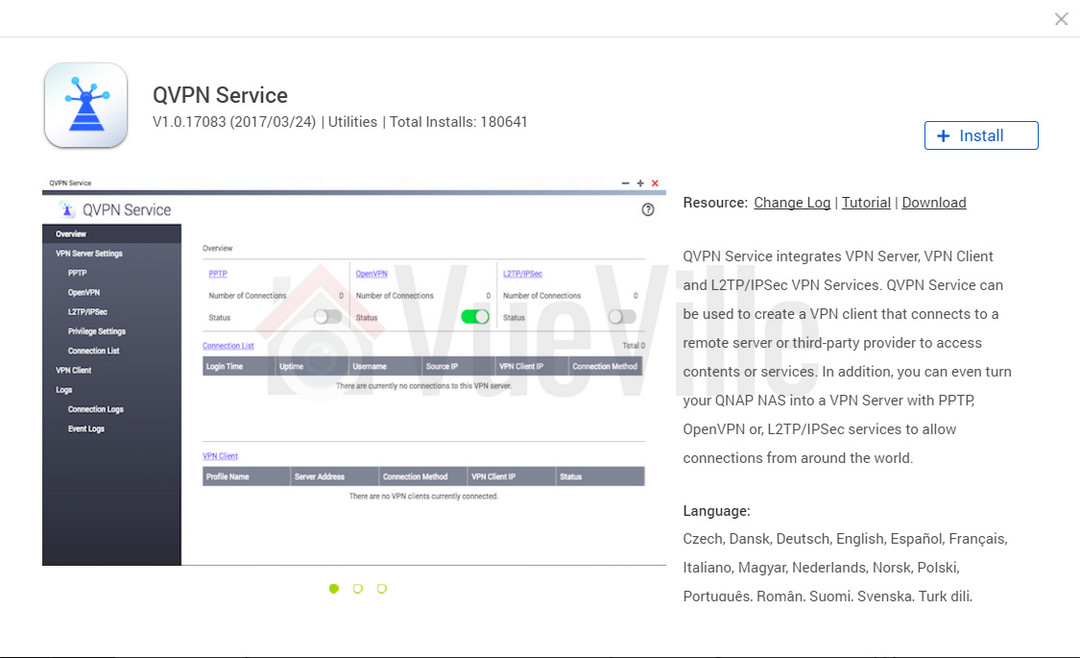
This will take you to the QVPN page in the QNAP App service. Click the Install button.
Now go to the desktop and you will find a new QVPN Service shortcut. Click on it.
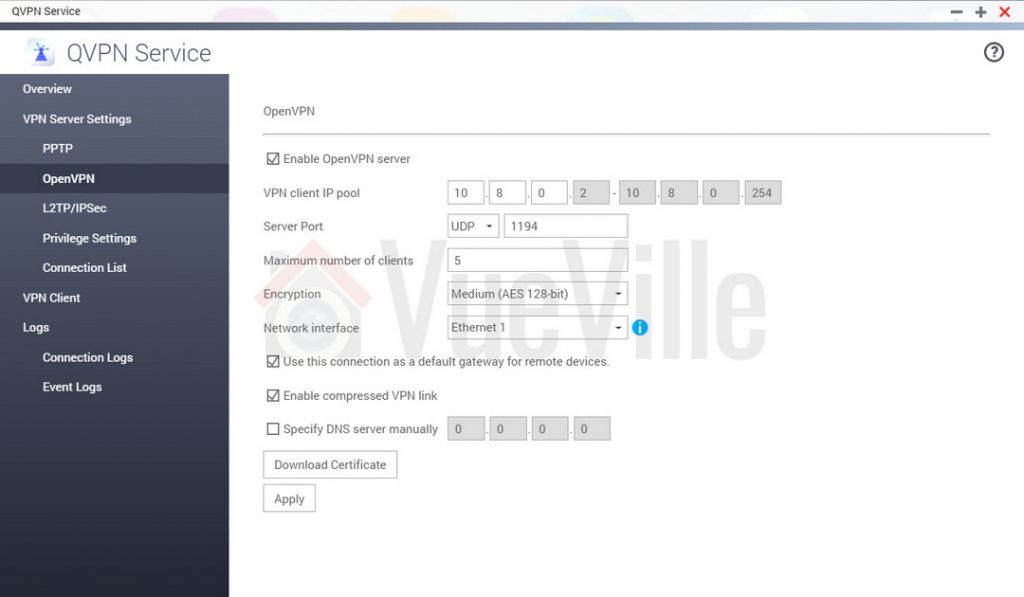
The QVPN app will open. You have three different VPN technologies to choose from at this point – PPTP, OpenVPN and L2TP/IPSec. Since PPTP and L2RP/IPSec are not the most secure protocols, turn on OpenVPN.
Choose OpenVPN from the menu on the left and tick the checkbox of the first three options as shown below. Click Apply.
Now click “Download Certificate” and save the resulting zip file to your hard drive.
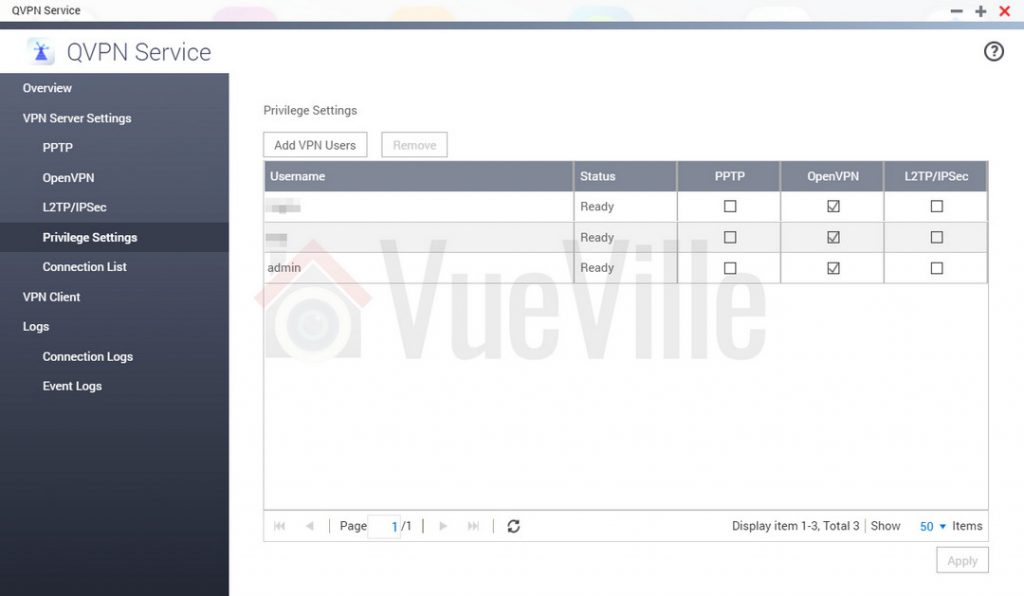
Choose Privilege Settings from the menu on the left, and enable OpenVPN for the accounts you would like to use to login to your home network.
If you would like to have all VPN connections logged, turn this on in the Connection Logs section.
Step 2 – Port Forwarding from your NAS to your router
Follow your broadband router or gateway’s instructions to forward the 1194 UDP port from the NAS to an external port. 1194 is the default port used by OpenVPN.
If your router supports port forwarding with port translation, one tip I have is to choose an external port that is not 1194. This adds an extra layer of security from hackers who may be scanning for an open 1194 port on your network. So for example, I would map UDP port 1194 of my NAS to the router’s external port 35376, where 35376 is just a random port I chose.
So port 35376 on router -> port 1194 on NAS. The screenshot below shows how this port forwarding rule is set up in my ISP-provided broadband router.
Step 3 – Set up Dynamic DNS on your QNAP NAS
First sign up for a dynamic dns account at noip.com (or any service supported by QNAP), note that the free account forces you to verify your account every 30 days.
Login to your QNAP NAS using an admin account and navigate to Control Panel>Network & File Services>Network Access and click on the DDNS Service.
Enable the DDNS Service, and enter the noip username, password and host name you created at noip.com and click ‘Apply All’.
Step 4 – Set up the OpenVPN client on your device
Before you can set up the OpenVPN client on any device, you need to edit the client configuration file (openvpn.ovpn):
Unzip the certificate zip file you downloaded from your NAS earlier, you will now have 3 files ca.crt, openvpn.ovpn and readme.txt
Edit the openvpn.ovpn file and replace the IP address with the noip hostname you created in the steps above.
Save the file.
Android devices – Set up the OpenVPN for Android client
Transfer the three files, ca.crt, the edited openvpn.ovpn and readme.txt to your mobile device.
Install the OpenVPN for Android app from the Google Play Store.When you first open the app, it will look like this:
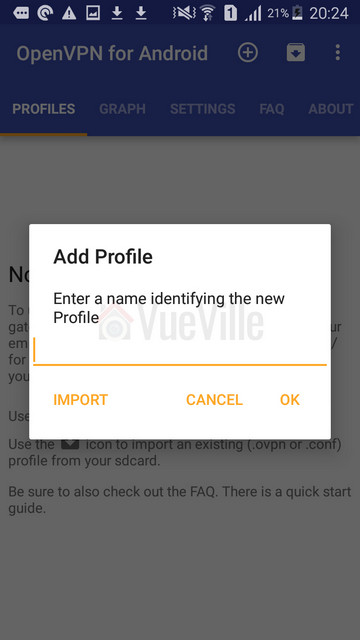
Tap the + symbol at the top right of the app which will give you the screen below.
At the ‘Add Profile’ screen, select Import.
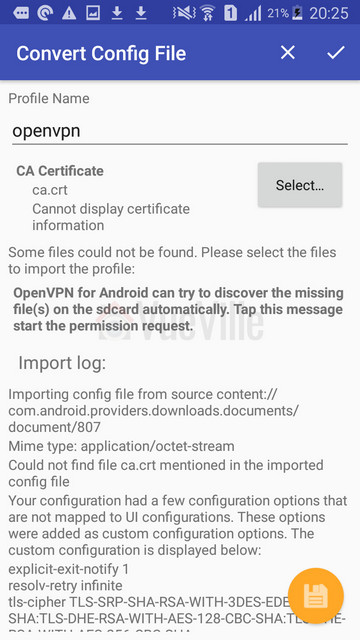
Now choose the openvpn.ovpn file you copied to your mobile device.
At the Convert Congif File screen, select the certificate file you downloaded.
Now select the tick mark at the top right.
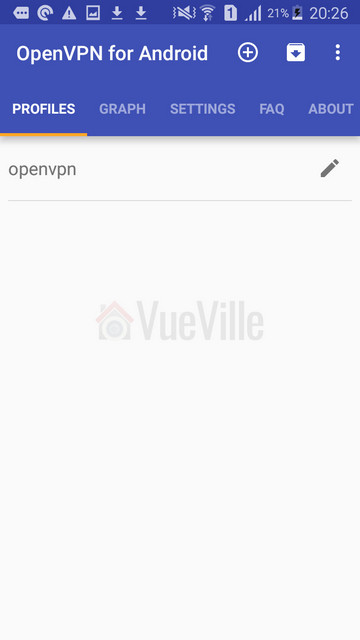
Now you will find a new profile called openvpn in the app Profiles tab, tap this.
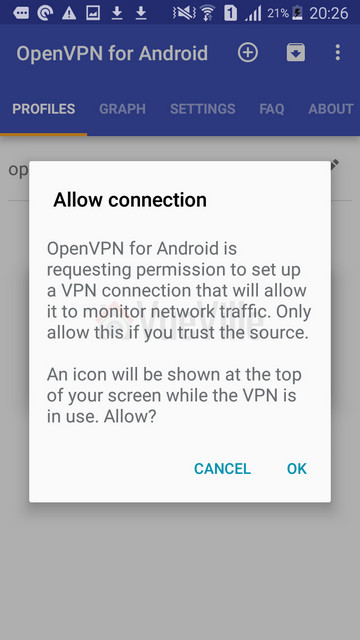
In the Allow Connection screen, click OK.
When it asks for the username and password, press Cancel.
Click on the edit icon of the openvpn profile.
Go to the Server List tab and change the Server Port to the port number you forwarded the UDP 1194 port to. If you followed my recommendation of using an external port such as 35376 which is different from 1194, use that. Back out to the main app screen.
Make sure you are on an external network such as 3G or 4G, and tap the openvpn profile to connect.
Enter the username and password of one of your QNAP NAS accounts which you allowed VPN access to the NAS. Click Ok.
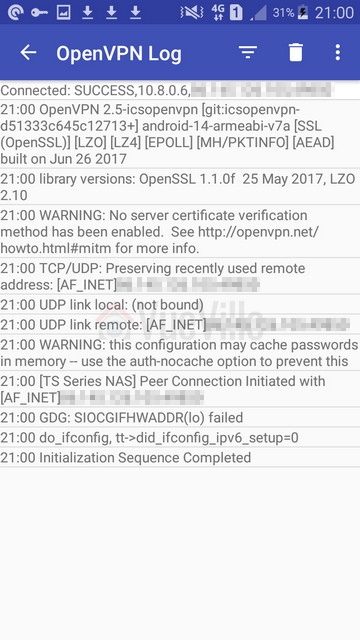
That’s it you are now connected to your QNAP VPN server!
Conclusion
I hope this how-to has helped you set up your own VPN server at home which lets you securely access your security cameras and the home network remotely.
Even if you are not ready to implement a full blown VPN server, it’s a great idea to disable uPnP on your router and to avoid port forwarding your devices to the Internet.
Comments
24 responses to “How-to: View your Home Security Cameras or NVR Remotely using a VPN”
robert
Great content! Why did you not use the Unifi controller to set up a VPN?
Many thanks for your helpful articles and for continuing to support home network enthusiasts of varying abilities. Your website has been a source of inspiration for me to venture into this and am faithfully recreating your setup with slight variations.
I’m currently in the process of setting up the VPN as per this article. However, my QNAP doesn’t directly connect to my ISP, but via my Unifi switch/USG (I suspect this your setup too from your network diagrams elsewhere, but I assume you simplified it here).
I’d appreciate your advise on how to proceed with port forwarding from here? ie. how do I open up a port from BT ISP (LANs are on 192.168.0.x) –> Unifi (LANs are on 192.168.1.x) –> QNAP?
Hi Mohan, yes you’re right in this article I used the most common setup in the UK -> a bog standard ISP router without any Unifi kit in the house. Are you using the BT router or the USG as your DHCP server? In my home, the USG does all the routing, not the ISP router. The ISP router is just for providing the WAN interface – in my case the fibre signal to WAN conversion. I would suggest you let your USG do all the routing: then you can simply forward the OpenVPN UDP port from the USG to the QNAP NAS. In any case Port forwarding instructions for the USG are here. I recommend the classic interface.
Hi Dan,
I’m reading the answer you gave for Chris’s question above, about how to view the cameras remotely. I “think” I set everything up correctly. But I can’t view cameras remotely.
I disabled wifi on my cell (since I’m home) to simulate being away, and I’m not sure what to use as IP and port. Are you saying that if I use say, 192.168.0.201:88 to access my camera LOCALLY, then once everything is setup, VPN client started on the cell and all, I should be able to use the exact same IP and port?
thanks,
Denis
I have three houses and I am trying to figure out if I can use one security-kit with 4 cameras spread out on these houses which have their own wifi and ISP. Asked about it on the webshop selling the IMOU Wireless Security Kit – 4 Cameras and they say all cameras must be on same wifi as base station. Not asking for a full explanation here but wonder if you see if it is possible without doubling the cost compared to what this kit is sold for.


Leave a Reply