
Let me tell you a story. One of my dear friends loves to write and has a hobby that he is passionate about. As we were talking about my blogging experiences, I encouraged him to start a blog to share the wealth of knowledge he had about his hobby. One autumn evening, we sat down and in just under 30 minutes, his new blog was set up and ready to go. Over the next year, he proceeded to write great content that provided insight into his hobby in a simple and very accessible manner. Guess what? In under a year he has over 1500 visitors to his blog per month, but even more importantly he has been able to express himself creatively and meet like-minded people.
If you have enjoyed reading my blog, I have a challenge for you. Why not consider starting your own blog? If like me, you thought you are not really the creative type, blogging may not be the first thing on your mind as a potential hobby. But if you think you have anything of value to contribute to the world, I think you should definitely give blogging a shot. How much time does it take to start a blog? Less than an hour following my step by step guide below.
I have been blogging for over 3 years now and this blog has grown tremendously over that time. You are one of the roughly 35,000 unique visitors to VueVille this month. I will also be the first to admit that one of the best ways to start earning money online is also through blogging. But that was never my objective – I started this blog to write about technology because its my passion. Whatever revenue this blog has generated has been a result of that passion and just the natural outcome of providing value to my readers.
If you start looking around though, you will find a ton of advice on how to start a blog. Not all of it is good advice though. In fact most of it is from people who have no clue how to start a blog the right way.
I often get questions from readers on how to start a blog like VueVille, especially with a view to generate some money from it down the line. So in this guide, I will attempt to answer the most common questions and then share my step-by-step method to starting a successful blog. Provide real value to your audience, and monetary success is sure to follow.
Note: This article contains affiliate links. If you click one of these links and then purchase something, I may receive a commission. This income goes towards the costs of hosting and running this website and does not affect you in any way at all. Thank you for your understanding.
Should I start a free blog?
If your aim is to build a solid blog that will make good money, you have no choice but to build a fast-loading, sleek and professional looking blog. Why? Because how your blog looks and feels makes a big impression on your visitors. It also influences how much they will trust your blog and become passionate subscribers and repeat visitors.
It is tempting to think that you can save some money and use a free blogging service such as Blogger, Tumblr, Weebly, Wix, or even WordPress.com. But my advice is: don’t use free blogging services. There is a reason this important service is being offered free to you by these organisations (hint: you are the product).
- Firstly, you will not have much control over the design and appearance of your blog. Your blog will look just like the millions of other blogs.
- Secondly, at no point in time is your blog fully in your control, the company owns your blog or website can pull the plug whenever they choose for whatever reason. They are not going to think about your interests because you are not paying them for it, and they are not answerable to you.
- Thirdly, your blog will not enjoy the same standing with search engines like Google as self-hosted blogs like VueVille. This means its going to be a lot harder to find your blog because it won’t rank as high on Google.
So self-hosted, as opposed to free hosting, is where you own your domain name (that you can brand also), and you rent hosting space in a server run by a hosting company. All your content remains yours and you can control how your website looks and which plugins you install (more on this later).
Where can I host my self-hosted blog?
Where to host your blog is a decision you need to take only after understanding the different types of self-hosting that are available to you:
Shared Web Hosting
This is the cheapest and easiest way to get your blog started. Essentially your website and other people’s websites are hosted on the same server. So you share the resources available on the server, such as CPU and memory (RAM). No resources are allocated or reserved for your user account. How quickly your blog loads and any downtime depends on the number of websites hosted by the server and how busy they are. All shared hosting accounts are managed by the web host, you do not have to worry about server setup, management or maintenance. You can focus on what’s most important – building your blog.
- Pros: Done right, shared hosting can be very reliable and speedy. Depending on how busy the server is, you will at most times have more resources available to you than you may get in more costly packages.
- Cons: However, unscrupulous web hosts and reesllers try to maximise profits by cramming as many users (and websites) as they can onto the same server. If one or two website go viral at the same time and get lots of traffic, other websites will have fewer resources and may even cause the whole server to get overloaded.
‘WordPress’ Hosting
This is generally a form of shared hosting but with more resources per user account and some optimisations specifically for WordPress. This is often just glorified shared web hosting but may be right for you if you don’t want to mess about with performance optimisations yourself.
- Pros: Speed and reliability optimisations for WordPress already built in.
- Cons: Costs more than shared web hosting but often without any increase in resources or reservation of resources.
VPS Web Hosting
VPS stands for Virtual Private Server and is a good step up once you have an established blog. Buying a VPS account means that you are assured a certain amount of server resources, usually counted in number of CPU cores and memory in GB.
- Unmanaged VPS – You are responsible for setting up the server, and all maintenance. Not recommended unless you are an expert in running web servers!
- Managed VPS – When you have an established successful blog and are outgrowing your shared hosting resources, this should be the next step. The web hosting company manages the server and provides support on configuring the server for optimum performance.
I have a VPS account from KnownHost in addition to my Bluehost and HostGator shared hosting accounts. This is because I have many blogs, but if you are just starting out, you don’t need a VPS.
Dedicated Web Hosting
The ultimate in web hosting, this is where you have rent an entire server running just your website! Don”t even bother with this option unless you have a a blog that has multi million views and VPS packages are still not providing the resources you need.
My Recommendation for Hosting your Blog
When starting a blog for the first time, I recommend going Shared Web Hosting. This is because it provides the resources you need to grow your blog easily to 50-100,000 page views per month, at a very low cost.
I recommend BlueHost for shared web hosting because I have been using their web hosting for 3 years now, and for the following reasons:
- Impressive performance (super fast response times of under 200ms)
- Super reliability (100% uptime in the last 90 days for my websites)
- 99.9% uptime guarantee
- Free One-click WordPress install
- Free domain included even in basic package
- Free SSL certificate included even in basic package
In fact I am so happy with it that I have already pre-paid for the next 2 years!
You may have heard the popular claim that shared hosting is not as reliable as VPS or dedicated hosting. This may be true of some web hosts, but I recommend Bluehost because they offer super fast webpage loading speeds and a 99.9% uptime guarantee even on the cheapest shared packages.
A very high uptime is what you want from a blog that aims at making money. For example, lets take affiliate marketing which is the most popular method of earning income from your blog. You recommend a product, and you get commission for every sale you drive. Every minute your blog is down is a missed opportunity for visitors to click on your affiliate links and for you to earn commission.
If you are looking to move up from shared hosting to a VPS, I recommend KnownHost’s Managed VPS packages (get 30% off for life).
How to Start a Self-Hosted Blog on Bluehost in 7 easy steps- Step by Step Guide
If you are strapped for time, here’s a quick overview OR you can find the detailed step by step guide right below this overview.
- Buy Bluehost hosting with a free domain, SSL, 1-click WordPress install
- Verify your email address for domain registration completion
- Install WordPress using Bluehost’s One-Click-Install feature
- Install a theme
- Install WordPress plugins
- Install Google Analytics tracking and exclude yourself from tracking
- Start writing content
Buy a Bluehost hosting package with a free domain, SSL, 1-click WordPress install
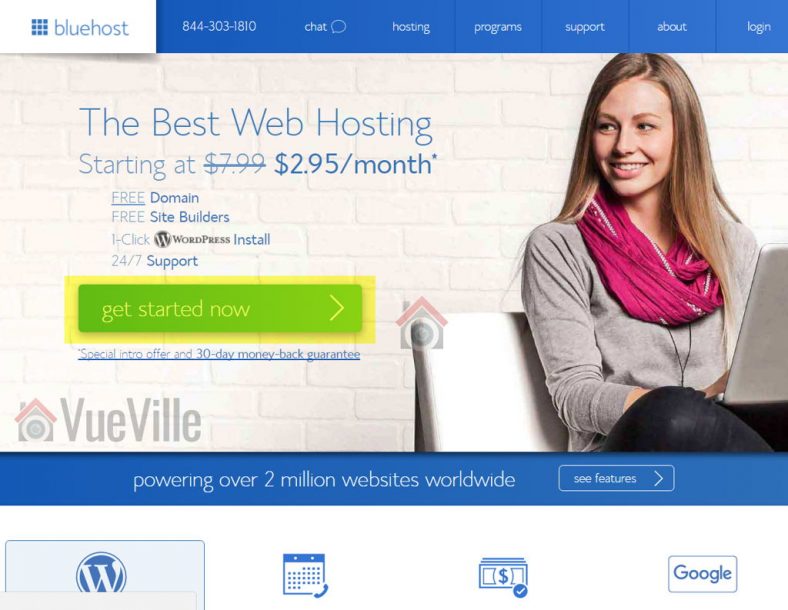
Start by going to Bluehost through my special link here which will give you a free domain, free SSL, and free 1-click WordPress installer. This will take you to the following screen (please note pricing offers may vary from time to time):

Click on “Get Started Now” to go to the plan selection page. I strongly recommend going for the Basic Package. For beginners, this is more than enough, and you can always upgrade when, hopefully, you outgrow your plan.

Click Select to go to the domain name creation page.The name of your blog is probably one of the most important decisions you have to make. The first thing to remember is that it should be brand-able. Instead of a generic name, the more unique it is the better. So instead of ‘mySmartHomeBlog.com’ I went for ‘VueVille’, use something that will stick in your visitors’ minds.

A unique brandable blog name also is far likelier to be still available with a .com ending.
Type in your desired domain name and click next.

Fill out all the necessary details. If you are a non-US resident, you can still use Bluehost and pay using a VISA credit or debit card. When you complete this step, you may see an intermediate offer screen, click “No Thanks” to go through to the final page. Then click ‘Create your password’ to set up your password.

Verify your email address for domain registration completion

After verifying your email address, the message should disappear.
Install WordPress using Bluehost’s One-Click-Install feature
I recommend WordPress for its ease of use, Search Engine Optimisation (SEO) friendliness, features and wide range of free plugins available.
Log into your Bluehost account if you are not already there and scroll down to the “Website” section. Click on ‘Install WordPress’ – this is the One-Click-Install feature available for free from Bluehost when you use my special link to buy your hosting.


You should now see the following screen, just click ‘Get Started’:
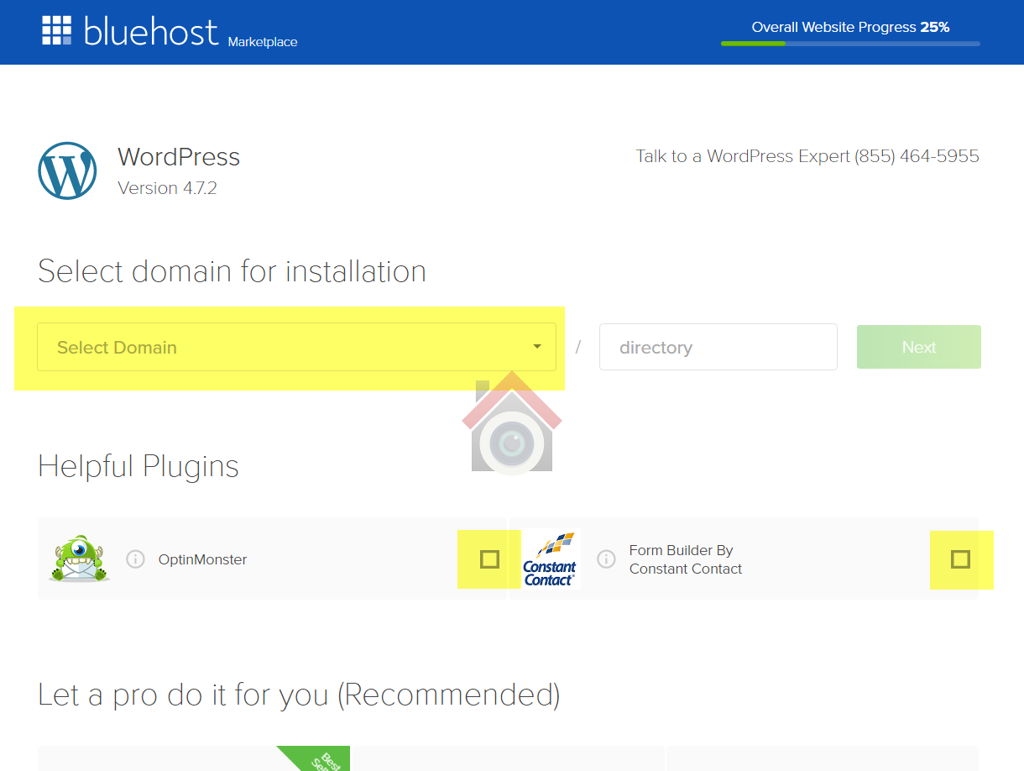

Choose your domain from the drop-down list. This is the point where you choose the default address of your blog – do you want it to be mydomain.com or www.mydomain.com? Its a matter of preference and either is fine. Note that www is actually a subdomain of your main domain, so if you want to keep things simple in the future, go for the non-www version. Also remember to un-check any plugins suggested by Bluehost, you don’t need these and even if you change your mind you can install them later on from within your WordPress dashboard.If you are wondering whether you should “pay a pro to do it for you” as the bottom of the Bluehost page suggests, the answer is an emphatic NO. I am showing you how to do it yourself, so save yourself a bunch of money and ignore it.

Then click Next and you will be taken to the final screen before WordPress installation begins:

Here you have to pick a title for your site (you can change it later) and fill in the username, email address you created earlier and the admin password. Check all the 3 boxes and click Install. Lean back and relax as WordPress is installed. When it’s done, you will see this screen:
Congratulations! You now have created a WordPress blog! Woohoo! You have now come farther than most people who want to make money online. Give yourself a pat on the back.
Ignore the message asking you to buy a theme, just click on the admin URL in the top right of the screen (highlighted in yellow above) and login using the admin username and password.
Install a WordPress theme
You now need to choose a theme for your blog. You may have been thinking of using one of the many free themes available, but I suggest you go for a paid premium theme. The main reason is future updates and technical support. Free themes are maintained less and often come without any technical support from the developers. What’s more, they often don’t come close to premium themes in appearance and having that professional look. If you are serious about making money from your blog, make the investment now and get a premium theme. You will save yourself time and money down the road by starting out with the best tools in the trade.
So my recommendation is to buy the Rehub theme. All my blogs and websites are built using this theme. I love this theme because it provides a solid base for your blog, is user-friendly, and is extremely SEO-friendly.
How well your blog gets ranked on Google and other search engines depends on many things, but one key factor is the quality of the coding of your WordPress theme. This is why I recommend Rehub. My blogs rank very well on Google without me having to do much else because the Rehub theme is coded in a way that Google likes.
If you would rather like to stick with a free theme, pick one of the high quality free themes from My Theme Shop. These guys have been making beautiful, high quality, well-coded themes for a long time, and know what they are doing.
Install WordPress plugins
The beauty of WordPress is the sheer number of high quality free plugins available in the official WordPress plugin repository. Now do remember that installing too many plugins can slow down your blog, so be judicious in your plugin selection! These are the plugins I install for every blog I build:
- Wordfence Security – A must-have plugin to make secure your WordPress blog and keep hackers away.
- Yoast SEO – The best SEO plugin you can use to improve the search engine visibilty of your blog.
- Revision Control – By default, WordPress will store an unlimited number of post revisions. This can quickly bring your wbsite to its knees. This plugin lets you control the number of post revisions WordPress stores. I recommend limiting it to 3.
- Social Stickers – This plugin lets you have very pretty social network icons in your sidebar or in the header. You can see it in action at the top right of this website!
- SumoMe – A very versatile suite of tools that help share and promote your content, the free version is not severely limited unlike other premium plugins. The floating social sharing bar on the left is an example of one of the tools SumoMe provides.
- TablePress – A very powerful plugin that helps you create beautiful tables – ideal for comparison tables and lists for affiliate marketing.
- Autoptimize – Another easy to use plugin that improves blog loading speeds automatically by minifying CSS and JS files. Very little configuration needed.
- WP Fastest Cache – The best caching plugin available for WordPress, it is a must-have in making your blog load as fast as it can. I recommend using only the caching function, as the Autoptimize plugin above takes care of CSS and JS minification. Can be difficult to configure though, so refer to a tutorial such as this one.
- Subscribe to Comments Reloaded – Lets blog commentors sign up for notifications to replies or new comments.
- EasyAzon – If you will be using the Amazon Associates affiliate programme to monetise your blog, this plugin from Chris Guthrie is invaluable. I use it on my niche sites and it has paid for itself in the very first month!
Install Google Analytics tracking and exclude yourself from tracking
An important part of running a blog is to monitor visitor traffic, identify high and low performing content, and make changes as needed. For this, you need a good traffic tracking tool. I use Google Analytics on all my blogs and it is an amazing free tool.
If you have a google account, you can start using Analytics right away. Otherwise get one, its free!
Google analytics data is what I use to create my monthly traffic and blog income reports.
Don’t forget to exclude your internet browsers from Google Analytics so that you don’t inflate your visitor and traffic numbers accidentally! Use the free Block Yourself From Analytics extension for Chrome browser and the No Google Analytics add-on for Firefox browser.
Start writing content
Your blog is now ready for arguably the most important step – creating content. Engaging, useful, and memorable content is what attracts readers and makes them come back again and again. It is also what you need to monetise your blog.
Promote your blog
Creating great content is not good enough – your readers need to find you. So learn as much as you can about how to promote your blog and make sure you put this into action. Blog commenting, social media promotion, guest posting and link-building are some of the things you should definitely explore.
The blogs I frequent most are Spencer Haws’ Niche Pursuits, Jon Haver’s Authority Website Income and Gael & Mark’s Authority Hacker blog.
Have questions?
I hope this guide has helped you to start your own blog. I always felt that when I started out, it would have been much easier if somebody had created a step by step guide to launching a blog. That’s why I have tried to create this guide leaning on my experience I have gained over the years through trial and error.
If you have any questions or doubts, please leave a comment below and I will do my best to answer them as quickly as possible. If this guide helped you in any way, please let me know too! All the best in your blogging adventures!
Leave a Reply