
Ever wondered what’s in the air you are breathing? All over the world, our cities are getting more and more polluted. Air pollution is an invisible killer that takes over 4 million lives every year.
But it’s not just outdoor air that can be harmful. Common activities like cooking or burning candles togetherwith poor ventilation can cause a severe drop in indoor air quality. This is because burning of fuels release countless numbers of tiny particles into the air.
In the past, air quality sensors were expensive and not very accessible. But now with readily available micro-controllers like the Arduino and affordable DIY sensors, we can make our own DIY Arduino air quality sensor in less than 15 minutes.
Video Tutorial
A quick note: As an Amazon Associate I earn from qualifying purchases. This post contains affiliate link(s). An affiliate link means I may earn advertising or referral fees if you make a purchase through my link, at no extra cost to you.
Air Quality Monitoring
The specific methods used to measure air quality depends on whether you are thinking of measuring indoor or outdoor air quality.
Indoor air quality is affected by pollutants such as dust, CO2 and Volatile Organic Compounds (VOC). By measuring one or more of these, we can get a good idea of indoor air quality. Different sensors are required for each of these pollutants.
Outdoor air quality usually depends on pollutants from combustion engines. The burning of fuel produces tiny particles called Particulate Matter (PM) that are classified by how small they are.
The smaller the particles, the more dangerous they are. PM2.5 refers to atmospheric particulate matter (PM) that have a diameter of less than 2.5 micrometres. This is about 3% the diameter of a human hair.
Exposure to PM2.5 particles over a long period of time is harmful for health. The key to managing your exposure to these harmful particles is to be able to measure it.
For this tutorial, we will focus on measuring PM2.5 and its close cousins, PM1.0 and PM10 (particle size of 1 and 10 micrometres respectively).
These figures will give us the Air Quality Index (AQI), the most commonly used metric for measuring and comparing air quality levels of different cities in the world.
You will be able to use this Arduino Air Quality Monitor indoors to measure pollution from cooking, smoking etc., and outdoors to measure the air quality of your neighbourhood.
Air Quality Sensors
The most common type of air quality sensor that measures PM2.5 uses a laser to detect particulate matter. There are two types of these laser-based sensors: ones without a fan like the Samyoung DSM501A and ones which have a fan like the Plantower PMS5003.
The fanless versions are cheaper but are also less accurate. The Plantower PMS5003 that we will use is the best DIY model that is still quite affordable.
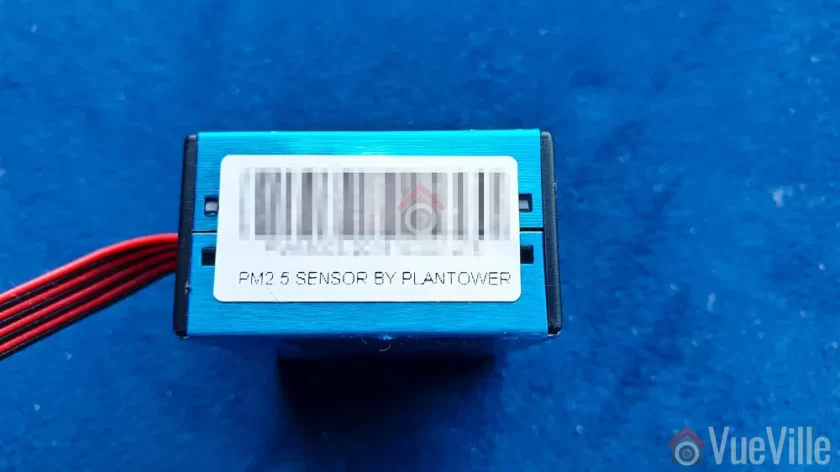
PMS5003 Air Quality Sensor
The Plantower PMS5003 sensor can detect particles as small as 0.3 micrometres. This is why the model number of the sensor ends with ‘003’. The 5 refers to the series generation.
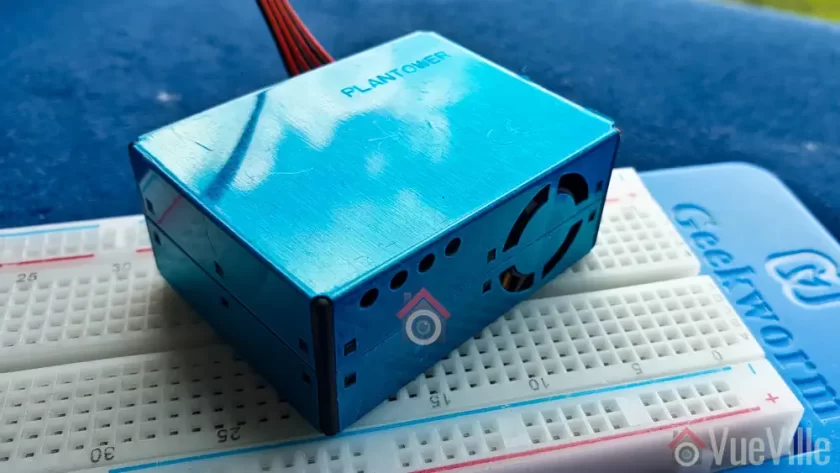
You can see the air intake fan on the back. That’s what makes this sensor more accurate than fanless designs like the Samyoung DSM501A.

Actually the PMS5003 is not a current generation model, that’s actually the PMS7003. If you can find the PMS3003 or PMS7003 at a better price than the PMS5003, by all means go for it. The Arduino code may be a bit different though.
Working principle
The PMS5003 uses a laser to scatter and radiate suspended particles in the air. It then analyses the scattered light to obtain the curve of how the light scattering changes with time.
The sensor then calculates the number of particles of various diameters per unit 0.1L volume of air.
The PMS5003 can output the following:
- PM1.0, PM2.5 and PM10.0 concentration in both standard & environmental units
- Particulate matter per 0.1L air, categorized by 0.3um, 0.5um, 1.0um, 2.5um, 5.0um and 10um sizes
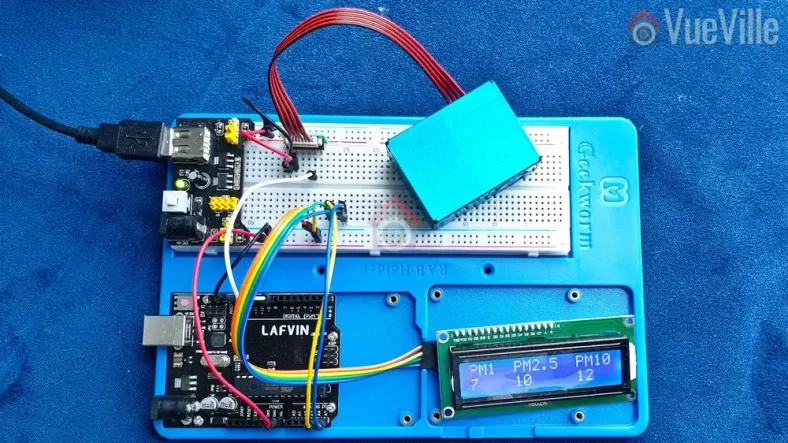
Connecting the PMS5003 to Arduino
The PMS5003 has an 8-pin JST port and comes with a cable that fits the port. But the easiest way to connect the sensor to the Arduino is by getting a JST to DIP 2.54mm standard spacing adaptor board.
This makes it super easy to interface the sensor to your Arduino.
Components required
If you have an [easyazon_link identifier=”B01D8KOZF4″ locale=”US” tag=”vueville.com-eaz-20″]Arduino Starter Kit like this one[/easyazon_link], the only thing you need is the PM2.5 sensor.
Here’s the full parts list.
- [easyazon_link identifier=”B008GRTSV6″ locale=”US” tag=”vueville.com-eaz-20″]Arduino Uno Rev3[/easyazon_link]
- [easyazon_link identifier=”B0787H244V” locale=”US” tag=”vueville.com-eaz-20″]Plantower PMS5003 Air Quality Sensor[/easyazon_link]
- [easyazon_link identifier=”B07S7PJYM6″ locale=”US” tag=”vueville.com-eaz-20″]1602A LCD Display[/easyazon_link] – 2 rows, 16 characters per row
- [easyazon_link identifier=”B07DL13RZH” locale=”US” tag=”vueville.com-eaz-20″]Breadboard[/easyazon_link]
- [easyazon_link identifier=”B077SFGWYP” locale=”US” tag=”vueville.com-eaz-20″]Breadboard power supply[/easyazon_link]
- Connecting Wires
Wiring diagram

PMS5003 sensor
Connect the PMS5003 as below if you are using a JST to DIP 2.54mm standard spacing adaptor board (recommended):
- VCC to 5V (do not use Arduino to supply this voltage)
- GND to common ground with Arduino
- Arduino pin #8 to TX pin on sensor (this is incoming data from the sensor)
- Leave pin #9 disconnected even though it is defined in the code below
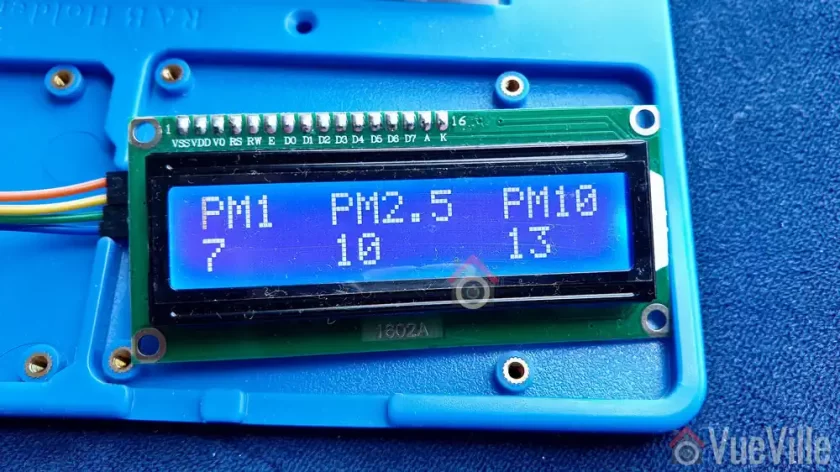
1602A LCD display
I strongly recommend using the I2C method to connect the 1602A LCD display to your Arduino. This means you need to use just 4 pins instead of over 9 with the traditional method.
For this get a version of the LCD that is already soldered with an I2C module. Most of the starter kits include this version so that beginners don’t get overwhelmed.
This is how you wire it:
- VCC to 5V (do not use Arduino to supply this voltage)
- GND to common ground with Arduino
- SDA to pin A4
- SCL to pin A5
Arduino Code
Copy the code below into a new .ino file, compile it and upload to your Arduino. That’s it!
Leave a comment below if this article helped you!
// Created by VueVille.com based on the Adafruit code for PMS5003 PM2.5 sensor
// Read the full how-to article at https://www.vueville.com/arduino/arduino-air-quality-sensor/

// Connect the PMS5003 like this if you are using a JST to DIP 2.54mm standard spacing adaptor board (easier):
// VCC to 5V (do not use Arduino to supply this voltage), GND to common ground with Arduino
// Arduino pin #8 to TX pin on sensor (this is incoming data from the sensor), leave pin #9 disconnected even though it is defined in the code below

// Connect the 1602A LCD like this if you are using an I2C module (easier)
// VCC to 5V (do not use Arduino to supply this voltage), GND to common ground with Arduino
// SDA to pin A4
// SCL to pin A5

#include <SoftwareSerial.h>
SoftwareSerial pmsSerial(8, 9);

#include <Wire.h>
#include <LiquidCrystal_I2C.h>
//I2C pins declaration for 1602A with I2C module
LiquidCrystal_I2C lcd(0x27, 2, 1, 0, 4, 5, 6, 7, 3, POSITIVE);

unsigned long previousMillis = 0;
unsigned long interval = 1000; //Refreshes the LCD once every 1000ms (1 second) without holding up the Arduino processor like delay() does. If you use a delay(), the PMS5003 will produce checksum errors

void setup() {
  // debugging output, don't forget to set serial monitor to 115200 baud
  Serial.begin(115200);

  // sensor baud rate is 9600
  pmsSerial.begin(9600);
  lcd.begin(16,2);//Defining 16 columns and 2 rows of lcd display
  lcd.backlight();//To Power ON the back light
}

struct pms5003data {
  uint16_t framelen;
  uint16_t pm10_standard, pm25_standard, pm100_standard;
  uint16_t pm10_env, pm25_env, pm100_env;
  uint16_t particles_03um, particles_05um, particles_10um, particles_25um, particles_50um, particles_100um;
  uint16_t unused;
  uint16_t checksum;
};

struct pms5003data data;

void loop() {
// Serial output code begins
if (readPMSdata(&pmsSerial))
  {
  // reading data was successful!
  Serial.println();
  Serial.println("---------------------------------------");
  Serial.println("Concentration Units (standard)");
  Serial.print("PM 1.0: "); Serial.print(data.pm10_standard);
  Serial.print("\t\tPM 2.5: "); Serial.print(data.pm25_standard);
  Serial.print("\t\tPM 10: "); Serial.println(data.pm100_standard);
  Serial.println("---------------------------------------");
  Serial.println("Concentration Units (environmental)");
  Serial.print("PM 1.0: "); Serial.print(data.pm10_env);
  Serial.print("\t\tPM 2.5: "); Serial.print(data.pm25_env);
  Serial.print("\t\tPM 10: "); Serial.println(data.pm100_env);
  Serial.println("---------------------------------------");
  Serial.print("Particles > 0.3um / 0.1L air:"); Serial.println(data.particles_03um);
  Serial.print("Particles > 0.5um / 0.1L air:"); Serial.println(data.particles_05um);
  Serial.print("Particles > 1.0um / 0.1L air:"); Serial.println(data.particles_10um);
  Serial.print("Particles > 2.5um / 0.1L air:"); Serial.println(data.particles_25um);
  Serial.print("Particles > 5.0um / 0.1L air:"); Serial.println(data.particles_50um);
  Serial.print("Particles > 10.0 um / 0.1L air:"); Serial.println(data.particles_100um);
  Serial.println("---------------------------------------");
  }

// Converting the sensor readings to string values that the LCD can display
String pm1String = String(data.pm10_standard);
String pm25String = String(data.pm25_standard);
String pm100String = String(data.pm100_standard);

// Non-blocking code for displaying the sensor readings on the LCD
unsigned long currentMillis = millis();
if (currentMillis - previousMillis > interval) {
  previousMillis = currentMillis;
  lcd.clear();//Clear the screen
  lcd.setCursor(0,0);
  lcd.print("PM1  PM2.5  PM10");
  lcd.setCursor(0,1);
  lcd.print(pm1String);
  lcd.setCursor(5,1);
  lcd.print(pm25String);
  lcd.setCursor(12,1);
  lcd.print(pm100String);
  }
}

// Code for calculating the sensor readings
boolean readPMSdata(Stream *s) {
  if (! s->available()) {
    return false;
  }

  // Read a byte at a time until we get to the special '0x42' start-byte
  if (s->peek() != 0x42) {
    s->read();
    return false;
  }

  // Now read all 32 bytes
  if (s->available() < 32) {
    return false;
  }

  uint8_t buffer[32];
  uint16_t sum = 0;
  s->readBytes(buffer, 32);

  // get checksum ready
  for (uint8_t i=0; i<30; i++) {
    sum += buffer[i];
  }

  /* debugging
  for (uint8_t i=2; i<32; i++) {
    Serial.print("0x"); Serial.print(buffer[i], HEX); Serial.print(", ");
  }
  Serial.println();
  */

  // The data comes in endian'd, this solves it so it works on all platforms
  uint16_t buffer_u16[15];
  for (uint8_t i=0; i<15; i++) {
    buffer_u16[i] = buffer[2 + i*2 + 1];
    buffer_u16[i] += (buffer[2 + i*2] << 8);
  }

  // put it into a nice struct :)
  memcpy((void *)&data, (void *)buffer_u16, 30);

  if (sum != data.checksum) {
    Serial.println("Checksum failure");
    return false;
  }
  // success!
  return true;
}
Leave a Reply