
In my tutorial on how to block IP cameras from accessing the Internet, I used the example of wireless security cameras.
But what if you have wired IP cameras and want to achieve the same result – block PoE IP cameras from accessing the Internet? Fear not, all you need to have is any one of the following:
- [easyazon_link identifier=”B086967C9X” locale=”US” tag=”vueville.com-eaz-20″]Unifi Dream Machine Pro (UDM Pro)[/easyazon_link] which is an all-in-one device that combines a managed switch and hardware firewall, OR
- a Unifi managed switch and separate firewall, such as the [easyazon_link identifier=”B01MU3WUX1″ locale=”US” tag=”vueville.com-eaz-20″]Unifi Switch 8[/easyazon_link] & [easyazon_link identifier=”B00LV8YZLK” locale=”US” tag=”vueville.com-eaz-20″]Unifi USG firewall[/easyazon_link] combo.
Assuming you have already created a VLAN as described in Step 1 of this tutorial, here are the steps to group or assign wired Ethernet devices into a VLAN:
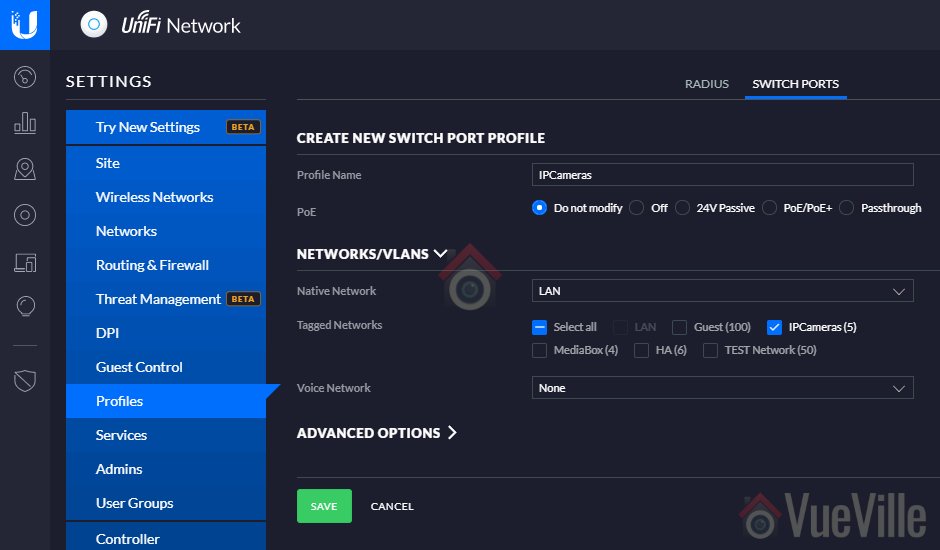
Step 1: Create a switch port profile
- Log into your Unifi Controller dashboard and click on the settings button (gear icon)
- From the settings menu, select ‘Profiles’, and then select the ‘Switch Ports’ tab

- Click ‘Add New Port Profile’
- Type in a profile name, I like to use the same name as the VLAN created ‘IPCameras’.

- Select the VLAN under the Tagged Networks section.
- Click Save

Step 2: Plug in your Ethernet device
Into a port of your Unifi managed switch, and note the port number. Let’s assume it is a PoE device, so let’s pick port 6.
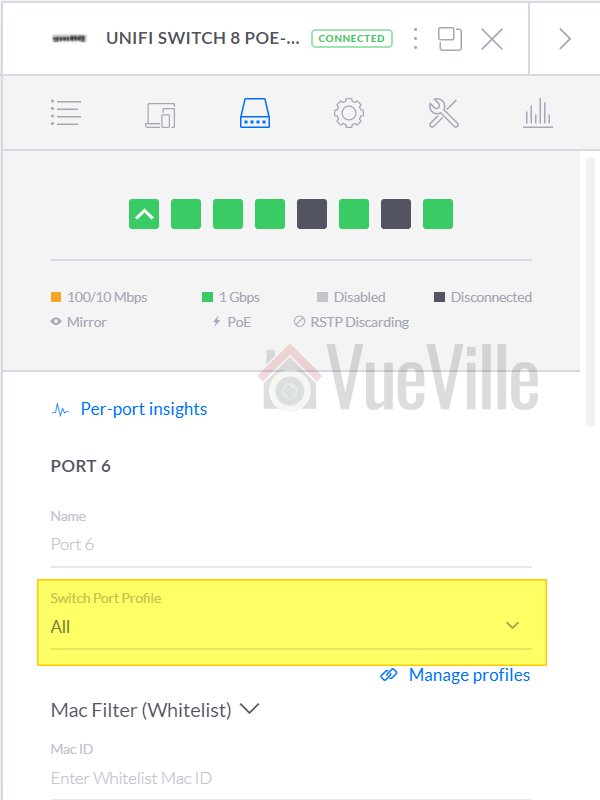
Step 3: Assign Unifi switch port to the new switch port profile
- From your Unifi Controller dashboard and click on the Devices button from the left menu
- Click on your Unifi Switch, this should open a slide-out menu on the right


- Click on the Ports section

- Click on the edit button (pencil icon) next to port 6

- Click the dropdown called ‘Switch Port Profile’
- Select the switch port profile you created earlier and click the apply button.
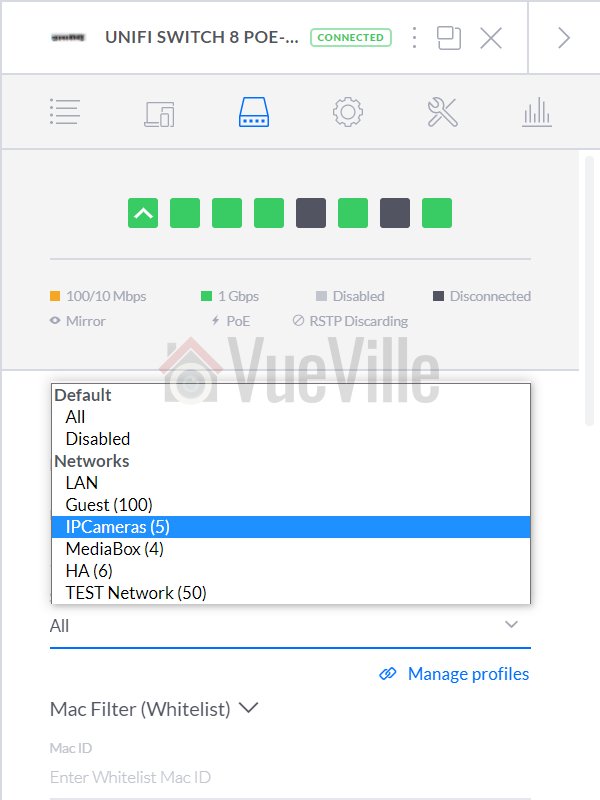

The switch will now provision the port and after a few minutes, you are in business!
How to group multiple ports into the same VLAN
Simple – just apply the port profile you created in Step 1 above to each port that you want to be in the same VLAN.
Conclusion
Liked this tutorial? Let me know in the comments below what else you would like me to cover.
Leave a Reply