It’s been quite a while since we’ve had a Reolink IP camera review here at VueVille. We already reviewed the 5MP Reolink RLC-422 dome, and today we have the bullet camera version named the RLC-511 also with optical zoom. The cameras seem to have similar sensors and share other features too.
Reolink provided us with a retail sample for this hands-on review. We are going to look at setting up the camera, video quality and how well it works with the VueVille DIY Home CCTV system and our DIY Smart Home Automation System!
Here’s a video review and if you prefer to read, just scroll down!
[text-blocks id=”earning-disclaimer”]
What’s in the box
The RLC-511 comes in a very professional-looking retail box. The camera’s main features are highlighted, as are the mobile app and the 2-year limited warranty.
Every Reolink camera I have reviewed has come very well-protected and the RLC-511 is no exception.
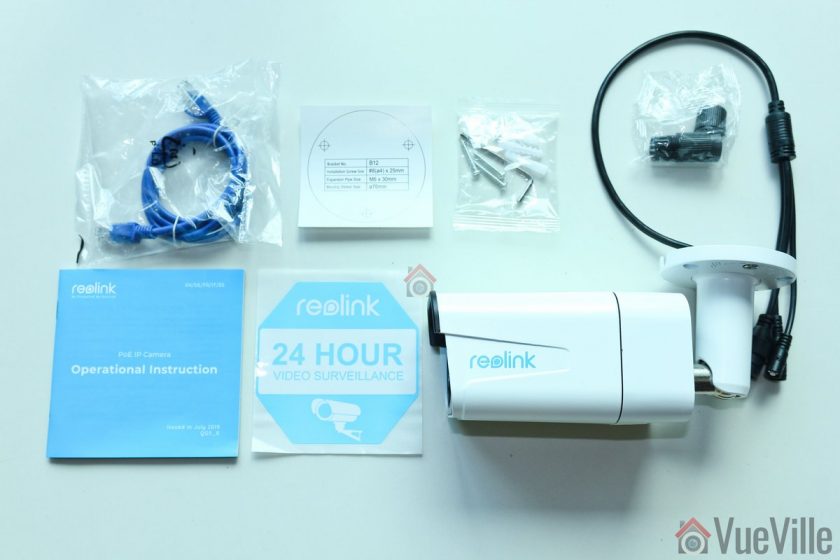
Box contents:
- RLC-511 Zoom IP camera
- Screws, rawl plugs and an Allen key
- Waterproof sleeve for Ethernet cable
- 1 metre blue network cable
- Software CD
- Installation guide with photos
- Mounting hole template
- Surveillance sign
Specifications
Design
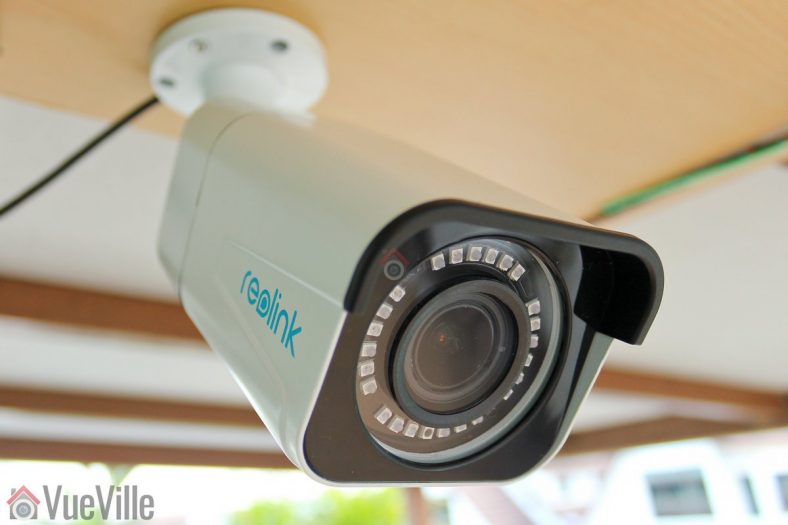
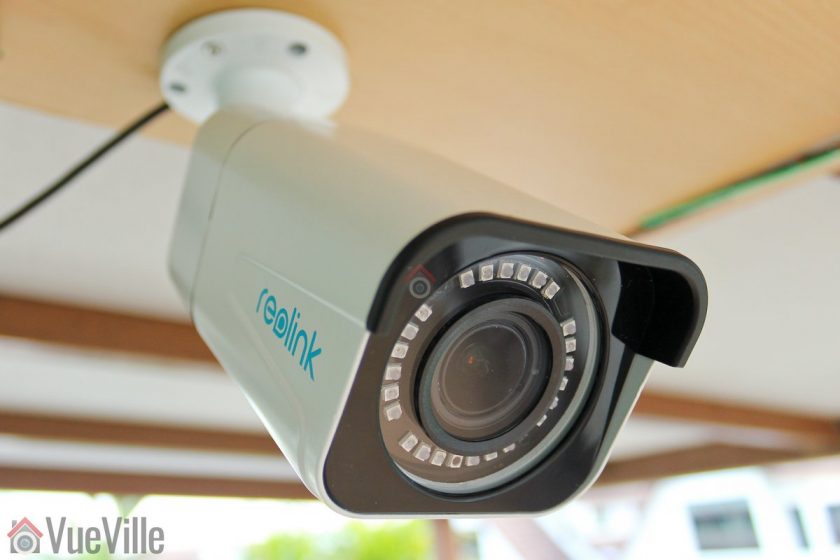
The RLC-511 is a bullet-style camera and has a boxy-look reminiscent of far more expensive Hikvision bullets. Compared to the [easyazon_link identifier=”B08F568BH1″ locale=”US” tag=”vueville.com-eaz-20″]RLC-510A[/easyazon_link], this camera is a lot bigger than you might expect. That’s because its got a 4x optical zoom.
The RLC-511 has a metallic body. The fit and finish is very good and as with other Reolink cameras I have reviewed, it feels like a camera that is far more expensive than it is.
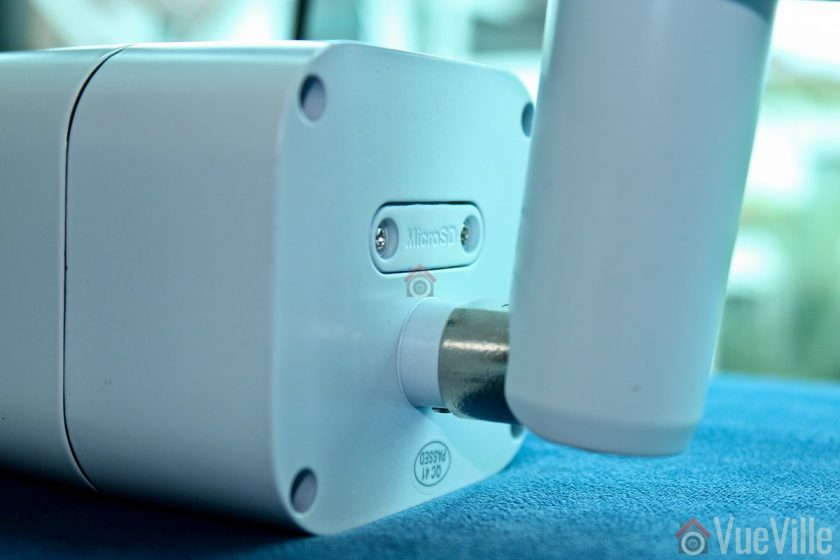
The back of the camera houses the microSD card slot, secured by two screws. The way it is located means that there’s no access to the slot after installation. And that’s exactly how you want it in a security camera – a burglar shouldn’t be able to steal the microSD card easily.
The motorized vari-focal lens on the RLC-511 goes from a focal length of 2.7 – 12 mm with auto-focus. The 1/2.7″ 5 Megapixel Progressive Scan CMOS sensor is par for the course, this is not a camera that specializes in low light performance (for that check out the [easyazon_link identifier=”B07B16DFMB” locale=”US” tag=”vueville.com-eaz-20″]Hikvision Darkfighter[/easyazon_link] series)!
There are 24 IR LEDs arranged in a ring shape around the lens. None of them are obscured or blocked in any way. A plastic shroud protects the lens from rain or snow.
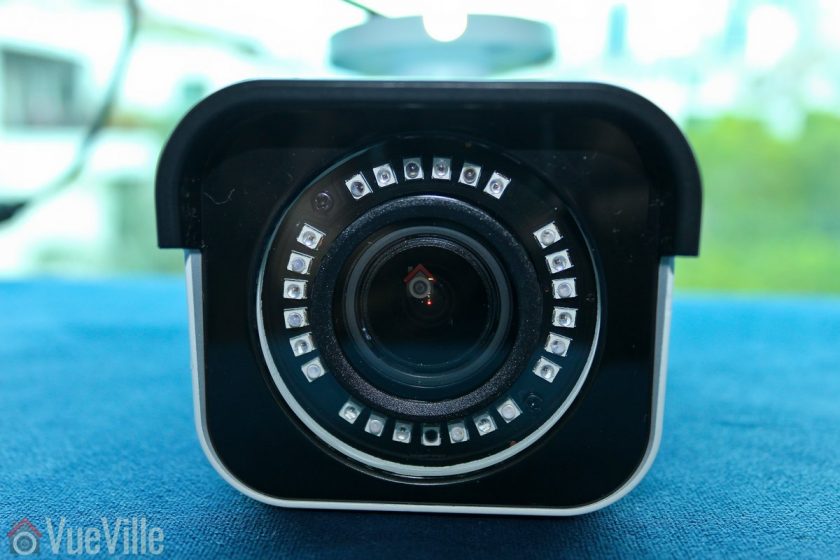
The day/night sensor for the auto IR cut filter is placed right below the lens.
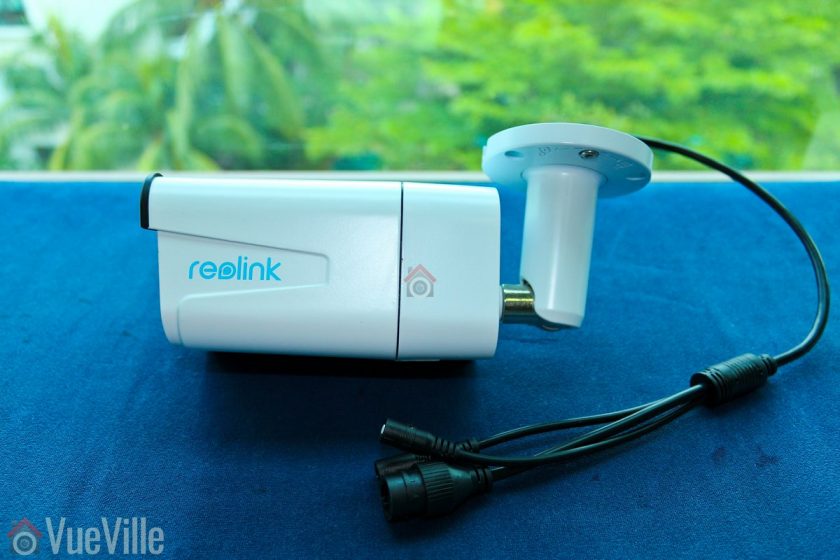
All the cabling comes out of the base and can go conveniently into a junction box or through the wall. As usual with Reolink cameras, the cabling consists of a pigtail with the following connectors:
- RJ-45 ethernet port
- 12V power input jack
- A reset push button

Just like the Reolink RLC-423 PTZ, the reset button of the RLC-511 is not on the main body of the camera. Apart from eliminating an ingress point, it means nobody can reset the camera unless they get to the hidden reset button which is probably inside the wall or the soffit! This is much better than many other cameras such as Hikvision’s which have the reset button externally on the camera body itself.
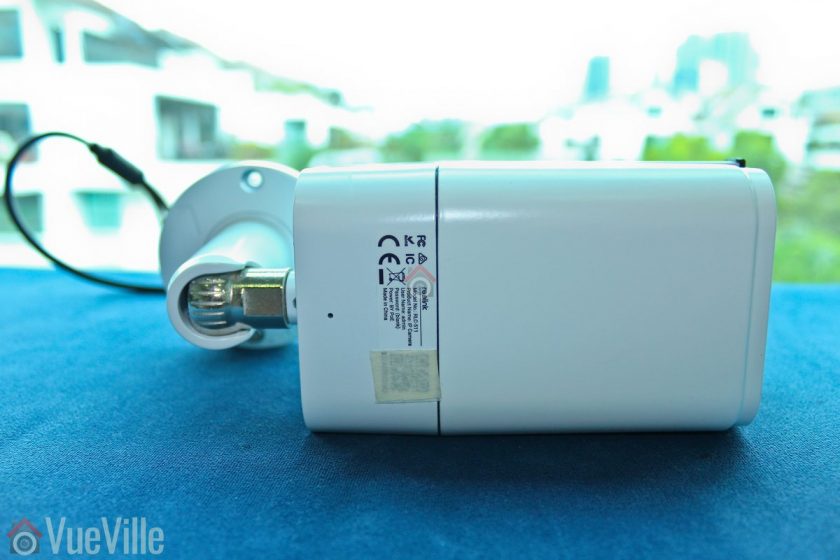
On the bottom, there is a sticker with the QR code for the mobile app setup and login details. I recommend removing this sticker before installing the camera outdoors for security purposes. Otherwise anyone will be able to load up the camera admin page, and if you haven’t changed the default admin and password shown next to it, you are in big trouble!
You can also spot the microphone hole on the underside.
Installation
Bullet cameras are the easiest type of IP cameras to install, and Reolink makes their installation process also super easy.
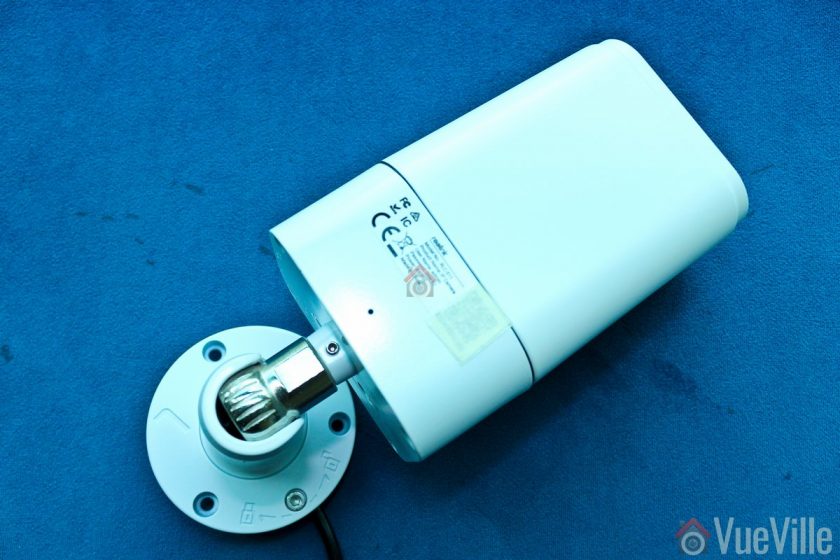
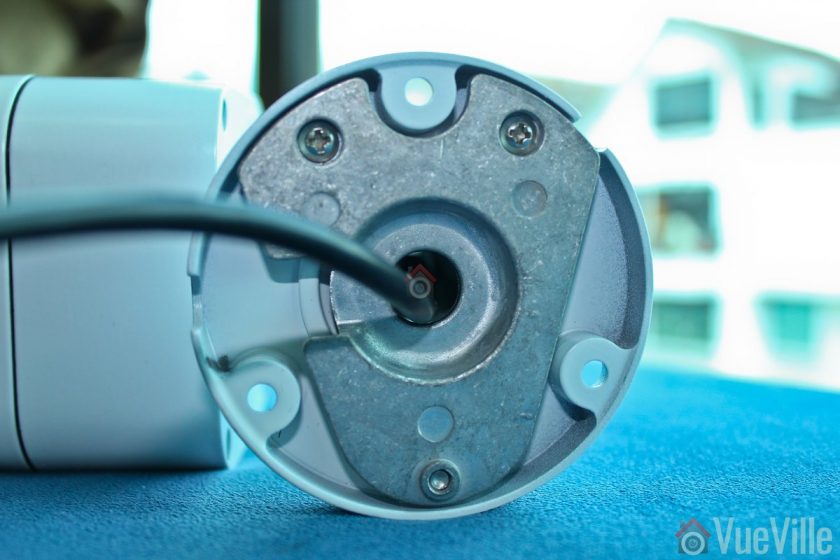
First I used the included Allen key to loosen the steel arm of the camera base. I did this by turning it in the direction of the unlock symbol engraved into the base.
This is required to access the three screw holes of the base one by one as you screw them in.
I then used the included screws to fix the RLC-511 to my usual test location, a wooden soffit.
After pointing the camera in the general direction of the scene, I tightened the steel arm again in the direction of the lock symbol.
Hardware setup
The RLC-511 supports Power over Ethernet (PoE) which is my recommended way of powering IP cameras. Using just a single Ethernet cable, you can send both data and power to the camera using either a PoE switch or a PoE injector.
Since this is a bullet camera with motorized varifocal lens, you cannot adjust it manually.
A typical fixed lens camera needs around 7W power, but the motorised lens of the RLC-511 means that it needs a little more power, up to a maximum of 10W. This is still within the 802.3af spec, so both my [easyazon_link identifier=”B01BW0AD1W” locale=”US” tag=”vueville.com-eaz-20″]TP-Link PoE switch[/easyazon_link] and [easyazon_link identifier=”B01DKXT4CI” locale=”US” tag=”vueville.com-eaz-20″]Unifi Switch 8[/easyazon_link] are up to the task of powering the camera over PoE.
If you want to use the included waterproofing connector, you will have to remove the RJ-45 plug on the Ethernet cable and re-crimp it once it has been passed through the waterproofing connector. My install location is sheltered from the elements, so I didn’t bother with this.
Software setup
Most manufacturers ship their cameras with static IPs by default – for example Hikvision and Dahua. In most cases the camera will not have the same network settings (like sub-domain) as your network.
This means that you cannot access the camera unless you change the camera network settings to that of your network. You are expected to do this using the manufacturer’s camera finder tool, like SADP in the case of Hikvision.
While this static IP method has a lot of security benefits, most home users would find it much easier if the camera manufacturer used DHCP as default. This way, the camera would automatically be configured to use your network settings and be ready to use.
As with all the Reolink cameras I have tested, this is exactly the case with the RLC-511: Reolink has DHCP enabled by default.
There are quite a ways to start using the RLC-511:
- Use the Reolink mobile app
- Use the Reolink desktop client software
- Use any camera monitoring software such as BlueIris
- Use a mobile security camera app such as tinyCam Monitor Pro
The Reolink setup guide for this camera suggests the first two methods – Access the camera by smartphone and access the camera by computer.
I have tried option 1 with another Reolink before so I went with option 2 this time – setup through a computer. These are the steps I followed:
Step 1: I downloaded the Reolink Desktop Client app from the URL as the manual suggested: https://reolink.com/software-and-manual/
Step 2: Installed Reolink Desktop Client and installed it. Windows Defender identified it as a new app and asked me if I want to allow it Internet and LAN access. I allowed it to proceed.
Step 3: The app automatically identified the camera and logged in successfully, and presented me with the Live View screen.
Step 4: As I mentioned earlier, the camera has DHCP enabled by default but I like to assign my cameras static IP addresses. The main reason is that its easier to set up and access the camera form other devices without having to check each time what the IP address is.
Clicking on the setup gear icon and clicking through to Network > General allowed me to change it. This caused the Reolink app to add another camera to the list, with my new static IP address. It also then started complaining that it could not find the original camera with DHCP IP address. This was a bit tiresome so I disabled the ‘Add Camera Automatically’ option under app settings. No reboot was needed which is great.
Step 5: I then tried to access the camera from the new static IP address through Chrome. I logged in with the default login details. However since the camera admin site uses Flash and Chrome disables it by default, I just had to click on the “Get Adobe Flash player” button in the live view section and enable it in Chrome.
Step 6: I then changed the password for the admin account. I also created a new user and tried to delete the admin account for safety but like most IP cameras, the RLC-511 doesn’t support this feature.
Once you have the IP address, you can simply pop that into Chrome or Firefox to directly access the camera settings. You could also use the desktop client app to change camera settings if you don’t want to use the web-based admin panel.
You should change the password of the camera as soon as you can, especially worth noting as the camera doesn’t require you to nor remind you to do it.
Software features
I have a number of ways of accessing my camera live feeds – typically I use the tinyCam Monitor Pro app on my Android phones. But when I want to tweak camera settings, I use the built-in web admin page of the camera.
So entering the camera’s IP address into any browser that supports the Adobe Flash player will let you login to the camera. An HTML5 interface would have been better but Flash is far better than the NPAPI plugin that Hikvision still insists on using. Use Internet Explorer or the new Microsoft Edge, Chrome doesn’t support Flash anymore.
You can choose the video stream quality you want to see at the login screen, ‘Channel 1’ is called Clear and is actually the 5 Megapixel stream (unless you have changed the camera settings). The other options are Balanced (medium quality) and Fluent (sub-stream). These can also be selected once you are logged in.
Click on the ‘Get Adobe Flash player’ button, and click ‘Allow Once’ when the browser says the content is blocked. The live view should now begin.
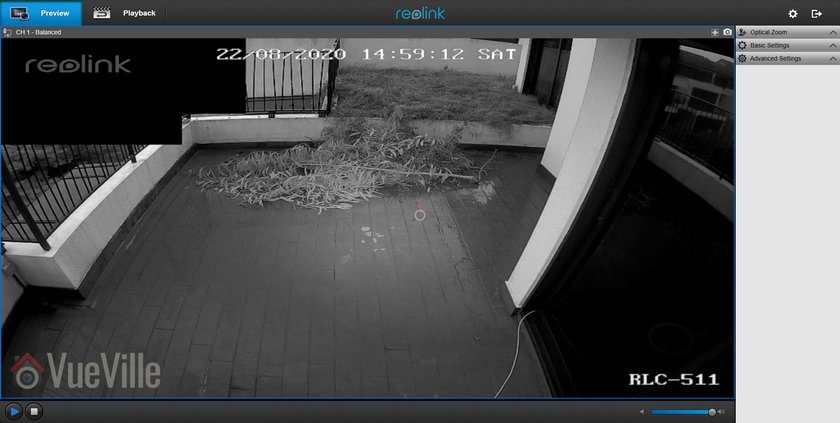
Reolink calls the landing page the Preview page, but I like to call it the Live View page. On the left hand side you have the live view stream, and at the bottom clicking the play button lets you select between the video quality by switching between the Clear, Balanced and Fluent streams.
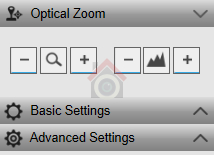
On the right hand side, there are three sections – Optical Zoom, Basic settings and Advanced settings. The basic and advanced settings sections are like a quick access area that duplicates the settings on the actual configuration page – accessed by clicking on the gear button at the top right.
The Optical Zoom section adjusts to the abilities of the camera. You can change the zoom and adjust the focus manually (see the zoom test in our video review).
The Basic Settings section includes OSD settings, video stream encoding and image settings. Remember you can also change all of these settings in the configuration pages. So The OSD page is pretty standard and lets you choose whether and where to show the OSD information such as day, date and time.
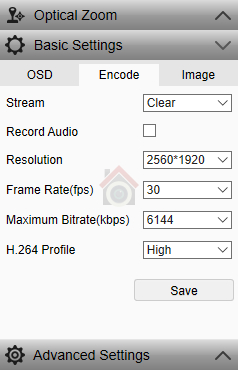
The Basic Settings is where you can set the video resolution, bitrate and frames per second of each of the Primary “Clear” stream (5MP default @30fps and 6Mbps) and the Fluent stream (640×480 default @7fps). Interestingly, the ‘Balanced’ stream is missing in the stream selection drop-down.
The Image section lets you adjust the usual image settings such as brightness, contrast, saturation, sharpness and also mirroring and image rotation.
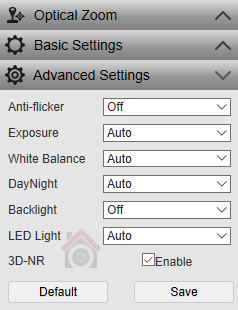
The advanced settings tab is where you will find the rest of the video settings and the ones I was most interested in – exposure, backlight and noise reduction. Setting the Exposure to ‘Low Noise’ lets you control just the range of gain, ‘Anti-smearing’ lets you control only the range of shutter speeds and manual lets you select both the gain and shutter speed ranges. The range selection method is novel – it means the camera will automatically choose the optimum settings from the range you specify.
A new addition is the LED Light option, which wasn’t available on the RLC-422 or the RLC-423.
I didn’t see an option to change the i-frame interval. This is a bit strange as it is a setting that I would have expected to find. Why is it important? The i-frame setting specifies how often the entire frame is captured and not just what has changed from the previous i-frame. So being able to control it is important for getting the right balance between network bandwidth utilisation and a high quality non-blurry video.
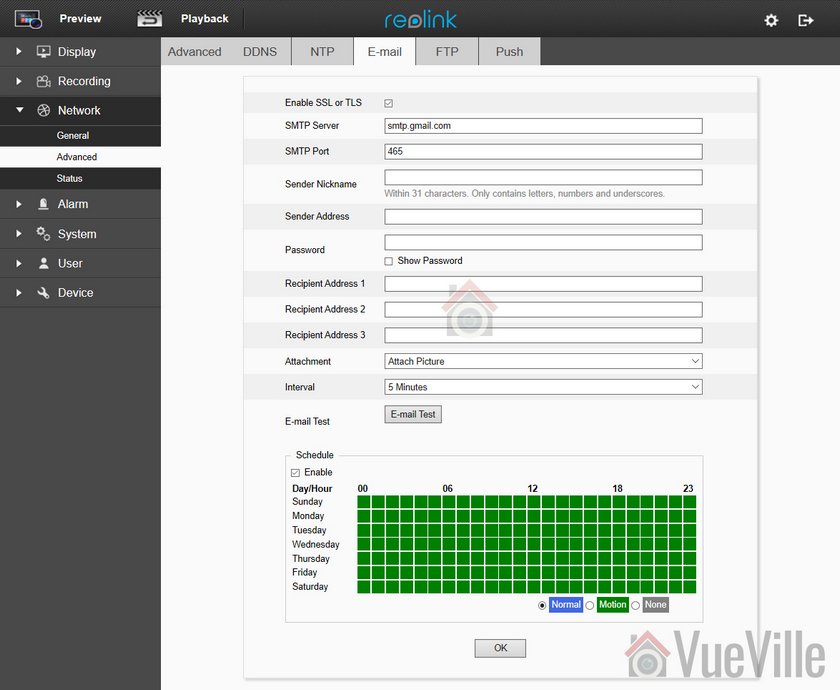
Now the full camera settings configuration page is accessed by clicking the gear icon at the top right of the Live View page. This lets you access video resolution, network, motion detection, email and push notifications, user control, and system maintenance settings.
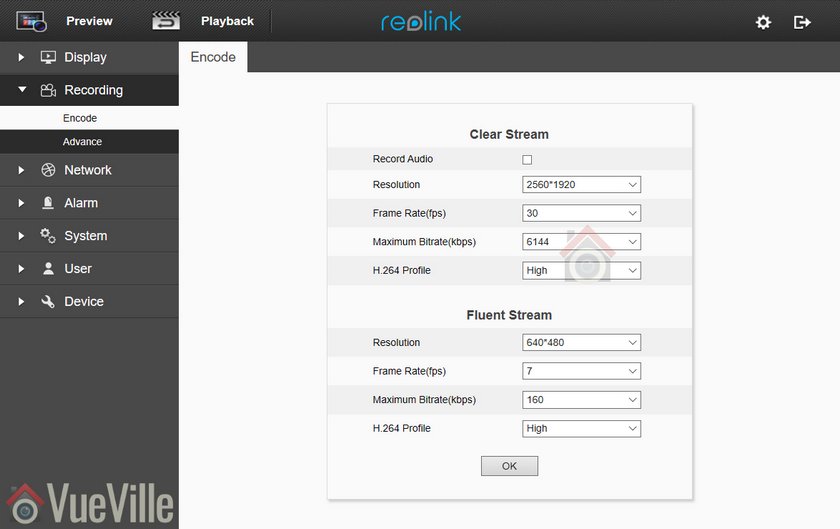
Under the recording section, there are 2 tabs – encode and advanced.

While the camera support motion detection alerts, these are of the basic variety. There is no advanced motion detection such as line crossing, or intrusion detection on offer here. One of the best ways to reduce false alerts is by using these advanced motion detection methods, so bear this in mind if you are planning to use this camera not for 24/7 recording but motion triggered recording. I would use it only for 24/7 recording or to capture images and videos based on commands from my DIY home automation system.
You can adjust the motion sensitivity for the time of the day. For example, you can have a higher sensitivity during the daytime and a lower sensitivity at night to avoid false alerts. On the detection tab, you can draw motion detection regions.

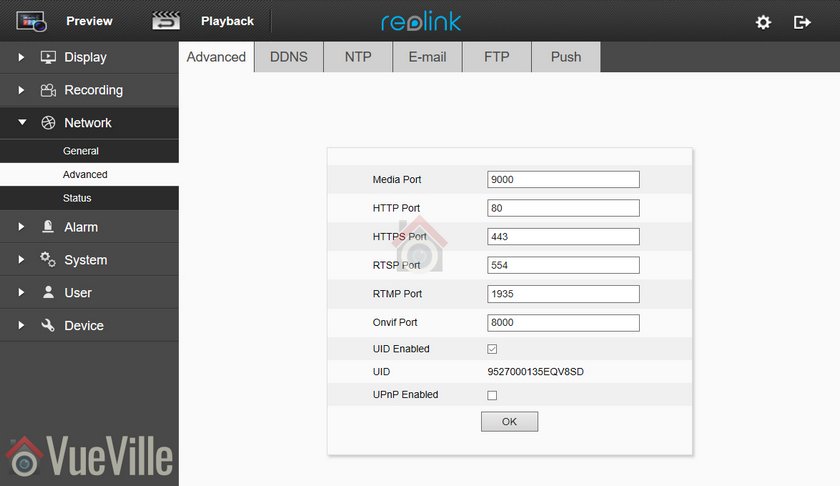
The network settings section groups together port configuration, DDNS, FTP, and motion detection notifications.
There is a built-in NVR feature, so the camera can record motion detection clips to the on-board SD card, and even 24/7 a network/NAS drive.
Performance
I tested the RLC-511 at its default settings of 5MP resolution, 30fps and 6Mbps bitrate.
To optimise recording storage, I suggest setting the main stream to 5MP resolution @ 10fps, and increase the sub-stream bitrate:
Primary Stream: 5MP (2560×1920), constant 6144 Kbps @ 10 fps.
Secondary stream: 640×360, 512 Kbps @ 6 fps.
Optical Zoom Function
The optical zoom function is the standout feature of the RLC-511. I found the zoom speed to be very similar to the [easyazon_link identifier=”B09DPSB9BL” locale=”US” tag=”vueville.com-eaz-20″]Reolink RLC-422 dome[/easyazon_link] (review) and the [easyazon_link identifier=”B095H2BBWZ” locale=”US” tag=”vueville.com-eaz-20″]Reolink RLC-423[/easyazon_link] PTZ (review). The autofocus is a bit sluggish just like the RLC-423 but at such an affordable price, I shouldn’t complain.
Video quality
The RLC-511 is a 5MP camera with a 1/3″ sensor, just like the RLC-422 dome. Daytime performance should be good, but the small sensor is not suited for ultra low light situations.
In my testing I found the daytime video to be similar to the RLC-422 dome. Crisp and much sharper than my 4MP Hikvision DS-2CD2542FWS-IWS as well as the 4MP Reolink RLC-423 PTZ. However it couldn’t compare with the 8MP Hikvision camera.
If the camera has one weakness, it is the speed of the autofocus. While the accuracy of the autofocus is pretty good, it does take a few seconds to re-focus after zooming in or out.
The real test of an IP camera is when the sun’s gone down and the lights are off. In my opinion, the night-time video quality is great with just a slight hint of noise. The RLC-511 uses 24 conventional IR LEDs arranged in a ring around the lens. While these are powerful, the ring arrangement does cause a noticeable flash-lighting effect when you are pointing the camera at a nearby wall or floor.
Mobile app
The Reolink mobile app is one of the best original manufacturer apps I have seen. Hands down it beats Hikvision’s rather poor efforts and runs circles around other brands’ apps.
I was able to quickly add the RLC-511 to the Reolink app on my phone, adjust the zoom level, and use the built-in NVR feature to access the recorded clips on the on-board SD card.
The RLC-511 works great with my favourite mobile CCTV app, tinyCAM monitor Pro.
Compatibility with QNAP QVR Pro
Adding the RLC-511 to QVR Pro was a breeze. It works well because QNAP officially supports this and other Reolink models. I created a motion detection trigger and event to test the reliability of the trigger and the pre-record and post-record features.
For this I also logged into the camera admin page and set up the motion detection zone – you can’t do this from the QVR Pro interface.
Motion detection was reliable and worked as expected. The QVR Pro client even allows you to control the optical zoom of the RLC-511.
You can also set up event recording of the main stream at the same time as 24/7 continuous recording of either the main or sub stream. This is great for getting those pretty pink markers on the timeline that you can jump to quickly.

Verdict
The RLC-511 is the best budget 5MP camera on the market with optical zoom. It has great video quality in the day and night, and is also capable of stand-alone operation with the microSD card slot and built-in NVR feature.
While the 5MP resolution is very good for a budget IP camera, other brands such as Amcrest are moving to 8MP cameras which have 4K resolution. I am looking forward to an 8MP version of the RLC-511.
What’s missing with all the Reolink cameras are advanced motion detection methods, and audio & alarm connections. The slow zoom and auto-focus is also a bit frustrating.
For those who need a 24/7 recording bullet camera with optical zoom, the ONVIF and RTSP support makes the camera very easy to integrate with compatible NVRs or a DIY NAS NVR. BlueIris users, note the lack of an iframe setting – this makes it tricky to get the camera to work as desired in BlueIris.
[review]
Where to buy
[easyazon_link identifier=”B08QV8T3D9″ locale=”US” tag=”vueville.com-eaz-20″]Check Price on your local Amazon site[/easyazon_link]
Leave a Reply