Got a Hikvision camera because you have heard of its legendary motion detection features? Looking for a quick and easy guide to set it up? You are in the right place – here’s the VueVille tutorial on Hikvision motion detection setup.
In this tutorial, I assume you are using your Hikvision camera in standalone mode (using a microSD card) or with a NAS as the NVR.
If you are using a dedicated NVR from Hikvision, the setup should be done on the NVR, not from the camera’s web interface. The steps are very similar to this tutorial.
If you are using [easyazon_link identifier=”B00CE1F3NM” locale=”US” tag=”vueville.com-eaz-20″]BlueIris[/easyazon_link] or similar NVR software running on a PC, you can either follow the below steps on each Hikvision camera OR make BlueIris do motion detection. The cameras can send the basic ONVIF motion detection event to any ONVIF-compliant NVR.
[wpsm_titlebox title=”Contents” style=”3″][contents h2][/wpsm_titlebox]
How Hikvision Motion Detection works
Hikvision has separated motion detection recording into two halves – 1) events, and 2) actions triggered by those events. You activate and configure the events first, and then setup the actions the camera should take including recording.
Hikvision motion detection is very powerful and extremely customizable. That’s why they are great cameras for reducing false alerts due to shadows, clouds, insects, bugs, flies etc.
To cater to both beginners and advanced users, Hikvision have categorized motion detection as follows in most of their IP camera models:
- Basic Event
- Motion Detection
- Normal Mode
- Expert Mode
- Motion Detection
- Smart Event (or advanced events)
- Intrusion Detection
- Line Crossing Detection
The above events become active only when you tick the ‘Enable’ checkbox at the top of each event’s page and configure them by setting at least the sensitivity.
The basic event is what most people have in mind when they think of motion detection. Here the camera uses software methods to compare video frames and thus detect motion. The smart or advanced events also compare frames but check whether certain virtual boundaries like a line, tripwire or area has been breached in addition to various conditions like direction of motion and dwell time.
Hikvision cameras that are equipped with a PIR motion sensor have true motion detection abilities and will fall under the basic event category.
In this tutorial we will look at setting up a basic motion detection event.
Hikvision Motion Detection – Basic Event
Login to your camera admin page and navigate to Configuration > Event > Basic Event. I will be using my DS-2CD2542FWD-IWS for this tutorial, but depending on your firmware and camera model the menus may be slightly different.
Enable Dynamic Analysis for Motion
If you want the recorded video to show the areas that triggered the motion detection event, tick this checkbox. I do not use this feature as it is fairly pointless.
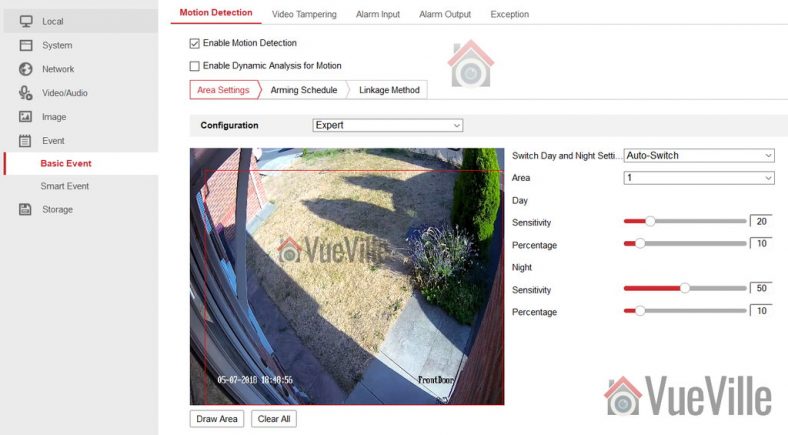
STEP 1: Area Settings Tab

Within the basic event under the ‘Area Settings’ tab, you have a normal mode and expert mode. In both normal mode and expert modes, you can draw an ‘area’ or motion detection zone that the camera should monitor.
In normal mode the only other setting you can adjust is a simple sensitivity percentage slider. This controls the threshold of differences between subsequent video frames which triggers a motion detection event and subsequent alert.

In expert mode, you are able to control sensitivity settings separately for daytime and night-time. You can also draw more than one area – my camera supports up to 8 distinct areas. Furthermore, you can either let the camera automatically switch between day and night according to light levels or create a schedule for daytime and night time. You can also define how large an object has to be for it to trigger a motion detection event. These are all great features and if you do not want to use the advanced methods (line crossing & intrusion detection) I strongly recommend using the expert mode of basic motion detection.
If you are using a 3rd party NVR or a NAS NVR such as QNAP or Synology, the only motion detection method you can use will be the basic events. I use a QNAP TS-253A NAS and the QNAP Surveillance Station app to integrate my security cameras with HomeSeer3. So I am forced to use the basic motion detection events only. You can see my settings above which minimize the number of false alerts massively.
Don’t forget to press the Save button before moving to the next step.
Hikvision Motion Detection Sensitivity
In my experience, you need a lower sensitivity percentage setting during the day time. I suggest 20% as a starting point. For night-time, increase the sensitivity so that movement in the shadows is not missed. I suggest 50% as a starting point for the night setting.
Hikvision Motion Detection Percentage
As I mentioned earlier, what Hikvision calls the ‘percentage’ setting actually means ‘how big should the object be to trigger the motion detection event’. It is calculated as the area covered by the object in the video frame divided by the total area of the video frame. This is why it is expressed as a % from 0 to 100, and also why Hikvision rather calls this setting ‘percentage’.
STEP 2: Arming Schedule
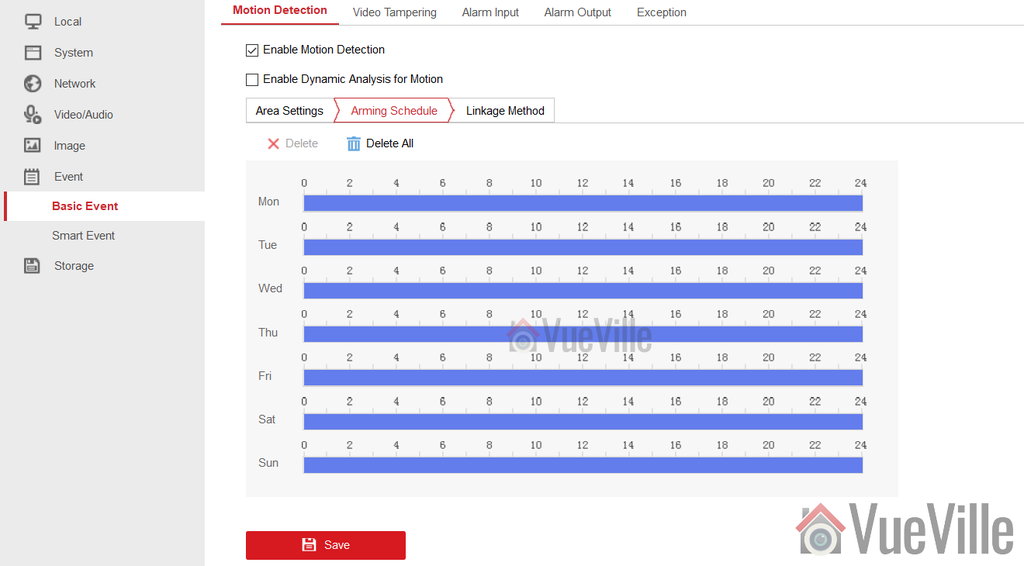
When you save the settings in step 1, the arming schedule should be automatically created for you. You can set it to be ‘armed’ during particular times of the day or night if you wish.
STEP 3: Linkage Method
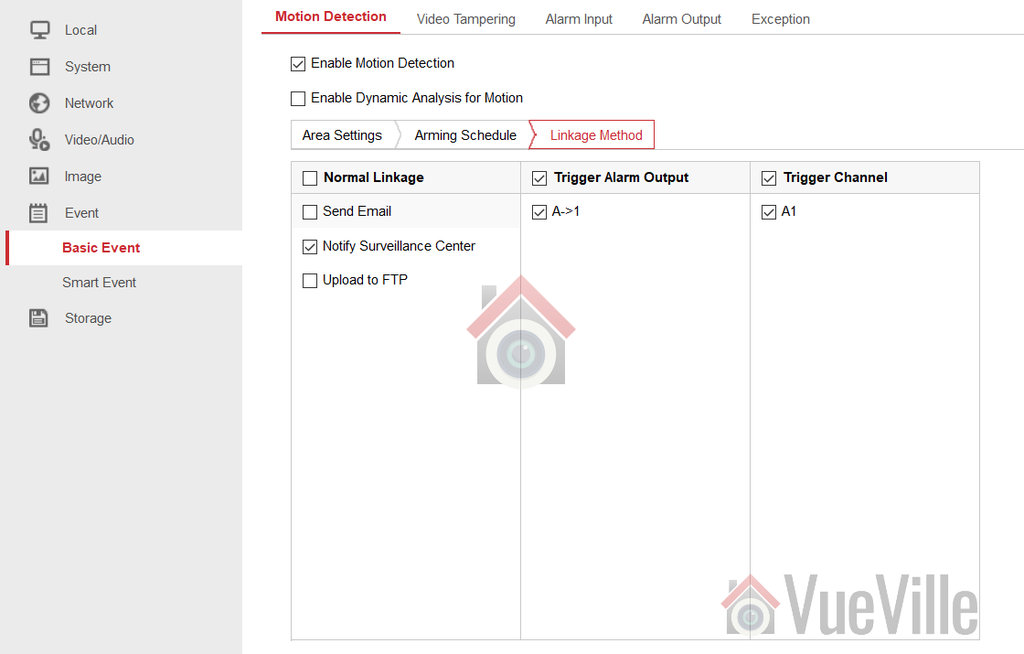
This is where you can activate email alerts, and other actions such as uploading to FTP or triggering an external alarm if you have connected one to the camera. Hit Save when you are done and the basic motion detection event is now active.
Smart Motion Detection Events
You can have both basic and smart motion detection events active at the same time. My post on how to reduce false alerts using these advanced smart methods such as line crossing will show you how to set this up.
Leave a Reply